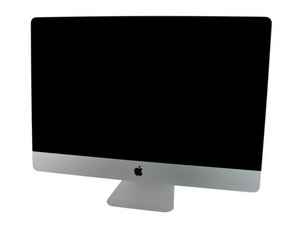
Model A1312 / Mid 2011 / 2.7 & 3.1 GHz Core i5 or 3.4 GHz Core i7 Processor, ID iMac12,2

708 Questions View all

Replace Hard Drive After Only Unhooking One Cable?

Preparing to replace the drive on my iMac and have read and viewed a lot of very helpful information.

Two of the comments have referenced just removing the vertical sync cable at the top and supporting the LCD screen with a pair of Bic pens or white board markers. Supposedly there is then enough room to work on the hard drive without the risk of ripping up cables and connectors, which a beginner might be prone to do.

How exactly do you prop the screen up, and how much actual clearance is there?

Answered! View the answer I have this problem too

Is this a good question?

Score 1
Add a comment

2 Answers

Chosen Solution

I don't recommend using the cheater method which is to prop up the display enough to gain access to things. The problem is as a first timer you don't have a lot of room and if you slip... Opps!

Best to take the display off and out of the way as the IFIXIT guide walks you though. You do need to use care not to force things! Take your time and follow the steps as outlined in the guide.

One tip I can give you is get a roll of electrical tape. Getting the display screws back in can be tricky! As the cover glass magnets are quite strong. I take a piece of tape and cut a small slit to push the screw threads through and roll the tape onto the shaft of the driver. Once the screw is well started I pull the tape off to finish screwing the screw, Electrical tape I find is better than regular clear tape or masking tape for this.

FYI: I use Dave Letterman pencils (erasers on both sides) but remember! I've done this quite a few times!

Block Image

But before you open your system You still need this! OWC In-line Digital Thermal Sensor for iMac 2011 Hard Drive Upgrade. Otherwise your system fans won't work correctly

Was this answer helpful?

Score 1
Add a comment
Most Helpful Answer

So in the iFixit guides, there is the step where the screws are removed and the actual LCD is lifted up. The screen due to the cables only should be pulled up gently, and you will see that this comes up at the top edge of the iMac. There is a cable closest to you that should be disconnected.

Once this is done, take 2 sharpies or equivalents and place them vertically in the corners to prop up the LCD. They should be wedged snugly, but be careful not to put it on a circuit board or anywhere that it can damage the back of the LCD. This should give you room with a short screwdriver to remove the hard drive.

Was this answer helpful?

Score 1
Add a comment

Add your answer

David Sloan will be eternally grateful.
View Statistics:

Past 24 Hours: 0

Past 7 Days: 0

Past 30 Days: 0

All Time: 75