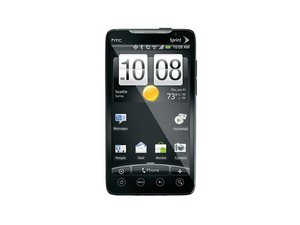
The HTC EVO is a Smartphone by HTC powered by a 1-GHz Snapdragon processor and runs the Android operating system.

71 Questions View all

HTC EVO 4G Micro-USB Connecter Broken

I can clearly see when looking inside of the Micro-USB charging port that one of the pins broke off. After a while of looking online this I've realized is incredibly common.

Sprint tells you to give them 100 dollars or get bent. HTC says give me your credit card number or get bent. If you read about people that have taken this approach with HTC, they just charge the customer for the cost of the board $240 or HTC charges you $40 if you tell them no thanks.

Is their a part # or a place that I can send my phone to get it repaired or repair it myself due to this obvious design flay by HTC.

That being said it's a sad day when corporations can pass the cost of bad designs to customers and when company's openly tell U.S. service members to get bent.

Answered! View the answer I have this problem too

Is this a good question?

Score 2
1 Comment

Demand RECALL! Why are we continually paying and suffering with a KNOWN manufacturer issue? File a complaint, PLEASE

https://www.ftccomplaintassistant.gov/FT...

by

Add a comment

7 Answers

Chosen Solution

I went on ebay and bought a few "Micro USB B Female 5Pin SMT Socket Connectors" for about $5. I'm now in the process of soldering the new connector on. I find that the hardest things to do are:

  1. getting and keeping the connector aligned while soldering
  2. positioning it so the connector has a good connection with the motherboard.

Don't be fooled into buying a new soldering iron with a smaller tip. Yes, it would make it easier but it is not really necessary unless your current soldering iron tip is a medieval sward.

There are external chargers for the evo so charging is no longer an issue, the problem is I still want to be able to sync it with my computer.

Was this answer helpful?

Score 3

5 Comments:

That's awesome please let me know how that goes.

I doubt I'd be able to reproduce your result given I'm currently deployed to Iraq, even if I was able to there's not a CDMA tower within 1000+ miles out here.

Also, I recently went home for R&R (rest and relaxation). When doing so I contacted sprint and ran into a representative that actually replaced my phone without question. I guess with sprint you just actually have to run into the right representitive.

Though, since this is such a common problem this project that you've delved into would be for the greater good of EVO owners.

On another note if you wouldn't mind letting me know how it went that would be great, you can contact me via my email or skype

skype = puterg33k

email = puterg33k@gmail.com

Thank you for your efforts

-Frank

by

I figured I would post the info I emailed you here too for everyone to read.

So I got the connector soldered and tried to plug it into the charger when the first problem arose; it didn't fit correctly. I probably would have snapped it off the board again had I tried any harder to make it fit. It WAS the right connector, just not manufactured well. This is exactly why I bought five:

Lesson 1: When buying fragile and important parts, buy MORE than one. However many you buy is how many chances you have to get it right.

I bought 5 chances so it was no big deal. I de-soldered it and put in a different one and it worked great. When I plugged it in to a charger a "car mode" popped up but the phone didn't charge. I assumed this meant the 5 points DO need to be soldered for a good connection so I tried anything I could think of to solder the points. First I tried to heat up the reverse side of the board with a soldering iron to hopefully melt the solder on the reverse side. I got it hot but it didn't work. Second, I tried using a candle to heat a safety pin tip red hot, then move the tip over to the phone and touch the solder but that didn't work. SO... Until today I had tried all I could think of to solder the points. However today the neighbor, who gave me the phone pointed out that when the charger was connected, it went in "up side down" from how it use to, but it still fit right. Long story short, my connectors are designed up side down which means the power connectors are reversed. So rather than the connectors going: (circuit board connections) 1,2,3,4,5 with a connector who's contacts go: 1,2,3,4,5. Instead its 1,2,3,4,5 connected to 5,4,3,2,1. That explains why it responds to being connected but doesn't charge. Rather than hunting down and ordering a new connector, tonight I'm going to reverse the wires in a charger and see what happens.

by

I encountered the same problem. The pins are reversed, and I ordered a part for an HD2 that I wrongly assumed would be the same. Does anyone have any luck finding a supplier for these reversed micro usb ports?

by

I did find the proper connector on globaldirectparts.com however they are out of stock at the moment and they don't know when they will get more. I saw a site that was called www.missionrepair.com who claim to fix the port for around $50 or $60. I may look into that if needed. Last but not least, there are also external battery charges on Ebay for the Evo. Some include extra batteries which is nice. But I decided to get the extended battery packs and charger for now; I really like them. I got them for $14 including shipping and it came with an extended phone backing plate, extended battery packs, a external charger. The backing plate is a little difficult to get off but that can be fixed by filing the tabs on the back at an angle so they slip off easier.

by

what's a sward?

by

Add a comment

Mouser electronics

part number - 649-10104111-0001LF

price (43 cents) Im not kidding.

You must be skilled to install this...please read this re-print for tips ....

__________________________________________________________________________________________________________________________________________

I got a micro USB female socket from mouser electronics for a whopping 43 cents. lol

It was "wave soldered" during assembly, so forget about conventional soldering .

Im an electronic technician, engineer, and a ham radio operator... and this is one tall order.

The way to kill this bird is not with a soldering iron, but with a heat gun...and not just any heat gun...one specificly for tiny surface mount electronic repairs. The one I used was attached to the end of a butane fired soldering rig, and keeps direct flame away from target area. Heat the metal jacket gently while lifting the socket assembly upward, away from board surface. When solder melts enough, it will let go. Then clean gently and inspect the board surface for debris or any "bridging". Since the thing was wave-soldered originally, chances are there wont be satisfactory amount of solder left for installing the new socket. What I did was prep the socket terminals (freekin tiny row of 5 little brass stubbs) with a thin application of fresh solder...after warming it up and applying raw soldering paste (rosin) 1st. This prevents bridging, and is almost guaranteed to screw you up if you dont rosin it up 1st, as the little pins (stubs I call em) are so close together and will cause too much solder (as in, a speck more than the one speck required, lol) to cling to them, causing ... (drum roll) ... bridges....(another drum roll) ... and failure.

So all thats left after pre-tinning the new socket pins, is placement againt the PCB and then take a little (tiny) vise clamp, or any tiny metal clamp (alligator clip worked great) to squeeze the socket down against the target area while re-heating assembly again in a reverse operation of the dis-assembly.

Then , after maybe some prayer, or meditation, or ... for some folks .. a sacrifice of a small animal or three, ... You can test your work. I recommend not neglecting to make sure that on each side of this socket assembly you manually solder a decent bead of "mechanical solder support" on both sides (right and left)

This is required for "mechanical" stability of the plug itself, and not really an electrical connection, besides the fact that it does indeed provide a ground for the outer metal sheild.

If you dont solder the two corners down, you can count on the other tiny little heat-gun bonded solder joints you took so much pains to do correctly, absolutely peeling back off the PCB the 1st time you stress that socket with a USB plug or charging dongle.

If you cant comprehend the layman terms used in this description (or you have never soldered anything small before) ...totally forget even contemplating this kind of repair. You will fail before you even start.
Was this answer helpful?

Score 1

2 Comments:

I see that you are a ham radio user. I have come into possession of an old short wave radio in unknown condition (i.e.: I dont know if it works or not. the power cord is broken.) Do you know of anyway I can check to see the value, if any, and have someone check it to see if it works? I live in South Jersey about 25 minutes from Atlantic City.

by

Also, my email is planedude@comcast.net

by

Add a comment

Just a useful bit of info for all of you attempting to replace the micro USB connector on the HTC Evo's poorly designed charging port. If you are realizing that when soldered into place the cord plugs in upside-down. This is because the HTC Evo uses REVERSEtype micro USB port. I noticed there are a lot of sellers who are selling the incorrect part. This micro USB mounts to the reverse side of the board, so using the correct reverse style mount it fixes the issue I noticed some of you are running into. If you are looking for the correct replacement part, I found it here Fox PC Parts and it fit perfectly and has since been working great. So, I hope this solves the issues some of you are experiencing. You can also look at the teardowns of this model and you will see the difference I am referring to.

Was this answer helpful?

Score 1
Add a comment

Phone wouldn't charge; the cable micro-b connector felt loose in the phone when inserted. Took a peek behind the antenna panel; lo and behold, the entire receptacle had begun to lift off the board. All 4 of the solder beads that held the shield down had cracks, 3 of them were completely cracked through, and the solder point for pin 1, Vcc, (left most with screen side down) was no longer connected to the pin. %#*!^@.

So I spent about 3 hours attempting a repair and finally gave up. No easy way to "repair" the connector without completely removing it and then replacing it. It's just impossible to get any good instrument underneath the shield because of the vibrator- it's exactly in the wrong place, preventing a good look at those solder points even in the first place. (I used a magnifying light along with a high-powered optical microscope light source to see in there).

I desoldered the entire thing, and am living with it while I wait for a lot of the connectors (ebay, http://cgi.ebay.com/10X-Micro-USB-Connec...). What I did was solder a small set of leads to pins one and five that extend out a little so I can connect (very gently) something to them (I'm using little teeny obscene connectors-- I don't think I've ever known what they were really called, but they're gold, one looks like a... male part, the other is a hole...) and an old usb cable I cut up. Female side on the cable, male on the phone. I'm keeping a piece of tape over the hole as well to keep those pins from being hit by anyting, as well as help keep dirt/dust/moisture/beer/vodka out of the phone.

My plan is to resolder the pins in the same fashion as the last poster, namely use a heat gun. I'm going to use a heat gun with a highly directional/formed air flow, it's got a much smaller end than most. I'll probably just use the solder station to get the shield put back down. I'm also going to put some hot glue down around the part to help keep it down, especially at each end of the shield (the back part next to the vibrator, and the front part, sealing the connector region).

Was this answer helpful?

Score 0
Add a comment

circuit burner is correct. you need a heat gun to do the job. It is not easy. I have been repairing USB ports on HTC EVO and I only get 80% success ration doing it.

But you have to be careful when doing it as there is microphone right next to USB port that gets damaged during heating process.

for those who tried to solder the port on the board, how do you get the solder iron in there? I just don't see how you can get the tip on the solder point in there. there is hardly any room between the port and the vibrator.

Was this answer helpful?

Score 0
Add a comment

After owning my HTC Evo USB came out completely. My friend knows how to solder fairly well so we decided to see if we could find a replacement online. Well I bought replacement on ebay that I thought looked like the Original. Unfortunately, I ran into the same problem the part was very similar although it was not mounted upside-down or reverse style. After doing a little more searching I found a seller on ebay (Fox PC Parts )who was selling the" Reverse Micro USB Port Connector for HTC Evo". It cost a little more but they shipped it very fast and they even included braided copper. Since my friend installed this one, it has worked perfectly and has already outlasted the original by a lot. So took a me a couple tries and some searching but it has paid off and I would recommend this seller to others who need this replacement USB component. From what I have been learning this has been a very common problem. So, I hope this helps because if I would have know earlier it would of saved me time and money.

Was this answer helpful?

Score 0
Add a comment

I used a Metcal soldering iron, the type with the coaxial heating elements. The tip number is STTC-126, which is a 700 degree temp 45 degree bend micro-conical profile. This allowed me to get UNDER the back side of the connector while leaving the vibration motor in place. I just pulled the rubber "boot" from the motor so I wouldn't singe it. Be sure to pre-tin all contacts prior to soldering (if the connector is off, or when using a new one). Use REAL 60-40 LEAD/TIN SOLDER with mild rosin core. Also, it is my belief that the rectangular anchor pad not bonding at the factory is the reason these go bad. On my phone, there were these sad little silver bumps on it, but no connection to the USB shell like there should have been. Getting this large (2.5mm x 4mm) pad to lock on to the connector is the key to a lasting repair, is what I hope. Perhaps many phones have a good bond here, but those that don't will likely fail as mine did...

Was this answer helpful?

Score 0
Add a comment

Add your answer

something anonymous will be eternally grateful.
View Statistics:

Past 24 Hours: 0

Past 7 Days: 0

Past 30 Days: 1

All Time: 18,601