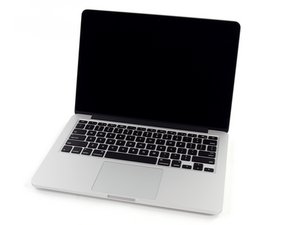
Apple's line of laptops for professional and power users. To date, the MacBook Pro line includes 13, 14, 15, 16, and 17-inch variants, with major revisions defined by Pre-unibody(Original), unibody, Retina display, Touch Bar, and SOC (system-on-a-chip) designs.

19983 Questions View all
Question Closed

Replaced Hard drive, can't transfer info with Migration

The hard drive failed in my MacBook Pro. I purchased a new hard drive from ifixit and got it installed just fine with Yosemite installed. I put the old hard drive in the rubber case they sent. When I hook it up while running Yosemite, it shows up. However, when I try to transfer the information using Migration Assistant, the drive won't show up.

What am I doing wrong?

Answered! View the answer I have this problem too

Is this a good question?

Score 0
1 Comment

Did you format the drive GUID, Mac OS Extended before you installed Yosemite?

by

Add a comment

2 Answers

Chosen Solution

Migration Assistant is for system to system migration (old to new). If you want to use Migration Assistant you'll need a second Mac system to host your old HD. Then connected via an Ethernet cable (back to back) connect the two systems.

Was this answer helpful?

Score 1

4 Comments:

My other system IS on the old HD. I can't connect it via ethernet as all they sent was a rubber case with a USB cable.

by

You'll still need that. Do you have an Ethernet cable to connect the two systems? Here's some useful info on how Migration Assistant

by

I don't know how I would hook an ethernet cable into the hard drive that I took out of the same computer. It's now in a rubber case that came with the new hard drive that has a USB cable attached.

by

Do you have a second Mac system MacBook Pro or iMac? Can you borrow one from a friend? You'll need it to connect with the Ethernet cable to your system.

by

Add a comment

Can I suggest an alternative solution? I use this when I have compatibility issues with migration assistant:

Connect the HDD containing your old system.

Then start your computer and immediately press the letter R and keep pressing until your laptop starts in "restore mode."

Choose "disk utility;" you will see your new system on top "Macintosh HD" as a grey HDD, and your new partition underneath.

Then below it your old "Macintosh HD" as an orange USB HDD, and also your old partition beneath it.

Choose your OLD partition (bottom orange), and click on "repair permissions" then "repair disk."

If all OK, choose again your OLD partition, and click "restore;"

Drag your OLD partition to the line "source;"

Drag your NEW (top) partition to the line "target;"

Once done, run "repair permissions" and "repair disk" again, this time on the NEW top partition (it now contains your data exactly like your old data).

Restart your system, and run all your applicable updates from the Apps Store.
Was this answer helpful?

Score 1

5 Comments:

BE VERY CAREFUL when choosing your source and target disks. The source MUST BE your OLD HDD/OLD PARTITION (the one which contains the data that you want to migrate), and the target MUST BE your NEW HDD/NEW PARTITION (the one you just installed, that contains the new Yosemite but no data).

Otherwise, you will loose all your data.

by

I'm assuming I can't do this because I couldn't repair the disk before I swapped it out....that's why I had to buy a new drive. It wouldn't even start up the computer from it. But, now that I have the new drive in, it does show up on the desktop, it just says that it can't be repaired.

by

If the drive is not repairable then you really can't get to the point to moving the files over. At this point you'll need to fix the drive enough to get the files off. Forget Migration Assistant as that only works when the drive is working. You'll need to fix the drive first. You'll need a better tool. Give this a try: Data Rescue but even this may not work. If not the drive is not repairable and you'll need to try to restore your stuff from backups. If you really have something you really need then you'll need to send the drive to a data recovery service. But that will be expensive!

by

eajunkmail, I had cases when the drive could not be repaired when inside the laptop but was successful repaired by Disk Utility when connected as an external drive.

Since your set-up is ready, you can give it a try. However, there's a decision to be made: every time you run a damaged HDD, you decrease the chances of recovering the data. So plan your next step carefully.

by

Alternatively, if you can read it from your computer, you can try transferring the Home Folder. You'll have to re-install the applications though. It will be a PIA this way, but a valid alternative if you can salvage important data.

by

Add a comment
View Statistics:

Past 24 Hours: 0

Past 7 Days: 0

Past 30 Days: 0

All Time: 2,344