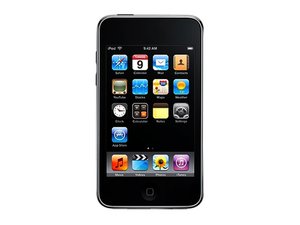
Model A1288 / 8, 16, or 32 GB capacity

451 Questions View all

iPod Touch 2G won't charge after battery was replaced?

In the process of replacing the battery, I accidentally pried the middle connection of the battery from the circuit board. A small copper foil where the middle wire/ribbon of the battery is soldered came off. I still replaced the battery hoping it's nothing important. After putting everything back together, it still worked fine. But when I connected to my computer and even the wall charger it won't charge anymore. I think it's because of that thing that came off. Can you post a photo of the circuit board with the solder removed so I can see where the battery is connected? Can you tell me where I can solder it to so it will charge again? Thank you.

Answer this question I have this problem too

Is this a good question?

Score -1
Add a comment

8 Answers

Most Helpful Answer

Are you able to upload a good picture of the damage ?

is the copper "foil" still there or did you tear the middle contact completely of the board?

if there are fragments of the original soldering point, i would solder the middle contact to it, then i would "restore" (paint) the broken circuit with conductive silver on the logic board - but thats not as easy as it sounds - i do something like that for almost 10 years - maybe it would be better to find someone in your area who is able to fix that for you.

Was this answer helpful?

Score 1

2 Comments:

Unfortunately I completely pried the middle contact from the board. There are still fragments of the original soldering point and I did tried to solder it there but with no success. I'm scared I might burn the board and create more damage. My eyes are not that sharp as they used to as well. I'll take your advise and find someone to fix it for me.

Thanks a lot mate! Appreciate it.

by

you're welcome - i think it's better that way ;-)

by

Add a comment

Hello Every One I also made this mistake by accident but instead of completly prying of one connect i pried off both of them i can upload a picture of damage if needed, how can i fix this?

Was this answer helpful?

Score 1

1 Comment:

The best bet is to follow the copper trace from the pad to where it next goes to, and solder jumper wires from battery flex terminals to there. In the Touch, I believe there are circular test point pads from each battery terminal pad. They're tiny, but you may be able to solder a wire to each of them.

For future reference for anyone suffering the 'no charging' problem after a battery change, and/or damaging the centre pad where the battery flex solders to the logic board: the middle tab on the flex is for current sensing, which is feedback from the battery and used when charging. Without this connection, the battery will work the iPod, but won't charge.

One thing that can happen is if you don't tin the flex pads (they're not tinned on a new battery) and merely solder the tabs onto the logic board from the top of the tab, the solder may not wick beneath the flex tabs. It then looks soldered from above, but is not actually soldered underneath to the logic board.

by

Add a comment

This also happened to me just the other day and now the iPod won't charge. Maybe an idea going forwards is rather than un-soldering the old battery is to maybe cut it just before the solder point with a pair of scissors. Then solder the new battery over the top. At least this way you don't end up tempering with the original solder points?

Was this answer helpful?

Score 1
Add a comment

At this point the options are desoldering the fragmented ribbon cable and replacing the battery (which contains a new cable) or buy a new ipod touch. There is an excellent battery replacement repair guide on this site located at iPod Touch 2nd Generation Battery Replacement. Although the sharpness of your eyes may not be the greatest many specific step-by-step instructions are available with high quality photo's. Perhaps someone with some soldering experience could assist you. Just a thought do you live near the Washington== Heading text == DC area?

Was this answer helpful?

Score 0
Add a comment

Hello, I was doing a search and did exactly the same thing as what the poster of this question did. I realize this question is about a year old but checking to see if the original poster did get it fixed or if he took it to someone to get fixed, but what did that person do about getting a new solder point elsewhere on the board? Maybe use one of the tiny circular test points as George Mathew suggested, and if so, which one?

And just a side comment, I examined the middle connection of that battery cable and it just seems like that one is soldered differently from the other two (on either side of it), as the ones on the side easily came off with the same amount of heat applied to the middle one and the middle seems to have its contact point above the circuit board because when I examined the old battery terminal, there was no residual solder or what looks like a foil contact on the bottom like the other two connections on the sides had. Sounds like an Apple manufacturing process designed into it so do-it-yourselfers cannot do as what we attempted ;)

Was this answer helpful?

Score 0
Add a comment

I too had this same issue. I found that even with my soldering iron set high(over 700 degree's F) I could not really melt the solder from the factory. At best it became a little pliable. I got one exterior connection free, but like the others mentioned, the middle pad pull completely off even taking a little of the board underneath with it. I tried jumper a small wire from the ribbon cable to the small round pad in front of the damaged area but was not able to make a good connection so it will not charge. I liked the conductive silver paint idea. The local Radio Shack had a Circuit Writer pen. I used it to fill in the damaged area up to the round pad in front of it.

Once dry I soldered the the outside pads and then barely heated the center pad to get a little liquid solder touching the silver ink. I have solid connections on all 3 pads now and the unit charges.

Was this answer helpful?

Score 0

1 Comment:

Is there any way of bypassing the terminal? I had the same problem on quite a few of my ipods that I fix (tried to fix) do you think there is a way of soldering a fine wire from the pins on the inside directly to the ipod battery?

by

Add a comment

How do I thin the flex pads on the battery?

Was this answer helpful?

Score 0

1 Comment:

You need a soldering iron with a very fine tip! Don't risk unsoldering the existing battery, just cut it and solder on top otherwise you risk breaking off the centre soldering point off the motherboard!

by

Add a comment

Can you please upload a pic, I did the same thing. I have changed a battery before but never had this problem

Was this answer helpful?

Score 0
Add a comment

Add your answer

nonniemolines will be eternally grateful.
View Statistics:

Past 24 Hours: 0

Past 7 Days: 0

Past 30 Days: 0

All Time: 9,292