Released April 2010 / 2.4, 2.53 GHz Core i5 or 2.66 GHz Core i7 Processors

591 Questions View all

Disassembling the Anti-Glare Screen

If anyone is familiar with iColours, they sell colored inserts that go behind the apple logo on the lid. In order to install these, it is necessary to take apart the entire display housing. With the glossy model, the instructions are to use a suction cup/heat gun/credit card and take off the glass, after which it is very straightforward. However, the anti-glare model obviously is a little different. The only thing covering the LCD itself is the bezel/black trim. Does anyone know how to disassemble the AG model display?

Answered! View the answer I have this problem too

Is this a good question?

Score 2
Add a comment

2 Answers

Chosen Solution

Guide Published!

I finally published a guide on replacing the Matte finish LCD. You can find it here: MacBook Pro 15" Unibody Mid 2010 Matte Finish LCD Replacement

Update

I just went ahead and tried to remove the Matte LCD screen and was successful.

The key is to remove the bezel, which is attached to the assembly using doublesided tape, similar but not exactly as with the glossy screen. Underneath the bezel, the screen is screwed in just like the glossy LCD assemble. As with the glossy, a heatgun works for this purpose. One big difference from the glossy (aside from the bezel) is that there is NO coverglass. The matte glass you see is optically bonded to the display, which is screwed in underneath the bezel, and so using suction cups will not work.

It helped me tremendously by removing the rubber seal around the bezel first. Steps were:

1. Remove the display assembly as described in steps 1-20 of the glossy tutorial MacBook Pro 15" Unibody Mid 2010 LCD Replacement .

2. Applied heat around the edge to losen the tape.

3. Remove rubber seal on lower corner. Using the sharp end of the spudger helps.

4. Apply more heat

5. Wedge flat end of spudger between bezel and screen to remove, while applying heat gun.

6. Remove the LCD as in steps 31-36 of the glossy tutorial MacBook Pro 15" Unibody Mid 2010 LCD Replacement .

I still haven't put this back together, but it all came apart rather cleanly. I'll post how this goes back together once I get the replacement LCD.

Murdercity - Were you able to remove the bezel?
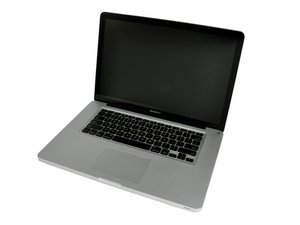
MacBook Pro 15" Unibody Mid 2010 LCD Image

Guide

MacBook Pro 15" Unibody Mid 2010 LCD Replacement

Difficulty:

Very difficult

3 hours

MacBook Pro 15" Unibody Mid 2010 Matte Finish LCD Image

Guide

MacBook Pro 15" Unibody Mid 2010 Matte Finish LCD Replacement

Difficulty:

Difficult

3 hours

Was this answer helpful?

Score 3

2 Comments:

+ Thank you for bring this back here. This does clear up the differences between the 2. Keep your double sided tape well protected. You will be using it again when the new lcd arrives.

by

Actually, the double sided tape was gone, but ordering more is easy. I don't think I'd want to have saved the old stuff anyway, as the bezel gets slightly bowed and so adhesiveness becomes a major factor. Better to get new tape.

The bezel went on cleanly, the project was a success. I took pictures throughout the process and will post a guide.

by

Add a comment

This guide should help you: MacBook Pro 13" Unibody Mid 2009 Front Display Glass Replacement

Was this answer helpful?

Score 2

1 Comment:

I assume you're implying that the procedure for removing the AG bezel is the same as removing the glass?

by

Add a comment

Add your answer

murdercitydevil will be eternally grateful.
View Statistics:

Past 24 Hours: 0

Past 7 Days: 0

Past 30 Days: 1

All Time: 7,768