
8bitDo Ultimate C 2.4g Wireless Controller Battery Replacement

What you need

  1. 8bitDo Ultimate C 2.4g Wireless Controller Battery Replacement, Battery: step 1, image 1 of 3 8bitDo Ultimate C 2.4g Wireless Controller Battery Replacement, Battery: step 1, image 2 of 3 8bitDo Ultimate C 2.4g Wireless Controller Battery Replacement, Battery: step 1, image 3 of 3
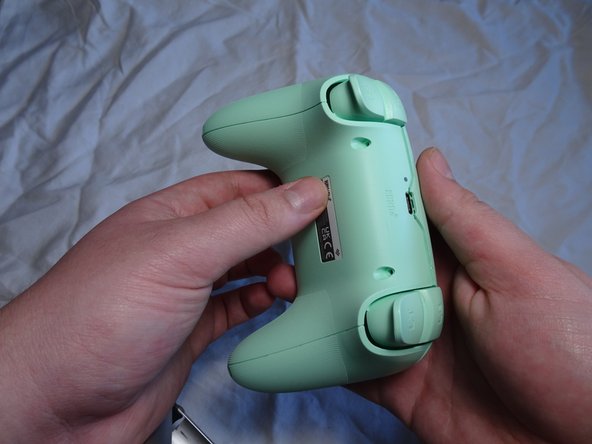
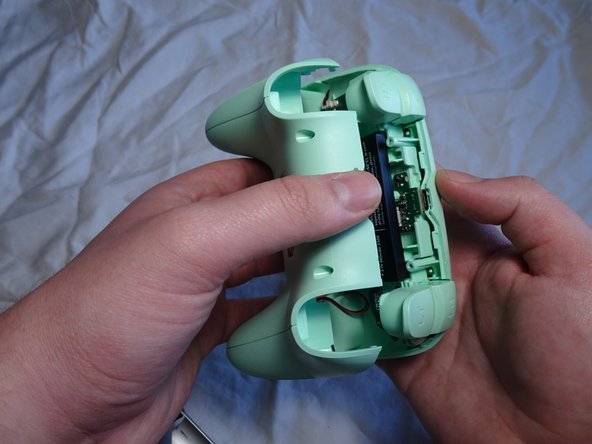
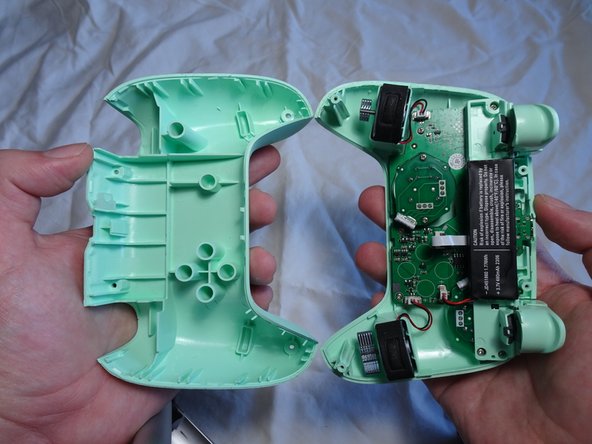
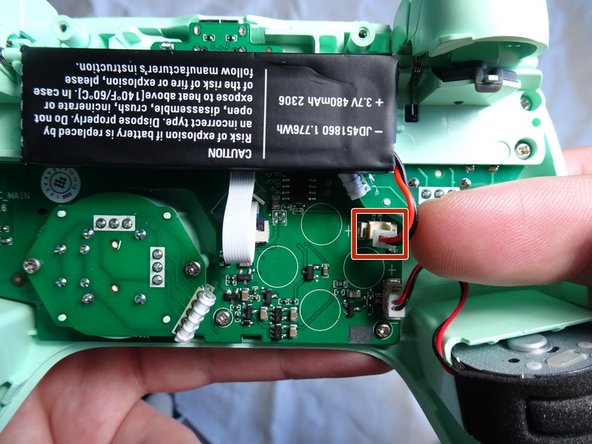
    • Remove the four screws from the back cover of the controller using a T6 Torx screwdriver.

  2. 8bitDo Ultimate C 2.4g Wireless Controller Battery Replacement: step 2, image 1 of 3 8bitDo Ultimate C 2.4g Wireless Controller Battery Replacement: step 2, image 2 of 3 8bitDo Ultimate C 2.4g Wireless Controller Battery Replacement: step 2, image 3 of 3
    • Insert a Jimmy into the crevice of one of the controller's bottom grips and use it to follow the lining of the crevice around the whole controller.

    • Opting for a plastic wedge instead of other metal tools may be a more practical choice. Metal tools may bend and cause cosmetic damage.

  3. 8bitDo Ultimate C 2.4g Wireless Controller Battery Replacement: step 3, image 1 of 3 8bitDo Ultimate C 2.4g Wireless Controller Battery Replacement: step 3, image 2 of 3 8bitDo Ultimate C 2.4g Wireless Controller Battery Replacement: step 3, image 3 of 3
    • Gently separate the front and back casing of the controller to expose the battery.

  4. 8bitDo Ultimate C 2.4g Wireless Controller Battery Replacement: step 4, image 1 of 3 8bitDo Ultimate C 2.4g Wireless Controller Battery Replacement: step 4, image 2 of 3 8bitDo Ultimate C 2.4g Wireless Controller Battery Replacement: step 4, image 3 of 3
    • Gently grab the white plastic front of the wire that is connected to the motherboard to detach it from its plug.

    • Be sure to only unplug the wire that connects the battery to the motherboard. No other wire needs to be unplugged for this specific replacement.

  5. 8bitDo Ultimate C 2.4g Wireless Controller Battery Replacement: step 5, image 1 of 3 8bitDo Ultimate C 2.4g Wireless Controller Battery Replacement: step 5, image 2 of 3 8bitDo Ultimate C 2.4g Wireless Controller Battery Replacement: step 5, image 3 of 3
    • Remove the battery from its position.

    • There will be adhesive at the back of the battery that may raise concern. However, removing the battery will not damage it or the controller.

  6. 8bitDo Ultimate C 2.4g Wireless Controller Battery Replacement: step 6, image 1 of 1
    • Apply the iFixit stretch release adhesive to the back of the replacement battery and place the new battery in the same spot as the old one.

    • Make sure to plug in the new battery's wire into the controller's motherboard.

Conclusion

To reassemble your device, follow these instructions in reverse order.

2 other people completed this guide.

letarian

Member since: 02/21/24

190 Reputation

1 Guide authored

Team

One Comment

Where did you boght the battery replacement? I'm trying to find it on the internet but no clues yet

Lucas Simões - Reply

Add Comment

View Statistics:

Past 24 Hours: 3

Past 7 Days: 83

Past 30 Days: 217

All Time: 287