Introduction
We are ecstatic to finally have the opportunity to disassemble an iPod Touch with a camera and not just an empty camera slot.
This is one of three iPod teardowns this week! We also took apart the new iPod Nano and Shuffle. Stay in the loop on twitter for the latest teardown shenanigans.
In case you missed it, last week we celebrated a major milestone. In addition to enabling Apple repair, we now have parts and repair manuals for most game consoles! We decided to celebrate by taking a trip through time and ripping apart five retro consoles.
Shameless plug: We fund teardowns like this by selling iPod Touch Parts! We've also got free open-source repair manuals for every iPod Touch including this one.
What you need
-
-
We've got the new iPod Touch in hand!
-
The feature set of the new Touch is suspiciously similar to the iPhone 4:
-
640 x 960 pixel resolution retina display
-
Rear-facing camera with 720p video recording
-
Front-facing camera with VGA video recording
-
802.11b/g/n Wi-Fi
-
FaceTime video chat
-
Three-axis gyro
-
-
-
The new Touch has a visible speaker grill on the bottom (to the left of the dock connector). On previous iPod Touches, the external audio simply came out the dock connector. Apple likely beefed up the speakerphone to enable FaceTime on the Touch.
-
The new Touch has once again been slimmed-down. Similar to the iPhone 4, the back of the Touch is now flat. Unlike the iPhone 4, the iPod Touch still features the same shiny stainless steel back that has graced every iPod Touch.
-
We paid $229 for our 8 GB Touch, which seems like a pretty good deal. A 32 GB Touch will set you back $299, and a 64 GB can be had for $399.
-
Bogus math: In dollars per gigabyte, the 8 GB Touch is a terrible deal: $28.63/GB. With the 64 GB Touch a gigabyte will only cost you $6.23.
-
Want bogus logic to go with our bogus math? BusinessWeek has a fallacious column up on how the iPod Touch costs $29 more than the iPhone 4.
-
-
-
The new Touch (right) with its retina display doesn't look exceptionally remarkable in this shot.
-
The retina display features a resolution of 640x960. Compared to the previous Touch (320x480), that's twice pixels in each direction, or four times the total pixels.
-
The retina display is almost completely black when turned off. That's noticeably different from the display of the earlier iPod Touch (left), which is dark gray when turned off.
-
-
-
Cameras!
-
That's right folks, at long last the iPod Touch has not one, but two cameras.
-
The front-facing camera is just like that of the iPhone 4, with support for VGA quality photos and video.
-
Unfortunately, the rear-facing camera is only 960x720 resolution. That's only about .7 megapixels, compared to 5 megapixels on the iPhone 4. It's likely that Apple had to sacrifice still photo resolution in order to squeeze the camera into the Touch's slim package.
-
There's a microphone hole next to the rear camera. Apple's updated the audio input and output prowess of the new Touch to enable it to play nice with FaceTime.
-
-
-
Enough of the exterior, let's get inside...
-
There are no visible screws. We'll have to figure out what combination of glue, tabs, and magic Apple used to hold the Touch together.
-
We first used a heat gun to soften the adhesive holding the display assembly in place.
-
Next, we ran a iPod Touch opening tool around the edge to separate the adhesive.
-
-
-
There's an EMI shield between us and the iPod. Fortunately, it's just held in place with a few Phillips #00 screws.
-
The EMI shield is surprisingly heavy, weighing in at 11 grams. The entire iPod Touch is only 101 grams, meaning Apple has devoted more than 10% of the iPod's weight to this metal EMI shield.
-
-
-
-
After removing the EMI shield, the battery looms large.
-
Apple claims you'll get (up to) 40 hours of audio playback. That's a long time!
-
Apple's making us do some digging to find the chips. This side of the logic board is quite barren.
-
Contrary to Apple's initial claims on their FaceTime marketing page, the iPod Touch does not have a vibrator. Apple's website has been updated to remove this claim.
-
-
-
The battery lists a capacity of 3.44 Watt-hours.
-
Like all other revisions of the iPod Touch, the battery is soldered to the logic board. This isn't a surprise given the slim form factor of the iPod, but we wish Apple would make battery replacement easier.
-
Fortunately, compared to the 3rd Generation Touch, Apple did add more space between the battery's three solder points (on the orange ribbon just to the left of the battery). This should make the soldering job a little easier when replacing the battery, as there's less chance of accidentally bridging the contacts.
-
-
-
Here's the headphone jack all by itself. Notice the liquid damage indicator on the bottom of the part.
-
The headphone jack is stamped with Foxconn. Foxconn has long been one of Apple's primary contract manufacturers and this part has one of the few indications that Apple doesn't actually manufacture the iPod.
-
-
-
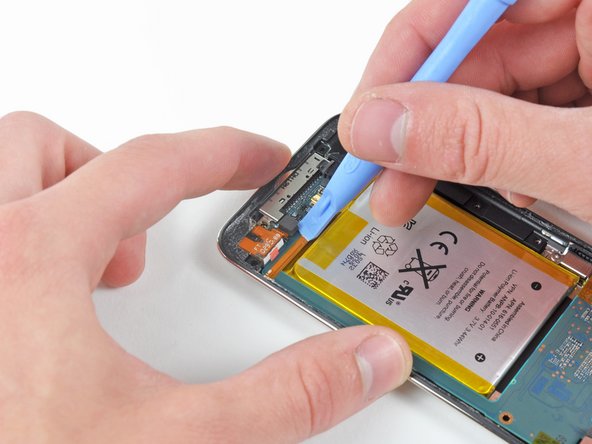
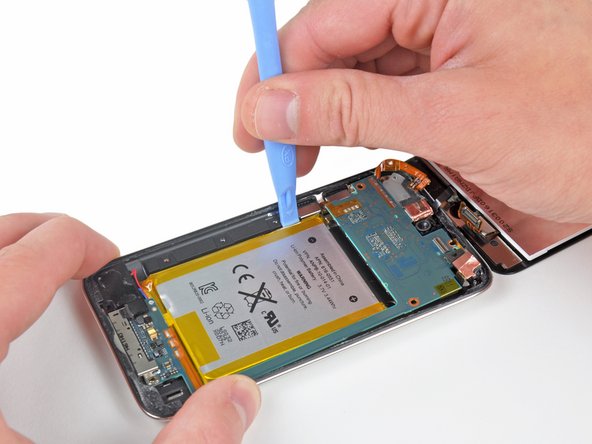
After wrangling the logic board/battery/display assembly out of the rear panel, we can finally access the screws holding the volume button cover and the sleep button down.
-
After a good bit of anxiety-filled scraping with a metal spudger, the ribbon cable is finally free from the rear panel.
-
-
-
At this point, the rear facing camera can be disconnected from the logic board.
-
Unlike the iPhone 4, the fourth generation Touch's rear-facing camera does not support autofocus and is a much lower resolution.
-
This camera is 6.5 mm square by 3.3 mm tall. That is dramatically smaller than the iPhone 4's rear camera.
-
Just above the rear camera, the cylindrical silver object is the microphone, a new feature for the iPod Touch line.
-
-
-
The front-facing camera is readily accessible and can be disconnected from the logic board at this point.
-
Unsurprisingly, it looks just like the iPhone 4's front-facing camera.
-
This camera is 4.9 mm square and 2.5 mm thick, slightly (0.3 mm) thinner than the iPhone 4's front facing camera.
-
-
-
Next, we disconnected the Touch's singular external antenna.
-
This antenna is presumably used for Wi-Fi reception and is situated near the front glass panel when the Touch is completely assembled. Its new location eliminates the need for the plastic "window" found on the 3rd generation Touch.
-
-
-
Finally! We found some serious chips.
-
This iPod features the same A4 processor that's found in the iPad and iPhone 4. The Toshiba chip is very similar to the one which was present in the iPad in the FCC teardown, that was replaced by a Samsung one.
-
The key marking of interest on the A4 processor package is K4X2G643GE. This is identical to the marking found on the iPad processor, but different from the iPhone 4 processor. The iPad has 256 MB RAM, while the iPhone 4 features 512 MB. Unfortunately, this means that like the iPad, the new iPod Touch includes only 256 MB of RAM.
-
The NAND flash memory is now provided by Toshiba, not Samsung like that of the iPad.
-
Murata KM0727121 Wi-Fi module
-
-
-
There are a few more chips at the other end of the logic board.
-
On the far left is a 338S0859 chip. It's similar to the Cirrus Logic audio codec of the iPhone 4 (338S0589).
-
The new AGD8 2032 gyroscope is very similar to that one of the iPhone 4.
-
The 2032 33DH chip is found next to the gyroscope. It seems this chip was packaged in the same die with the gyroscope in the iPhone 4. This is the accelerometer.
-
You can clearly see the 30 pins of the dock connector, located just below the row of chips.
-
-
-
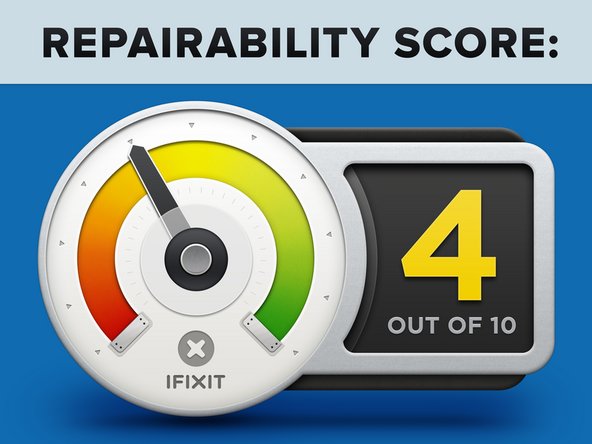
iPod Touch 4th Generation Repairability: 4 out of 10 (10 is easiest to repair)
-
Opening the device is pretty straightforward, as long as you have a heat gun and some iPod Touch opening tools handy.
-
The headphone jack is not soldered to the logic board, a first for the iPod Touch line.
-
The front glass and LCD are permanently fused together, increasing the cost of repairing broken front glass.
-
Removing the display completely requires removing the logic board.
-
Apple soldered the volume button and sleep button cable to the logic board. The previous Touch had a ZIF connector. This makes removing logic board very difficult.
-
The battery is still soldered to the logic board, just like previous models.
-


27 Comments
Very good Teardown! =)
But got still some open questions:
- What about the WiFi and Bluetooth Chip? Must be in the white case named "RV" on the logic board, as I see?
What about looking after the chip?
- Where's the gyroscope? On the iPhone 4 it's clearly visible as a big part, but here I can't find it.
- What about the microphone? Similar or identical to the iPhone 4?
Greetings
Marcel