Introduction
This is the first of three iPod teardowns this week! We'll be taking apart the new iPod Touch and iPod Nano the moment we get our hands on them. Stay in the loop on twitter as the week progresses.
In case you missed it, last week we celebrated a major milestone. In addition to enabling Apple repair, we now have parts and repair manuals for most game consoles! We decided to celebrate by taking a trip through time and ripping apart five retro consoles:
- Magnavox Odyssey 100 released August 1975
- RCA Studio II released January 1977
- Atari 2600 released October 1977
- Nintendo Famicom released July 1983
- Nintendo Virtual Boy released August 1995
Still want to keep your old Shuffle running? We have complete iPod Shuffle repair manuals and parts.
What you need
-
-
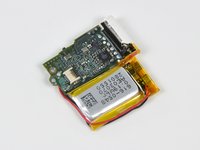
Apple's latest incarnation of the Shuffle bears little resemblance to its immediate predecessor.
-
Although the Shuffle features "new, smaller packaging," it doesn't feature a similarly resized shipping box. Apple could have shipped 30 iPod Shuffles in this box. Literally.
-
Its Apple model number is A1373, updated from the previous Shuffle's A1271 designation.
-
-
-
The 4th Gen Shuffle is priced at a paltry $49.99! The original iPod shuffle cost $99, and had only 512 MB of storage.
-
There's a button just for VoiceOver: push once for artist and song, twice for battery status, and hold for playlist menu.
-
Apple admitted that people actually like buttons and brought them back for this generation.
-
Pshhh! Those of us with 3rd Gen Shuffles just printed out this convenient chart and carried it around for reference.
-
-
-
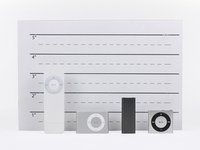
Here's the full lineup.
-
There seems to be pattern here: skinny, fat, skinny, fat. It seems like Apple can't decide what shape they like best.
-
iPod Shuffle 4th Generation:
-
Height: 1.14"
-
Width: 1.24"
-
Depth: 0.34"
-
Weight: 0.44 oz.
-
A bank was robbed last week in Ba Sing Se. Witnesses were given this lineup to identify the perpetrator.
-
-
-
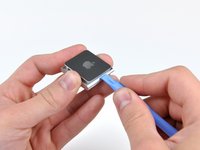
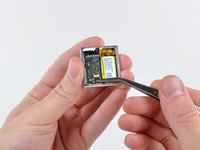
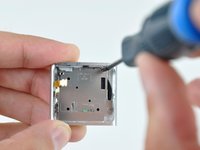
Tool used on this step:Tweezers$4.99
-
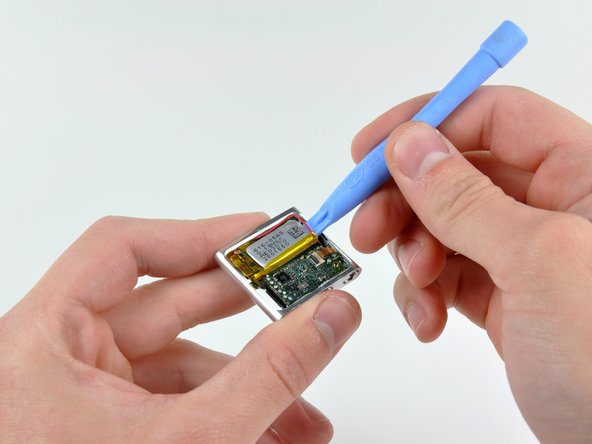
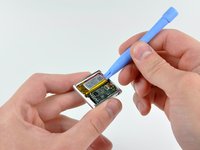
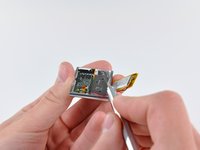
Even the seemingly simple task of disconnecting the control pad ribbon cable turns out to be quite a chore when the connector is 1/8" wide.
-
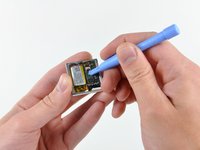
We have a feeling that as technology advances, we'll need smaller and smaller tools to take devices apart. You won't be able to see our hands in pictures, just little pointy tweezers.
-
We already have a microscope ready and waiting in the back room for when that time comes -- but we're not there quite yet (thankfully).
-
-
-
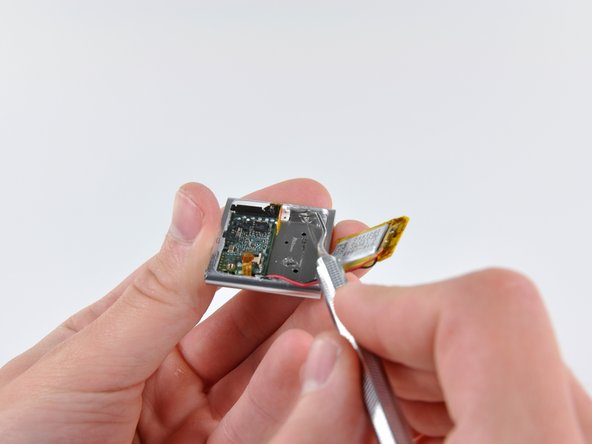
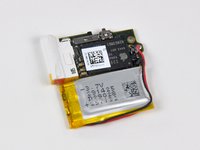
With a listed capacity of .19 Whr, this small 3.7V lithium-ion battery pumps out 15 hours of audio playback.
-
To calculate the capacity in amp-hours, we know P(power) = I(amps)*V(volts), so I = P/V. That yields a capacity of about .051 amp-hours, or 51 mAh. To say the least, that's diminutive in the world of batteries.
-
It's remarkable how long a battery lasts when it doesn't have to power a backlight.
-
-
-
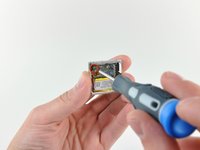
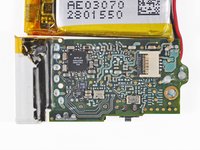
APPLE 338S0860 C0AN1021 TWN
-
339S0128 / K9GA608U0E BC80 / FDEF26QV 1025 / 8443 ARM / N2N63MQ1 1031
-
Unsurprisingly, the date codes on this package indicate die manufacture dates in late June (1025) and early August 2010 (1031).
-
"K9GA6" indicates Samsung 16Gb flash, unlike the Nano and touch which use Toshiba flash.
-
-
-
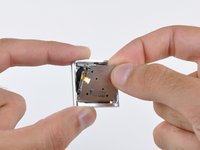
iPod Shuffle 4th Generation Repairability: 2 out of 10 (10 is easiest to repair)
-
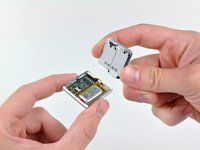
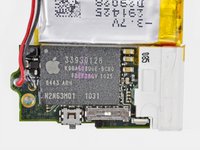
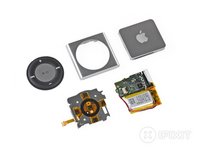
Good: The control pad is attached to the logic board via a connector, allowing it to be easily separated.
-
Good: The lack of a screen eliminates a large weak point of other devices, making the Shuffle more resilient to falls. Just don't flush it down the toilet.
-
Bad: You essentially have to break it to open it.
-
Bad: The battery is soldered to the logic board, making replacement that much more difficult.
-
Bad: Apple keeps shrinking connectors. These super-small cable connectors are increasingly difficult to open without breaking them.
-


7 Guide Comments
That guy stratched PCB, broke edge of a chip and totally wrench one capatitor. Seen on step 12. Thanks for HQ photos. I wish more patience to author, next time...
Thank you very much. The guide is very good and I was able to change the battery of my ipod shuffle. It is working again.
Hey,
do you mind sharing where you got your battery .. and how much it cost .. ? I’m curious to see how stuff changed in 7 years.
Mine’s still doing ok (bought 2011, used extremely often), but … it’s showing its age.
Thanks ✌️
Darie H -
How difficult is it to play any streaming media passing through ipod shuffle or ipod nano hardware