Introduction
We stripped the iPhone 4 down to its basic components. Apple definitely spent time giving the phone a thorough makeover, meticulously changing every little facet. We are happy to splay the fruits of their labor for your enjoyment!
We have confirmed that the iPhone's A4 processor has 512 MB RAM, unlike the iPad's more limited 256 MB. This decision may have been made fairly late in Apple's development cycle, because early leaked prototype phones only had 256 MB.
Can't get enough? Follow @ifixit on Twitter.
You can also take a look at the the YouTube video slideshow of the teardown!
For more detailed technical information on the silicon inside the iPhone, be sure to check out Chipworks' in-depth analysis of the iPhone 4's components.
What you need
-
-
The world's most wanted device is now in the hands of the world's most foremost tinkerers!
-
The all-new iPhone 4 features upgrades from the 3GS including:
-
A redesigned glass & stainless steel body that shaves 3.5 mm off the width and is 3 mm thinner than the 3GS.
-
Choice of black or white coloring
-
Retina display featuring four times the pixel density of the 3GS
-
iOS 4 for multi-tasking
-
5 MP, 720p capturing rear-facing and VGA front-facing cameras
-
-
-
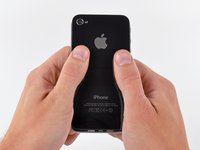
The iPhone 4's design is a dramatic departure from the aluminum and plastic drenched days that have plagued the iPhone in the past.
-
The rugged stainless steel bezels around the iPhone 4's perimeter double as both structural supports and antennas to boost reception.
-
Only time will tell if they absorb shock as poorly as the iPhone 3GS.
-
Shameless plug:
-
We also sell useful things, like Mac parts, iPad parts, and tools.
-
-
-
We'd expect our 32 GB iPhone 4 to fulfill its promise and give us, well, 32 GB. Unfortunately it has an actual capacity of 29.06 GB.
-
In terms of OS, the iPhone 4 comes preinstalled with the newly released iOS 4, build 8A293.
-
The iPhone 4 is Model A1332. Interestingly, that's a lower number than the A1337 iPad 3G.
-
-
Tool used on this step:Phillips #000 Screwdriver$5.49
-
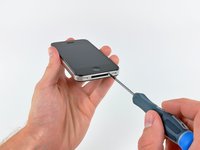
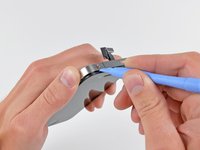
Like the iPhone 3G and 3GS, there are two silver Phillips #000 screws at the bottom of the phone. Note: newer iPhone 4 handsets use 5-point "pentalobe" screws instead, requiring the use of a special screwdriver.
-
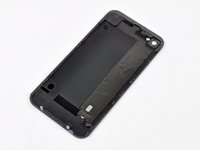
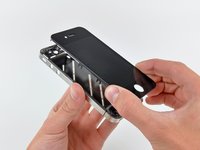
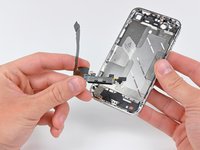
In a departure from the design of the 3G and 3GS, removing the screws releases the rear case, not the front glass.
-
This design makes switching out the rear panel trivial, but unfortunately means that replacing the iPhone 4 front panel will likely be rather challenging.
-
-
-
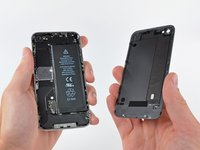
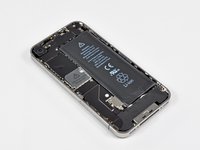
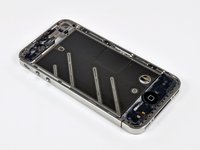
Removing rear panel gives us a pretty good look at the iPhone 4's innards.
-
Holy battery! The inside of this thing is dominated by its juice-provider.
-
It's pretty apparent that real estate was very limited inside the iPhone 4's 115.2 x 58.6 x 9.3 mm footprint.
-
You can also see pressure contact on the inner face of the rear panel for what appears to be an antenna.
-
-
-
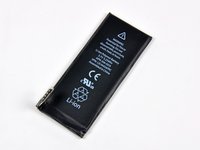
Luckily, the battery can be easily removed once the back panel assembly is out of the way.
-
The 3.7V 1420 mAh Li-Polymer battery allows for up to 7 hours of talk time on 3G or up to 14 hours on 2G.
-
The battery connector is different than the one in the 3G and 3GS. Fortunately, the battery is not soldered to the logic board. This will make battery replacement on the iPhone 4 fairly easy to accomplish.
-
The plastic pull tab for the battery says "Authorized Service Provider Only."
-
-
-
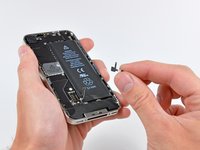
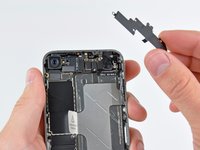
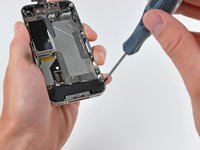
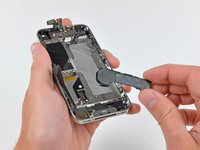
No EMI shield will stand between us and the innards of this iPhone 4!
-
The EMI shield comes off after five screws are removed to reveal lots of important connectors.
-
Upon further inspection, it looks like the EMI shield actually acts as the Wi-Fi antenna. The long screw at the top and center grounds the antenna.
-
-
-
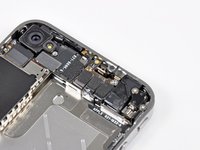
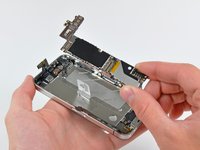
The logic board is heavily embedded under wires and EMI shields.
-
While we're not too busy, let's talk RAM. Unlike the iPhone 3GS and iPad, which are both equipped with 256 MB, the iPhone 4 has a whopping 512 MB!
-
The increase in RAM allows for a larger amount of cached data allowing for a smoother and faster user experience.
-
-
-
-
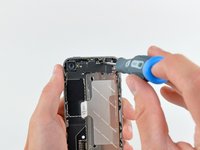
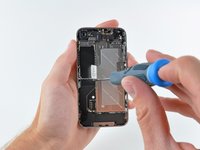
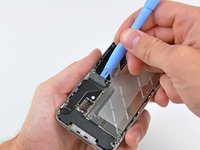
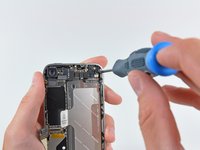
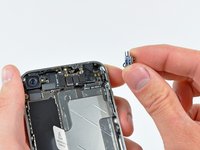
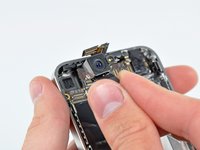
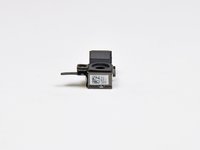
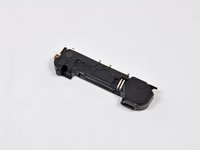
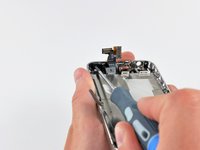
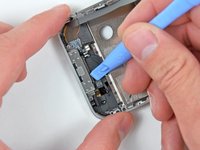
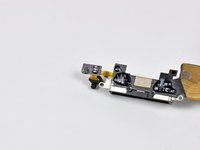
Removing the lower antenna/speaker enclosure from the bottom of the phone.
-
The improved audio chamber aids in clarifying sounds leaving the iPhone, including calls via speakerphone as well as music played through the speaker inside this housing.
-
Apple hasn't made taking the iPhone 4 apart very hard so far: no 5-point Torx bits or fragile clips to be seen.
-
-
-
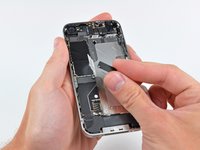
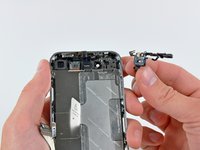
Apple has integrated the UMTS, GSM, GPS, Wi-Fi, and Bluetooth antennas into the stainless steel inner frame.
-
The dual purpose stainless steel inner frame/antenna assembly addresses possibly the two biggest flaws concerning previous iterations of the iPhone: continuous dropped calls and lack of reception.
-
Apple has gone a step further and tuned the phone to utilize whichever network band is less congested or has the least interference for the best signal quality, regardless of the actual signal strength. Early reports suggest this feature, while buggy in its early stages, will greatly improve the phone's reliability on AT&T's fragile network.
-
-
-
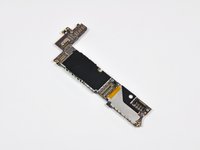
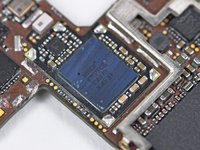
With the EMI shields off, we can get a look at what makes this beast roar.
-
Lurking deep within the phone, the A4 processor, manufactured by Samsung, is the centralized unit that provides the iPhone 4 with the much needed computing power.
-
Replacing the Samsung S5PC100 ARM A8 600 MHz CPU used in the 3GS, the new iPhone uses the ARM Cortex A8 core, much like its bigger sibling, the iPad. The iPad's A4 is clocked at 1 Ghz.
-
Just to the left of the A4 package, the AGD1 is the new 3 axis gyroscope that we believe is designed and manufactured by ST Micro for Apple. The package marks on this device do not appear to be the currently available commercial part, L3G4200D. The commercial version of this gyroscope is yet to be released — Apple got first dibs on it.
-
-
-
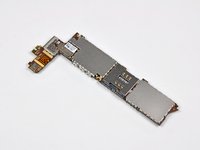
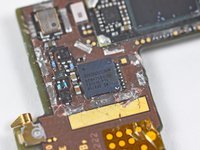
On the back:
-
Samsung K9PFG08 flash memory
-
Cirrus Logic 338S0589 audio codec (Apple branded). This is the same part as in the iPad.
-
AKM8975 - newest magnetic sensor that promises to improve the performance over the prior generation.
-
Texas Instruments 343S0499 Touch Screen Controller
-
36MY1EE NOR and mobile DDR
-
-
-
Wi-Fi, Bluetooth, and GPS are all provided by Broadcom and located beneath EMI shields on the front side of the board.
-
Broadcom BCM4329FKUBG 802.11n with Bluetooth 2.1 + EDR and FM receiver.
-
Broadcom BCM4750IUB8 single-chip GPS receiver.
-
-
-
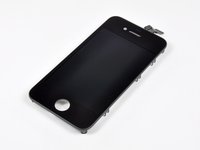
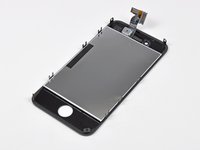
The front glass panel of the iPhone is reported to be constructed of Corning Gorilla Glass, a chemically strengthened alkali-aluminosilicate thin sheet glass that is reported to be 20 times stiffer and 30 times harder than plastic.
-
Gorilla Glass holds many advantages as the iPhone 4's front panel, including its high resistance to wear and increased strength from an ion-exchange chemical strengthening process.
-
LED Backlight for the LCD.
-
Unfortunately, the LCD panel is very securely glued to the glass and digitizer, with the entire assembly measuring 3.05mm thick. It appears that if you break the glass, you'll have to replace the iPhone 4's glass, digitizer, and LCD as a single assembly.
-
-
-
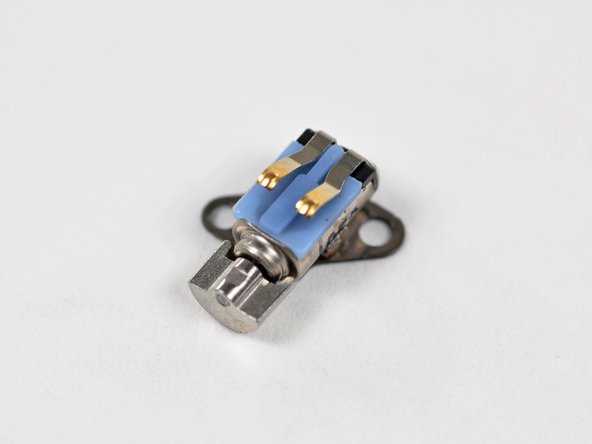
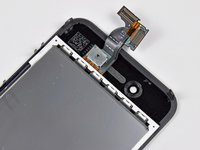
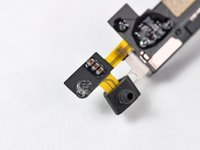
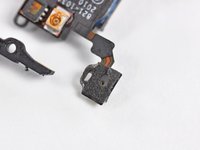
Apple is following in the footsteps of the Nexus One by using dual microphones to help improve audio quality and suppress background noise.
-
Interestingly, the two microphones are positioned at the two far ends of the phone. The microphone at the top of the iPhone is most likely utilized for capturing background noise to be analyzed by internal circuitry and used to cancel any noise put into the main microphone other than the user's voice.
-
You can also see the ambient light sensor which adjusts the iPhone's brightness as lighting conditions change.
-
The proximity sensor sits right next to the ambient light sensor. This will turn the display off when you bring the phone up to your ear thus preventing any touch interaction while it's pressed up against ear.
-
-
-
As always, we provide each device with a fitting final layout shot that it so greatly deserves.
-
We would like to thank you for joining us tonight during this monumental endeavor.
-
We also created a set of iPhone 4 repair guides for all major components inside the device. They will definitely help you fix your iPhone 4 should something happen to it!
-
-
Tool used on this step:P2 Pentalobe Screwdriver iPhone$5.99
-
iPhone 4 Repairability Score: 6 out of 10 (10 is easiest to repair)
-
The iPhone 4 is held together primarily with [lots of] screws, sans tabs, and limited adhesive.
-
The rear panel and battery are both easy to remove and replace (provided you have the right kit and/or correct screwdriver).
-
Apple is using Pentalobe screws to secure the rear panel and keep people out.
-
The LCD and glass are fused together, making repairing a cracked front panel more costly.
-
During disassembly, your finger oils interfere with the iPhone 4's RF grounding contact points, so we recommend you wear gloves while performing any repairs.
-


24 Guide Comments
Obviously creating antennas out of the frame pieces didn't work well for them... how obvious it should be that you should not touch an antenna and expect the radio to work. The "dual-band" enhancement is worthless - cellular got kicked off the 800-900 MHz spectrum.