Sony PlayStation Teardown

Teardown

Teardown

Teardowns provide a look inside a device and should not be used as disassembly instructions.

User-Contributed Guide

User-Contributed Guide

This guide is not managed by iFixit staff.

  • Add Note x

I have a PlayStation 1, and i have decided to make a new teardown of it.

I'm spanish, so my english is a bit poor, and sorry for the mistakes made in this teardown.

Without further delay, we start.

first image
thumb image 1
thumb image 2

Add Note Edit Step 1 — Sony PlayStation Teardown  ¶ 

  • Here's the PS1.

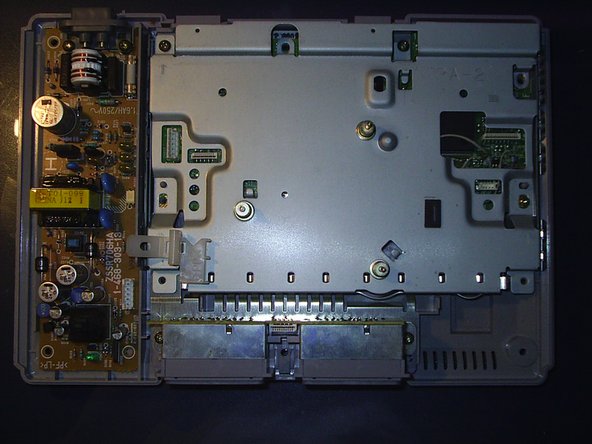
  • Turn the PS1 over and remove the six screws.

first image

Add Note Edit Step 2  ¶ 

  • Remove the top cover. It's very easy.

first image

Add Note Edit Step 3  ¶ 

  • Disconnect both CD-ROM connectors.

    • CD connector one and the socket it connects to.

    • CD connector two and the socket it connects to.

first image
thumb image 1
thumb image 2

Add Note Edit Step 4  ¶ 

  • Remove the CD-ROM reader. You should be able to pull it out gently, although you may have to wiggle it around a bit to loosen the rubber holders.

first image

Add Note Edit Step 5  ¶ 

  • Detach both cables. They go to the power supply and to the memory cards and controller connectors.

first image

Add Note Edit Step 6  ¶ 

  • Remove the four screws and the metal cover.

first image

Add Note Edit Step 7  ¶ 

  • Now you have the motherboard!

  • And the power supply.

  • Remove the four screws from the motherboard and the power supply.

first image

Add Note Edit Step 8  ¶ 

  • Once the screws are removed, remove the power supply.

first image

Add Note Edit Step 9  ¶ 

  • Remove the motherboard, and both of the screws from the memory card/ controller connection mechanism.

first image

Add Note Edit Step 10  ¶ 

  • Now, you have all your PlayStation 1 parts!

    • Main Board

    • Lower Casing

    • EMI Shield

    • Power Supply

    • Disk Reader

    • Memory Card/ Controller Mechanism

Comments Add Note Comments are offturn on