iFixit

Add Note
Sony Dream Machine ICF-C211 Teardown

Teardown

Teardown

Teardowns provide a look inside a device and should not be used as disassembly instructions.

User-Contributed Guide

User-Contributed Guide

This guide is not managed by iFixit staff.

While I was walking around my overcrowded basement I ran into something I stopped using years ago when I bought a super technological cellphone that did everything and more than my older morning companion. After checking if it was still working i decided to tear it down and see how this little gadget saved my life so many times in the morning..

View: Paginated Full width Slideshow  

first image
thumb image 1
thumb image 2
thumb image 3

Add Note Edit Step 1 — Sony Dream Machine ICF-C211 Teardown

  • How many of you at least once in your life wanted to smash your alarm clock against the wall to make it stop beeping?? Well today we're gonna do something worse... we're going to tear it down!!

first image
thumb image 1
thumb image 2

Add Note Edit Step 2

  • Let's turn the alarm clock upside down, regardless of the risk of electric shock as stated by the caution sign, we proceed using a regular Phillips screwdriver.

  • As you can see the Sony Dream Machine has a battery power backup just to make sure it'll ruin your dreams by going off even if the power is out! Diabolical..

first image
thumb image 1
thumb image 2
thumb image 3

Add Note Edit Step 3

  • After removing the screws, lift the front clear plastic panel in front of the LED.

  • Now flip the alarm clock. Lift the top gently to avoid breaking any plastic component inside, because you won't find any screws inside, everything is locked with plastic joints and glue...interesting..

first image
thumb image 1
thumb image 2
thumb image 3

Add Note Edit Step 4

  • Here it is.. your alarm clock split in half.

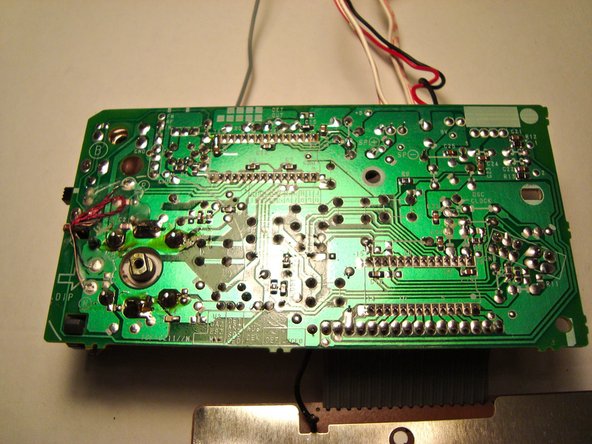
  • Now we need to remove the circuit board... nothing easier... just lift it from the side with your thumb and there you go!

  • Before we move on to the top half of the alarm clock we need to remove the AC, just like the circuit board use your thumb for some leverage and it will easily pop out of its case.

first image

Add Note Edit Step 5

  • This is probably the most fun part of the teardown: manage to unglue the speaker off the case... I suggest you grab a flathead screwdriver and start digging.. just be careful not to damage too much the plastic ring around it or you won't be able to put it back on!

first image
thumb image 1
thumb image 2

Add Note Edit Step 6

  • Here are some pictures of the circuit board.

  • Our teardown is now complete!! Good luck putting it back together!

Tools

Tool image

Flathead 3/32" Screwdriver

$4.95 · 114 in stock

Tool image

Phillips #1 Screwdriver

$4.95 · 31 in stock

Popular Repair Guides

Blurb image

Installing iPod Classic Battery

Battery not lasting long? Swap...

310 recent views

Blurb image

Installing PlayStation 3 Hard...

Replace the hard drive on your PS3.

189 recent views

Blurb image

Installing MacBook Core Duo...

The plastic frame around your...

163 recent views

Blurb image

Installing PowerBook G4 Aluminum...

This motherboard includes all...

74 recent views

Notes Add Note Notes are off | turn on