Introduction
The inside story of a compact digital camera from sony. This one belong to a friend of mine, and is actually broken, the shutter button broke.
What you need
-
-
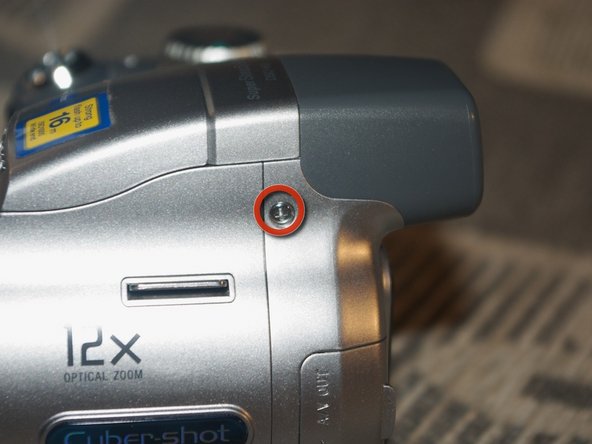
This is the Sony DSC-H2 we are going to tear down.
-
It's a 6.0mpix, 12x optical zoom compact digital camera.
-
It served well to the point at which the shutter button fell off.
-
To tear it apart, we need a #0 Philips screwdriver only, thats very nice of you, Sony!
-
-
-
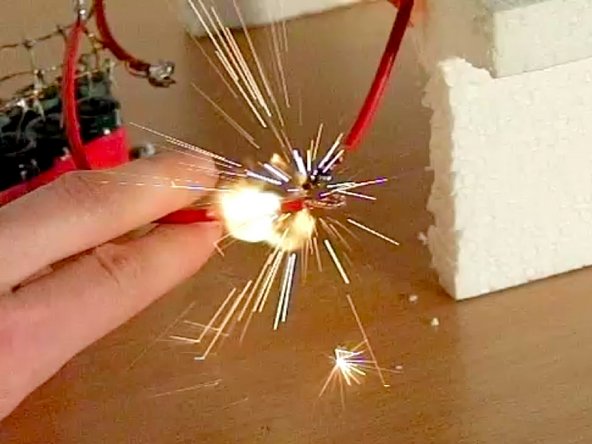
For safety reasons, find a screwdriver that has a plastic, wooden or other non-conducting handle
-
The second photo shows a spark and a plasma cloud created by rapidly discharging a capacitor similar to the one in this camera. (the picture was taken at the technical university of Łódź, Poland, do not try this at home!)
-
-
-
-
Under the LCD, we find a metal screen protecting the logic board.
-
Carefully unlock it at the top and left side
-
We're in
-
Remove all the ribbon cables. There sure is a lot of them.
-
Some of the ribbon cables have "Halogen free" singed on them. That's nice, but we are still not throwing the camera away, not just yet.
-
-
-
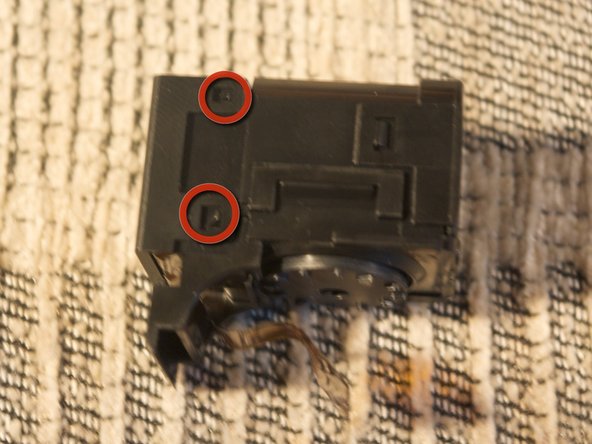
These two screws hold the logic board.
-
When removing the board, be careful about some remaining ribbon cables.
-
The board is out!
-
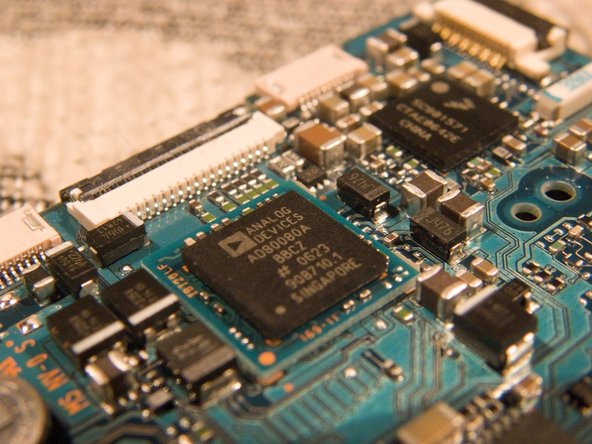
On one side we see the AD80080A chip from Analog devices responsible for capturing the analog signal from the CCD
-
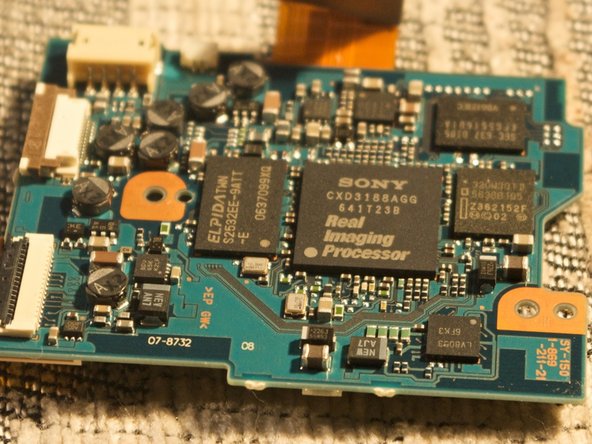
On the other side, we see the Sony "Real Imaging Processor" that converts raw photo data into nice and human-viewable .jpg files.
-
The analog cable connecting the CCD to the logic board is screened with some pieces of metal to reduce noise.
-
-
-
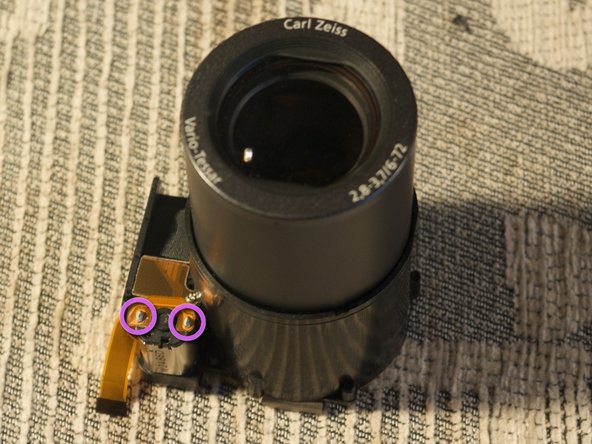
Remove these two screws to detach the sensor from the lens
-
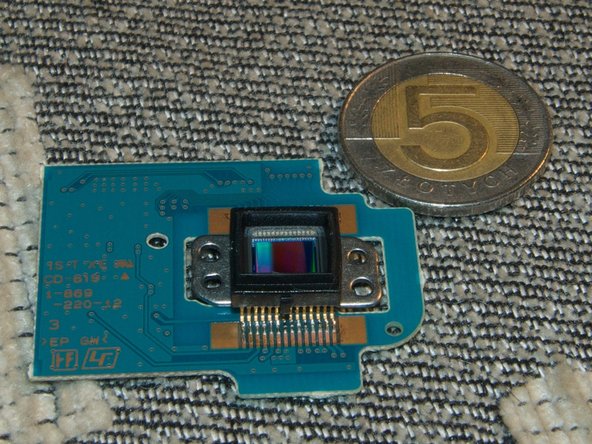
The sensor has a typical 1/2.5" size. That's not a big sensor.
-
Here you have a 5 polish zloty coin for comparison.
-
5 polish zloty's is about $1.80, in case you don't grasp the size yet :)
-
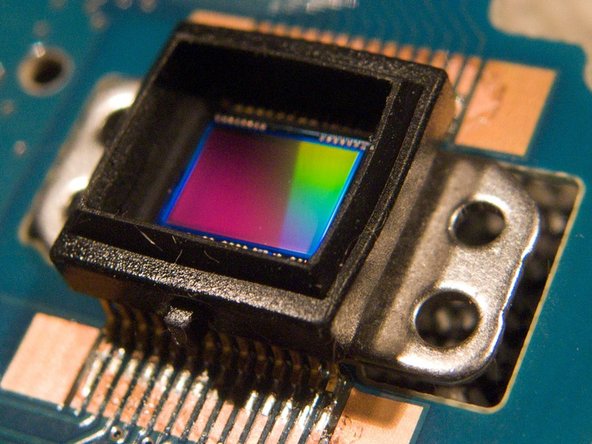
The CCD is very shinny.
-
6 megapixels from a 1 / 2.5" sensor is like expecting 70 megapixels from a 35mm film camera. It's still better then pumping 12 megapixels out of a pinhead sized sensor in mobile phones.
-
-
-
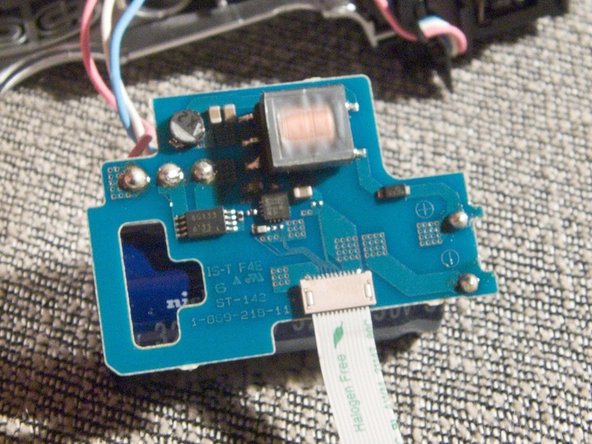
Lets get back to the body of the camera
-
Lift this plastic lock to remove the hight voltage chip powering the speed light.
-
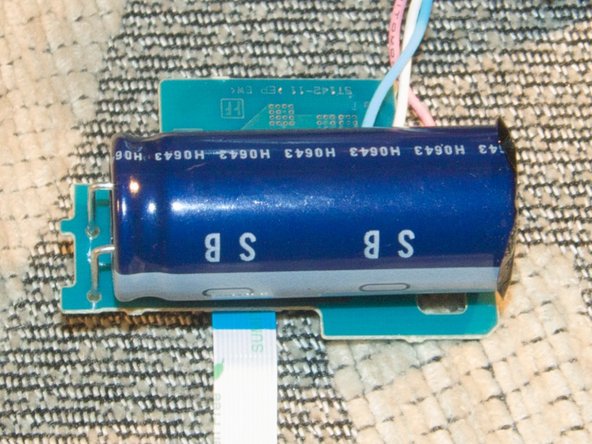
3 cables connect this board with the lamp and they are soldered.
-
The capacitor has 320 micro farads of capacity and operates at 330 volts. That's 17.4 joules of potential electric energy, quite much for a speed light.
-


7 Comments
Excellent teardown! Great job!
Do you have a Sony Cybershot DSC-H2 camera? Did your shutter button just POP OFF? Are you mad that your $400 Cybershot is now useless due to their design flaw?
Well jump on in! We're gonna do something about it. http://www.thepetitionsite.com/1/SonyCla...
Awesome tear-down, saved me $150 bucks and my camera is back!. We love this camera and are so happy to have it working again.
I actually went beyond this point and dismantled the lens. Something had come apart inside and it no longer worked. It didn't even retract when I turned off the camera. Can anyone help me with instructions to put it back together? I can't work it out. I figured that the cost to get it repaired would have been more than the camera is now worth, so no harm in trying!!!
Thanks.
My DSC-H2 is not picking up any video It does everything else except I cant see a picture. Much like the Lens coveris left on. Since I see this teardown, what should I look for to correct this?