
What you need

This teardown is not a repair guide. To repair your Motorola Droid 2, use our service manual.

  1. Motorola Droid 2 Teardown, Motorola Droid 2 Teardown: step 1, image 1 of 3 Motorola Droid 2 Teardown, Motorola Droid 2 Teardown: step 1, image 2 of 3 Motorola Droid 2 Teardown, Motorola Droid 2 Teardown: step 1, image 3 of 3
    • The Droid 2 features:

    • Texas Instruments OMAP (Open Multimedia Application Platform) 1GHz processor with dedicated GPU.

    • 8 GB internal storage space.

    • 5 MP camera with auto focus.

    • 3.7" WVGA display

    • Android 2.2 OS (Froyo)

    • The Motorola Droid 2 measures 4.58" x 2.36" x 0.54" and weighs in at 5.96 oz.

    • Taking a page from Apple, the Droid 2's nifty and compact packaging is a sight to be admired.

  2. Motorola Droid 2 Teardown: step 2, image 1 of 2 Motorola Droid 2 Teardown: step 2, image 2 of 2
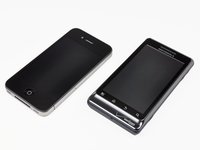
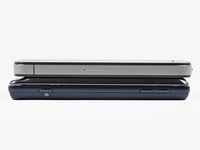
    • Side-to-side comparison of the Droid (left) and Droid 2 (right).

    • If you have a broken original Droid, check out our Droid repair manuals before forking out the cash for the new Droid 2!

    • The new Droid 2 looks sleeker than its predecessor with the dark blue finish and slight modifications to the case.

    • Rather than having a front panel with a sharp offset lip like the Droid, the Droid 2's front panel features a smooth transition to make it more pocket friendly.

  3. Motorola Droid 2 Teardown: step 3, image 1 of 2 Motorola Droid 2 Teardown: step 3, image 2 of 2
    • The top of the line Apple iPhone 4 up against the new Droid 2 equipped with Android 2.2 Froyo.

    • Unsurprisingly, the iPhone 4 is much thinner. Thickness is the price you must pay for a keyboard with actual buttons.

  4. Motorola Droid 2 Teardown: step 4, image 1 of 2 Motorola Droid 2 Teardown: step 4, image 2 of 2
    • The battery cover comes off without much fuss, and we're on our way to tearing this phone apart!

  5. Motorola Droid 2 Teardown: step 5, image 1 of 2 Motorola Droid 2 Teardown: step 5, image 2 of 2
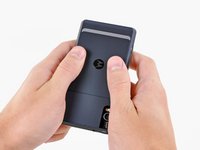
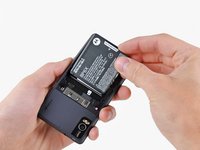
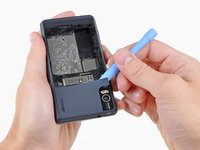
    • Unlike the iPhone 4 with its "Authorized Service Provider Only" pull tab, the Droid 2 has a helpful note stating "battery removal here." Thanks, Motorola.

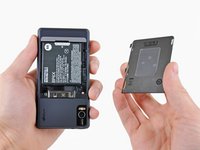
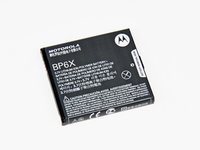
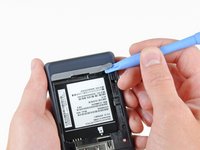
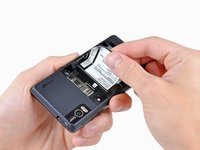
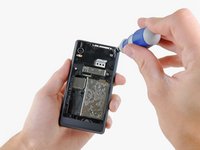
    • Along the top side of the battery is one of the two visible moisture damage markers. The other is found to the left of the microSD card.

    • The Droid 2 has a 3.7V, 1390 mAh Li-Ion Polymer battery, providing up to 9.5 hours of talk time.

    • This is the exact same battery used in the Droid, and only slightly smaller than the 1420 mAh battery found in the iPhone 4.

  6. Motorola Droid 2 Teardown: step 6, image 1 of 1
    • The Droid 2 comes pre-installed with an 8GB microSD memory card that can be easily slid out of its socket.

  7. Motorola Droid 2 Teardown: step 7, image 1 of 3 Motorola Droid 2 Teardown: step 7, image 2 of 3 Motorola Droid 2 Teardown: step 7, image 3 of 3
    • Every screw holding the Droid 2 together is cleverly hidden behind the many covers stuck to the rear of the device.

  8. Motorola Droid 2 Teardown: step 8, image 1 of 3 Motorola Droid 2 Teardown: step 8, image 2 of 3 Motorola Droid 2 Teardown: step 8, image 3 of 3
    • A screw here, a screw there, and we're almost in!

    • After prying the rear case off, we finally get to see what makes the Droid 2 tick.

  9. Motorola Droid 2 Teardown: step 9, image 1 of 1
    • Five pressure contacts on the headphone jack press against the gold pads attached to the camera board to exchange data.

  10. Motorola Droid 2 Teardown: step 10, image 1 of 3 Motorola Droid 2 Teardown: step 10, image 2 of 3 Motorola Droid 2 Teardown: step 10, image 3 of 3
    • The speaker is held in place by the pressure of the two case halves when they are locked together, so at this point it can be simply lifted out of the Droid 2.

    • The speaker looks to be the same model as the one in the original Droid.

    • The gold sticker applied to the speaker housing is a cleverly placed antenna.

  11. Motorola Droid 2 Teardown: step 11, image 1 of 3 Motorola Droid 2 Teardown: step 11, image 2 of 3 Motorola Droid 2 Teardown: step 11, image 3 of 3
    • This Droid 2 opening tool gets a workout disconnecting the antenna, display data ribbon cable, and power/volume button ribbon cable from the motherboard.

  12. Motorola Droid 2 Teardown: step 12, image 1 of 2 Motorola Droid 2 Teardown: step 12, image 2 of 2
    • After removing the screws securing the motherboard to the phone and disconnecting the keypad ribbon cable on the opposite side, the motherboard is finally free from Droid 2.

  13. Motorola Droid 2 Teardown: step 13, image 1 of 1
    • The motherboard assembly stands alone in all its glory.

    • The camera board is actually a separate circuit board that can be easily removed from the motherboard.

    • Awww man, all those chip covers are soldered down. You think that's going to stop us?

  14. Motorola Droid 2 Teardown: step 14, image 1 of 2 Motorola Droid 2 Teardown: step 14, image 2 of 2
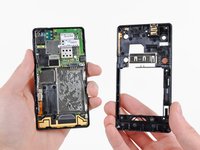
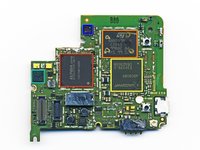
    • Big players on the front of the motherboard include:

    • Qualcomm QSC6085 CDMA Processor

    • Elpida K4332C1PD-50-F - 512MB Mobile DDR3 RAM for the OMAP3630.

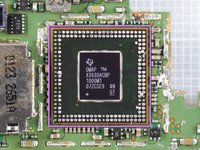
    • TI OMAP 3630 is secreted underneath the Elpida package (thanks Chipworks!).

    • Numonyx NANDA9R4N4 NAND/DRAM package that supports the QSC6085 CDMA processor. DRAM is most likely for the camera processor, while the NAND may be holding software for functions like the GPS.

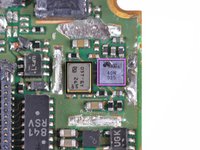
    • AKM 8973N 019A Compass

    • S202 7927 microphone

    • This secondary microphone picks up background noise and helps cancel it for clearer calls.

  15. Motorola Droid 2 Teardown: step 15, image 1 of 2 Motorola Droid 2 Teardown: step 15, image 2 of 2
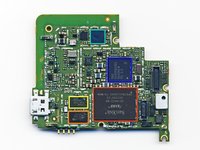
    • Back of motherboard:

    • SanDisk SDIN4C2 8 GB NAND flash

    • TriQuint TQM613029 CDMA PA-Duplexer Module

    • Avago FEM-7758 CDMA Front End Module

    • TI 51001582002 Power management IC

    • TI WL1271B WLAN Bluetooth/FM chip

    • ST G 40N 025

    • Unidentified OST chip

  16. Motorola Droid 2 Teardown: step 16, image 1 of 1
    • The Droid 2's 5 MP rear-facing camera with dual-LED flash supports DVD-quality video recording at 6 more FPS than the original Droid - 30 fps vs. 24 fps.

    • Yet the camera board doesn't look all too different than the one equipped on the original Droid.

  17. Motorola Droid 2 Teardown: step 17, image 1 of 3 Motorola Droid 2 Teardown: step 17, image 2 of 3 Motorola Droid 2 Teardown: step 17, image 3 of 3
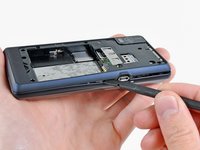
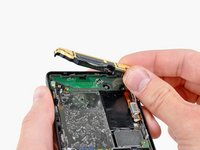
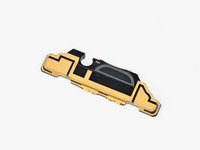
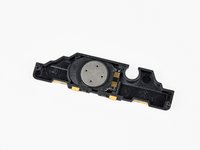
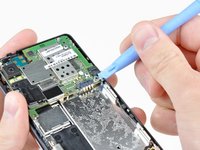
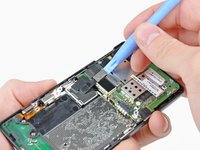
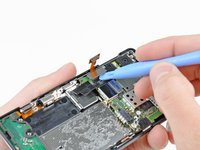
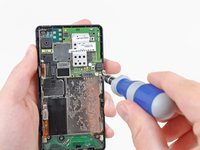
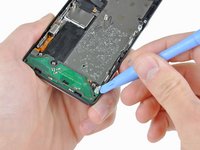
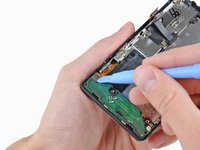
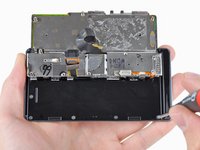
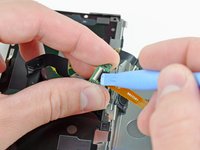
    • After disconnecting an antenna connector and a ribbon cable leading to the vibrator motor & control buttons, the small board at the bottom of the Droid 2 can be removed.

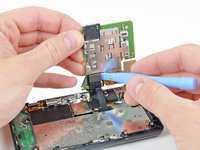
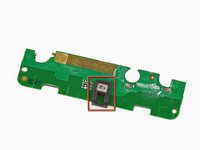
    • Between all the web-browsing and texting, when you make the occasional call on your Droid 2, this microphone lets you be heard.

  18. Motorola Droid 2 Teardown: step 18, image 1 of 3 Motorola Droid 2 Teardown: step 18, image 2 of 3 Motorola Droid 2 Teardown: step 18, image 3 of 3
    • At this point, the black plastic rim can be lifted off the Droid 2.

    • We've thoroughly torn the body of the phone down, so we've turned our attention to the sliding display.

    • A few screws later and the display is open, giving us a first glimpse at the backside of the LCD.

  19. Motorola Droid 2 Teardown: step 19, image 1 of 2 Motorola Droid 2 Teardown: step 19, image 2 of 2
    • After disconnecting the digitizer ribbon cable and lifting out the earpiece, the front panel can be separated from the rest of the phone.

  20. Motorola Droid 2 Teardown: step 20, image 1 of 2 Motorola Droid 2 Teardown: step 20, image 2 of 2
    • The LCD can be removed from the keyboard assembly after disconnecting the display data cable.

    • The Droid 2 uses the same 3.7 inch, Full WVGA, 854x480 TFT LCD as the original Droid.

  21. Motorola Droid 2 Teardown: step 21, image 1 of 2 Motorola Droid 2 Teardown: step 21, image 2 of 2
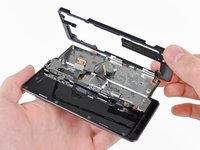
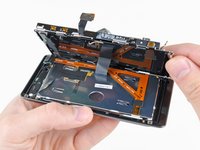
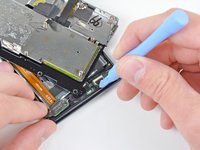
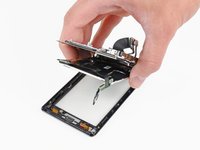
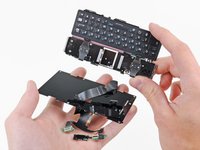
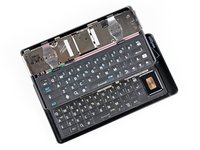
    • After de-routing the ribbon cable through the slider mechanism, the keyboard can be easily removed from the back of the slider bracket.

    • The second picture shows both Droid keyboards, with the Droid 2 obviously being on top.

    • A large D-pad panel was ditched for individual direction keys, a new record button was added, and the enter button was enlarged to more resemble a traditional keyboard.

  22. Motorola Droid 2 Teardown: step 22, image 1 of 1
    • Are you wondering if the Droid 2 has the capability to reassemble itself? So are we...in the meantime, here's a before snapshot of all the components. As soon as the Droid 2 reassembles itself, we'll have the after shot.

    • Thanks for joining us today during this exciting teardown.

7 Comments

I reviewed the iPhone 4 teardown and the construction of its parts looks a whole lot better than the Droid. I also was surprised to find so many screws behind glued on labels. I just think the iPhone is a better constructed device. The parts look good whether they're all put together or taken apart.

plink53 - Reply

I'm thinking the separate DDR+NAND is the RAM+Storage memory package for the CDMA processor, while the Eplida package contains both DDR+NAND+OMAP..

NTT - Reply

I agree with NTT, in addition the Droid X that I opened contains the OMAP stacked with a Toshiba memory chip with markings YCC0A211278LJ. The CMDA processor also uses a Toshiba memory chip with markings TY9A0A111182LC

Tom Z - Reply

Now, where's the TI OMAP?

Wanwoo Choi - Reply

The TI OMAP is located under the Elpida chip.

Matthew Newsom -

Add Comment

View Statistics:

Past 24 Hours: 1

Past 7 Days: 3

Past 30 Days: 16

All Time: 153,735