Introduction
In case you missed it, we tore apart the new MacBook Pro 15" Retina Display Mid 2012 last week. Inside, we found a whole mess of pretty, yet difficult to access components. In fact, the MacBook Pro with Retina display earned our lowest repairability score ever, with 1 out of 10 points.
What we didn't look at earlier, however, is the MacBook Pro's namesake: the Retina display. Apple claims that the Retina display in the MacBook Pro is the most stunning display to ever grace the lid of a notebook computer. "But at what cost?" we find ourselves asking. Being the repair-minded folks that we are, we feel that the only fair way to answer that question is to give this new display "the iFixit treatment": open it up and look! We may not be opthalmologists, but we are excited to be doing surgery on a Retina display. Join us as we investigate the intricacies of Apple's most stunning display.
Do you wake up in the middle of the night, tossing and turning in anticipation for iFixit's next teardown? Follow us on Twitter and get some rest. We'll keep you up to date with all the hottest gadget teardowns!
What you need
-
-
Here it is: the impenetrable fortress of pixels known as the Retina display.
-
Despite our initial apprehension about tearing down such an impressive (and expensive) piece of equipment, we are very curious to see for ourselves just how Apple managed to squeeze more than an entire HDTV inside a 15" display.
-
At first glance, it looks like a normal MacBook Pro display assembly with a skinnier bezel and no logo at the bottom.
-
-
-
Would you call us crazy if we told you that the display assembly from the latest MacBook Pro is the same size as its predecessor?
-
You caught us; we lied. The new display is actually a fraction of a millimeter smaller than the old one. Neat!
-
At its fattest point, the display assembly is a hair over 7 mm thick, and all the way down to just over 3 mm at the edges.
-
What's astounding is that Apple's engineers managed to cram four times the pixels of the previous 15" MacBook Pro into a display assembly that is (nearly) the same size.
-
The big savings here is weight, not thickness. The Retina display weighs in at 673 grams, while a standard 15" MacBook Pro display tips the scale at 908 grams. That's a solid 25% weight savings!
-
-
-
The disassembly begins pretty routinely. Like most Apple laptops, the clutch cover pries off fairly easily with a plastic opening tool.
-
But differences start popping up as soon as the clutch cover comes off. The array of antennas underneath the clutch cover looks a lot more involved than in previous generations.
-
-
-
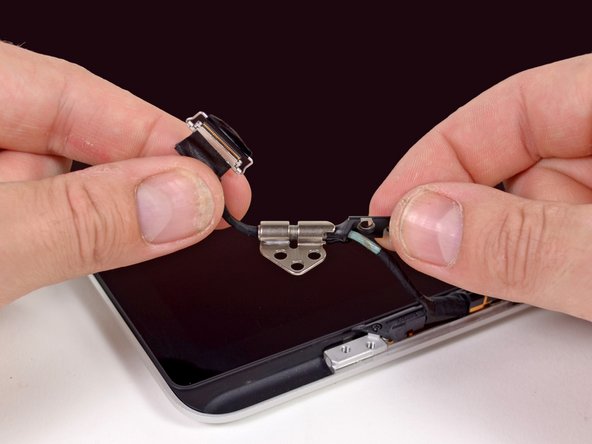
The left display hinge comes out with no issues, but good luck separating it from the display data cable.
-
Devices with cables fed through hinges can be a real bear to work on. None of that will be an issue with this machine, though, as the display hinge is pretty much sealed shut at the factory. Rather than routing the cable under a cable retainer -- as it's done in non-Retina MacBook Pros -- you just have to replace both cable and hinge together.
-
Don't think that the guys (and gals) who designed this machine are just out to get you. Routing the cables through the hinge is a way to save space and weight in the laptop.
-
-
-
In the opposite corner we find another hinge that holds the antenna and FaceTime cables captive.
-
Again, if you need to replace these cables, the hinge has got to go, as well. That might not be so bad, but having to replace all of those cables just because a hinge breaks would be less than ideal.
-
Markings on the inverter board read LP154WT1 (SJ) (A1) GD. Given that the board is soldered to the rest of the display, it appears to be a display manufactured by LG Display.
-
-
-
Things go back to being a little more familiar as we begin pulling off the rubber display gasket.
-
We were pleasantly surprised to find Phillips screws holding the Retina display in place. If you are trying to repair your Retina display and made it this far, you have earned the right to lay down your pentalobe and Torx bits and dust off your Phillips drivers.
-
The 1 mm gap between the aluminum panel and LCD layers might not seem very large, but to dust and debris it's a gaping hole.
-
-
-
-
Q: What happens when you hand over a groundbreaking notebook display to a group of careful, highly trained technicians?
-
A: They break it.
-
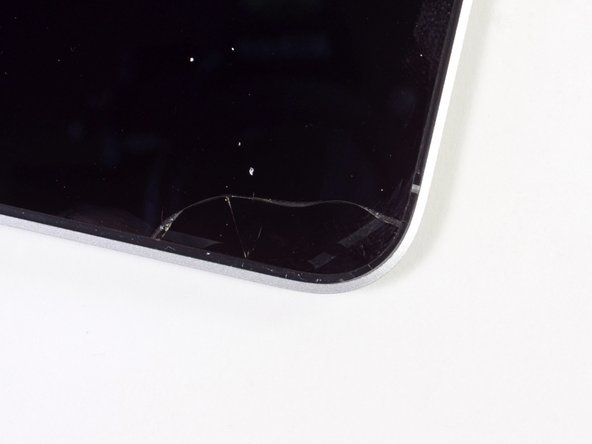
We were as careful as we could possibly be, but the glass on the Retina display is just too fragile.
-
So, how badly did we break it? Well, upon closer inspection we noticed two very distinct lines running around the perimeter of the display, the inner of which was filled with tiny bubbles.
-
Could those be the LCs of our LCD?
-
-
-
Once we got over the fact that obliterating the front panel of the display was the only way to get it out, we grabbed the skinniest tool we could find—an iFixit 6" ruler—and started prying.
-
With the top and sides of the display panel freed, we were able to slide the shattered remains out of the display assembly.
-
There were two thin strips of adhesive underneath the glass holding it in place, with a pattern that closely matched our trail of bubbles.
-
So, what's the lesson here? If you want a world-class laptop screen that doesn't take up much real estate, don't expect to be able to pop it out and back in at will.
-
-
-
At last! With the LCD removed, we can remove the antenna and FaceTime cables from the display assembly.
-
The camera cable is routed along the outside edge of the display assembly, making replacement very difficult and costly. Thankfully the cameras fail very infrequently, if at all.
-
If the FaceTime camera were placed at the bottom of the display, it would likely be much easier to replace, but we wonder what kind of awkward side effects that would cause.
-
-
-
iSight, uSight, we all sigh at lame jokes. Anyway, iSight is a thing of the past. This MacBook Pro has a FaceTime camera, allowing you to video chat with your grandmother in full HD.
-
The camera board comes out easily enough, considering the work it took to get there.
-
The camera interfaces with the rest of the computer via the Vimicro VC0358 USB camera interface IC.
-
-
-
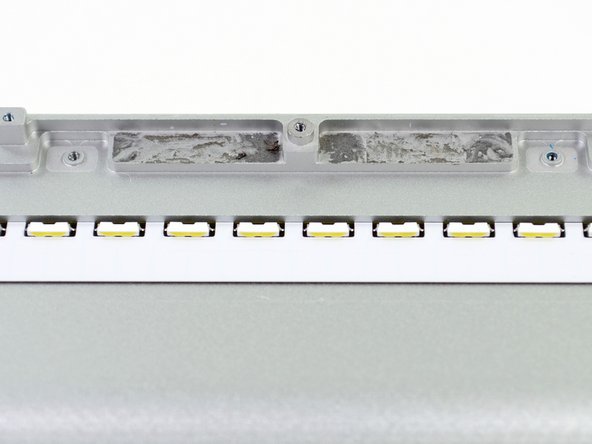
Underneath the top layer of the LCD, we find a series of films and sheets that manipulate light before sending it to the user's eye.
-
Diffuser and prism films evenly spread the light to create an even backlight for the display panel. A stationary polarizing sheet then works in conjunction with the liquid crystals to block or allow light for each pixel, all 5+ million of them.
-
-
-
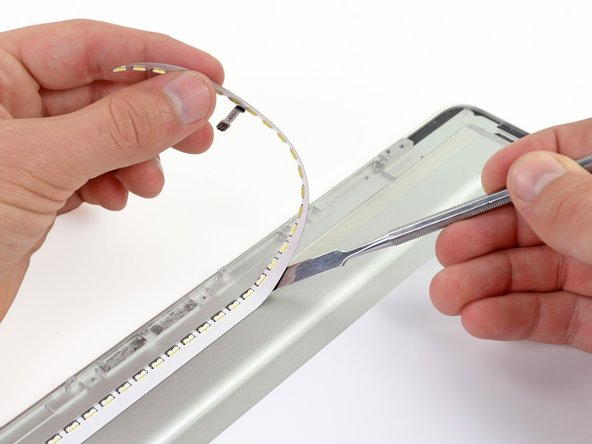
The light guide plate is held down by a small strip of mild adhesive—nothing like we saw before.
-
Erring on the side of caution, we proceded very slowly with our modified iSesamo opening tool and removed the plate.
-
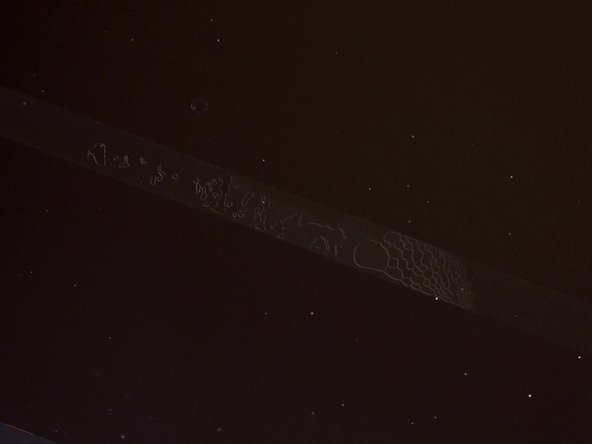
Backlight bounces through the plate due to total internal reflection until it hits one of those tiny dots, which sends the light up and out of the front of the plate.
-
By the way, the third picture is an image of the grid found in the clear plastic plate being removed in the second picture. We had to coerce it a bit in Photoshop in order to make it show its grid.
-
-
-
There's no real reason to pull the foam off the inside of the back case, but this is a teardown, so we're doing it.
-
We suspect that the foam is there to provide a flat, even surface for the LCD glass to brace against. But there is one thing that we do know about it: it is super sticky.
-
The bottom edge of the case has two features that we found pretty neat: a laser engraved data matrix code and a nifty arrangement of round indentations.
-
Upon further inspection and with the help of some keen-eyed readers, it appears that those dots form the pattern of a glider from Conway's Game of Life, the universal symbol for hackers.
-
That sixth dot to the right, though? Apparently, if you were to place that dot while playing, it would lead the glider into a state of death. Is Apple trying to send us a message?
-
-
-
And there you have it, the Retina display from the new MacBook Pro.
-
Normally we would provide you with a repairability score at this point, but since this display is part of another device, that's not really appropriate.
-
What we can tell you is that if anything in the display assembly breaks, you'll need to replace the whole thing. It will be more expensive than just replacing the LCD inside a regular MacBook Pro, but it will also make the choice (of whether to replace just LCD or entire display assembly) very easy.
-


28 Comments
That is a glider http://en.wikipedia.org/wiki/Glider_(Con...)
I'm the president of Ophthalmology Interest Group at my medical school, and I always spelled "Ophthalmologist" wrong before this year. It has an L in the middle of it! In the first paragraph of this guide, there is a mess up of the spelling.
Krupa -
Any idea who actually manufactures the panel?