Introduction
Create teardowns for fun! For more information about writing teardown guides, check out our how to take awesome photos guide and the Teardown FAQ. You can also take a look at our Teardown Guidelines to get ideas on how to write an awesome teardown!
What you need
-
-
To begin, decide what you want to take apart. Some examples of things not to take apart include:
-
Your pet poodle.
-
Grandpa's pacemaker.
-
Any device containing plutonium.
-
Optimus Prime.
-
Next, make your way to the store to pick up your new device. We prefer eco-friendly leg power, but to each their own.
-
Enter the store to find what you are looking for. If necessary, camp outside the store to be the first in line.
-
-
-
Now that you're safely home, unbox your new beauty and bask in its technological superiority. If you watch closely enough, you can witness your device depreciating.
-
Don't forget to pretend to read the instruction manual before throwing it away.
-
With your new device up and running, its time to actually enjoy your new purchase. Remember: water + electronics = shattered dreams.
-
-
-
-
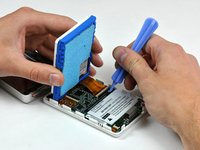
With all the proper equipment set up, you can now move on to the actual disassembly of the device.
-
During disassembly, document all your steps with notes and pictures to share your knowledge with the iFixit community.
-
You can place a sheet of white paper beneath your workspace for better pictures.
-


Great job! You made a teardown! But why stop there?
Cancel: I did not complete this guide.
235 other people completed this guide.

17 Guide Comments
Why do I ALWAYS have one screw that strips and won't loosen or tighten, one that is obviously lost in a interdimensional black hole, and weird extra parts when I finish. Or the most vital, irreplaceable, Jesus part breaks, shorts out or disappears? LOL
Because lots of machines have more parts than they need. It was suggested by Japanese motor cycle designers and manufactures that the British motor bike industry failed because they just put too many parts in their products and when copiers start they take apart the item and try to reduce the total number and reduce the costs increasing the profits
Mark Fort Te Teko NZ
nashi -
Is a teardown of an old, broken device OK? (I have an LG Optimus L7II with a busted LCD)
Totally! A broken device is a safe pick, you don't need to worry too much about breaking it more, and you might figure out how to replace the broken components!