Introduction
Feel like rocking out with your phone out? Well wait no more, as the HTC Surround is here to facilitate that need. Featuring a Dolby surround stereo slide-out speaker, along with a kickstand, the Surround is ready to bring the party to you. Join us as we explore the depths of this audioriffic phone.
A big thanks to Brian at EDN for providing the phone for this teardown. Be sure to check out his HTC Surround teardown analysis!
What you need
-
-
The HTC Surround takes the idea of a mobile media center to a whole new level.
-
The Surround is also among the first smartphones to use the Windows Phone 7 Operating System.
-
Technical Specifications:
-
1 GHz Qualcomm QSD8250 Snapdragon processor
-
448 MB RAM
-
16 GB internal storage
-
3.8 inch widescreen WVGA display
-
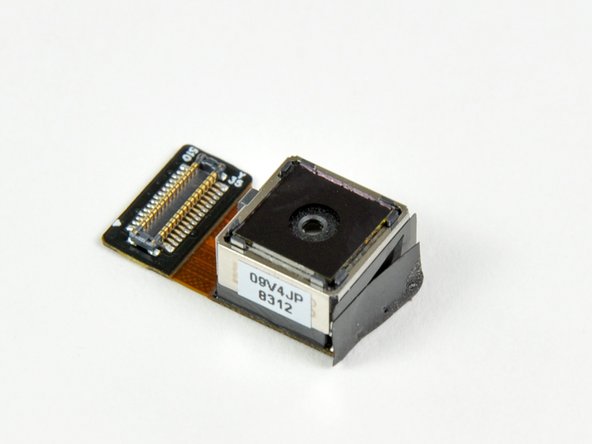
5.0 MP camera
-
-
-
To fully accommodate the phone home theater aspect of the Surround, the entire bottom half of the the phone slides out to reveal an impressive speaker array.
-
The phone also sports a kickstand (a la Evo), presumably so you can set the phone down upright when you want to night-club on the go. Or to watch videos. Whatever.
-
-
-
Through the use of plastic opening tools, the back cover of the Surround comes off easily and we get our first look at the internals of the Surround.
-
You really don't have to use plastic opening tools to open the back cover, as fingernails will work just fine. But we like to be cautious with these things -- you never know what might break.
-
-
-
-
After a bit of prying with a plastic opening tool, the bottom inner case can be removed from the Surround.
-
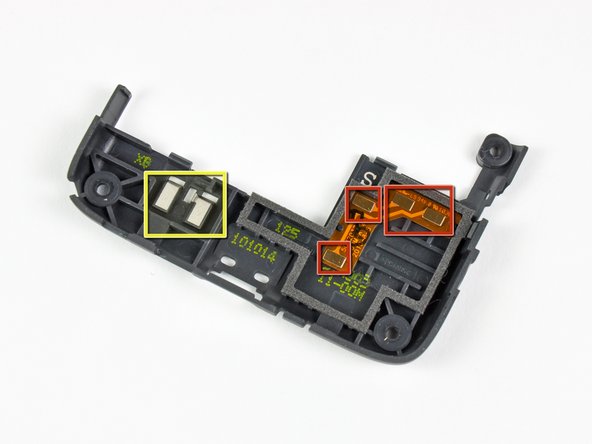
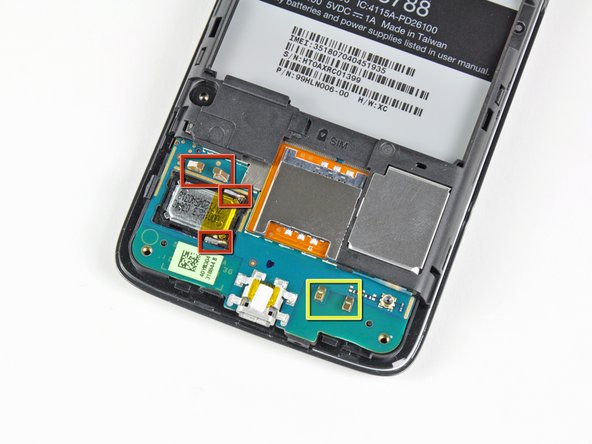
Six pressure contacts on the bottom inner case serve to:
-
Connect the lower speaker to the lower motherboard.
-
Connect to what is presumably an antenna housed in the bottom inner case.
-
-
-
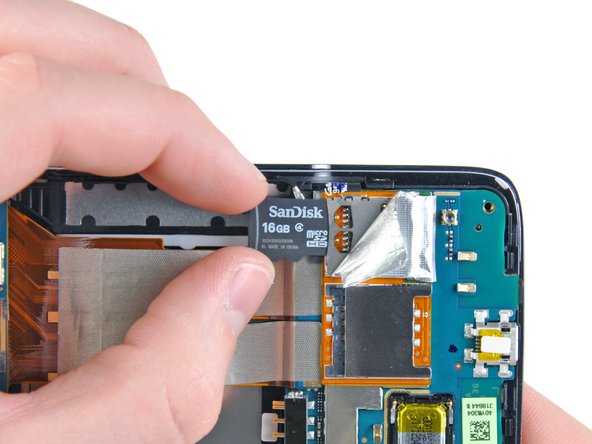
More poking and prodding reveals that the "internal storage" in the Surround is no more than a well-hidden MicroSDHC card. And they would've gotten away with it too if it weren't for us meddling kids!
-
Should you decide that 16 GB isn't enough, it definitely seems possible that you could easily swap the card out for a higher capacity MicroSDHC.
-
-
-
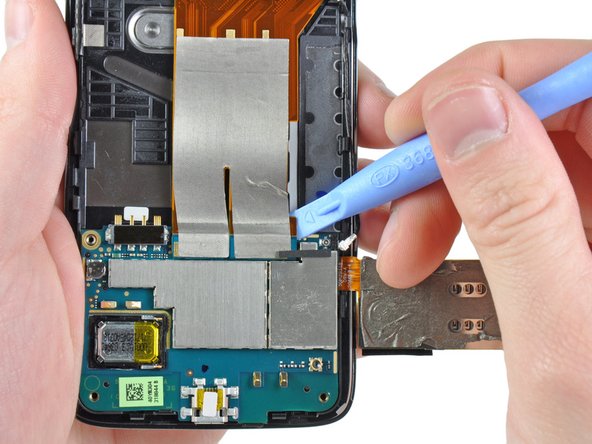
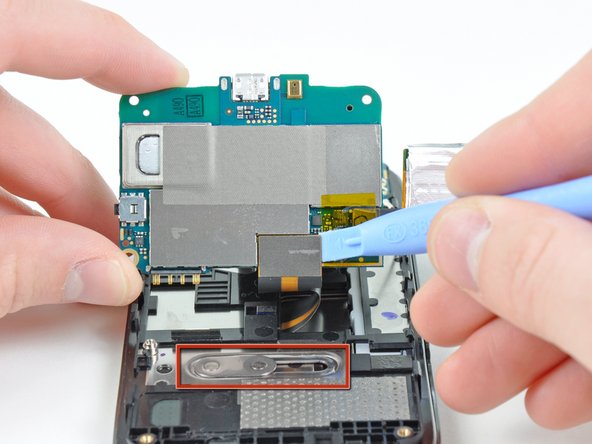
A handful of connectors attached to the antenna, motherboard interconnect, and display data cables stand between us and the lower half of the Surround's motherboard. Luckily, we're feeling up to the task.
-
The hefty slider mechanism should hold up to years of opening and closing the speaker grille.
-
-
-
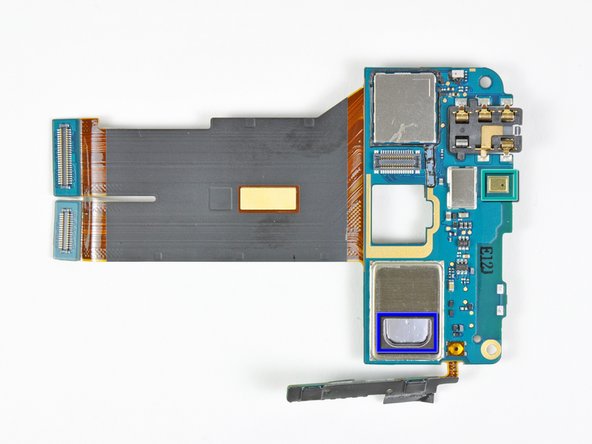
Big players on the front of the lower motherboard include:
-
Qualcomm RTR6285 multi-band UMTS/EGPRS transceiver with integrated GPS
-
Qualcomm Snapdragon QSD8250 1GHz RISC microprocessor with embedded DSP.
-
Samsung KA100O015E-BJTT 512 MB NAND Flash + 512 MB SDRAM chip
-
Like most smartphones, the Surround utilizes dual microphones to cancel background noise during phone conversations. The lower microphone can be seen near the Micro-USB port.
-
-
-
And on the back of the lower motherboard:
-
Qualcomm PM7540 power management IC
-
Skyworks SKY77336 power amplifier module
-
Audience A1026 voice processor, used in conjunction with the two microphones.
-
One of the two speakers used to project stereo sound through the Surround's speaker grille.
-
-
-
HTC Surround Repairability Score: 5 out of 10 (10 is easiest to repair)
-
Relatively easy to remove the rear case to replace the battery.
-
Slider mechanism provides added complexity for the sole purpose of arguable audio performance gains - but makes display removal that much more difficult.
-
Unable to access the internal MicroSDHC card without voiding the warranty.
-
It is very difficult to access the front panel and LCD for replacement.
-


2 Comments
Uh yeah… I am simply blown and gone with the wind. As Bowie once sang, “Wild is the wind…”
Thanks For Nuthin, rtm3rd (( ~|~ ))