Introduction
The BlackBerry PlayBook came out on the morning of April 19. We had our tools ready to take it apart and investigate its innards.
Like knowing about the inner workings of the latest gadgets? Follow us on Twitter to get the latest scoop.
Check out MJ's video analysis of all the cool stuff we found in the PlayBook!
What you need
-
-
BlackBerry's new PlayBook has hit the market with a name containing both entertainment and literary promise.
-
Such a bold name instills in us feelings similar to those felt by preteen girls minutes before a Justin Bieber concert.
-
Tech Specs:
-
7" Capacitive Touchscreen with Multitouch Support
-
1 GHz TI OMAP 4430 Dual Core Processor
-
1 GB RAM
-
Dual HD Cameras (3MP and 5MP in the front and back, respectively)
-
-
-
As we examine the device, the camera atop its sleek front stares back at us. The white dot to the left of the front camera is a notification LED.
-
The PlayBook feels impressive in the hands. The metal frame around its front glass panel, rubberized rear panel, and its overall heft makes us almost forget about its questionable software.
-
A small magnetic dock connector for charging on the bottom edge of the PlayBook is reminiscent of one of our favorite features of Apple's laptops.
-
-
-
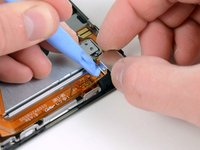
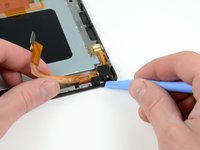
We insert a plastic opening tool into the PlayBook's rim, and pray to the gods of electronics that the front panel doesn't shatter.
-
Thankfully, strategically placed clips around the back of the plastic rear panel secure it to the front panel assembly without the use of screws or adhesive.
-
-
-
Upon releasing the clips surrounding the perimeter, the rear case can be removed.
-
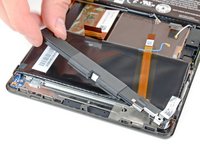
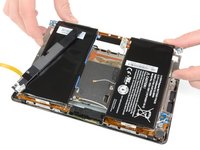
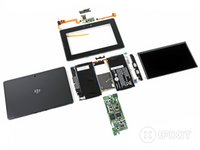
Unlike other popular tablets, the PlayBook's guts are not housed within the back cover but are instead attached to the display assembly.
-
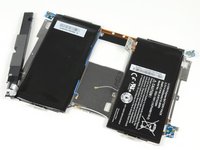
The PlayBook has a 20 watt-hour battery, which is a bit smaller than the iPad 2's 25 watt-hour and the Xoom's 24 watt-hour battery.
-
-
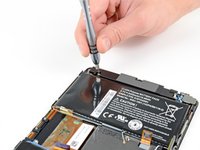
Tool used on this step:Phillips #00 Screwdriver$5.49
-
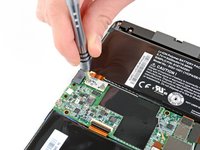
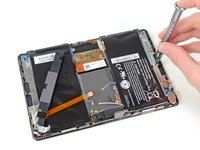
Now we can remove a pair of screws from the battery connector with a Phillips #00 screwdriver.
-
Next we pry off the battery connector to bring us one step closer to the goods.
-
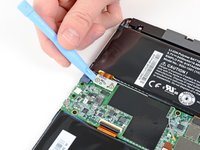
We continue by prying off all the other connectors from the motherboard.
-
-
-
-
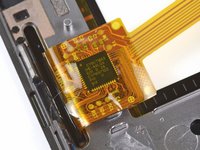
Front view of the motherboard. If you want the super-huge version of the motherboard, click here.
-
Elpida B8064B2PB-8D-F 1GB DRAM & the TI OMAP4430 1GHz dual-core processor
-
SanDisk SDIN5C2-16G 16 GB NAND Flash
-
Texas Instruments TWL6030 Power Management
-
STMicroelectronics XTV0987 5 MP mobile imaging processor
-
Wolfson WM8994E audio codec
-
Texas Instruments WL1283 GPS/WLAN/Bluetooth/FM
-
TriQuint Semiconductor TQP6M9002 802.11a/b/g/n + BT front-end module
-
-
-
And the rear view of the motherboard. (Here's the super-huge version):
-
Texas Instruments LMV339 Quad General Purpose Low-Voltage Comparators
-
Texas Instruments SN74AVCH4T245 4-Bit Dual-Supply Bus Transceiver with Configurable Voltage Translation and 3-State Outputs
-
Bosch Sensortec BMA150 Digital 3-axis accelerometer
-
Invensense MPU-3050 3 axis gyroscope
-
Texas Instruments PS63020 High Efficiency Single Inductor Buck-Boost Converter with 4A Switch
-
-
-
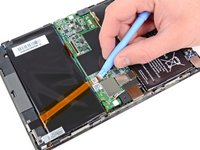
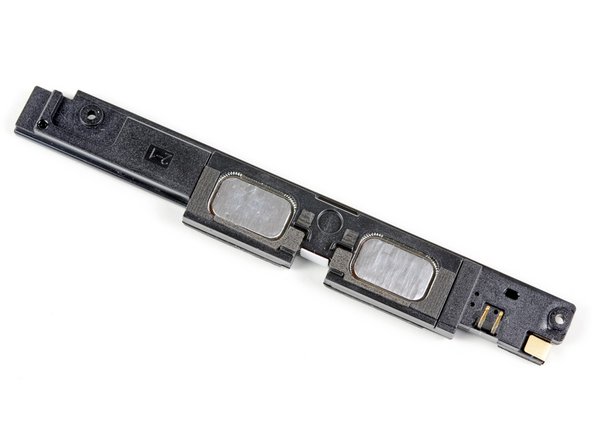
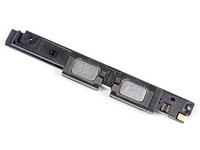
Let's remove the mid-plane board, which houses the battery, left speaker, and antennas.
-
This design allows for quick-and-easy access to the front panel and LCD - the most commonly broken components on mobile devices.
-
The actual antennas in the PlayBook are built into the rear case and speaker modules, and are attached to the antenna cables via pressure contacts.
-
-
-
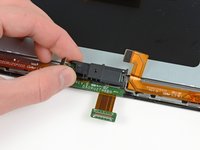
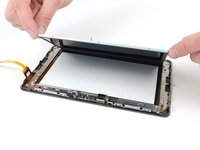
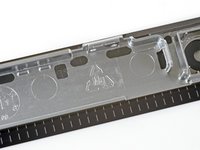
After removing a few retaining screws, the LCD can be lifted off the front panel assembly. This little 7" panel packs a 1024 x 600 resolution.
-
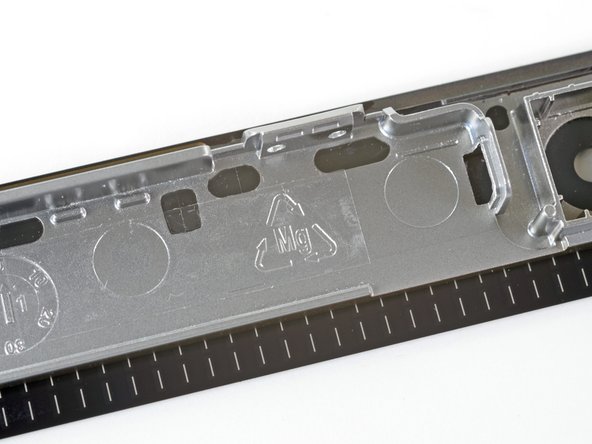
Upon closer inspection, we find that the frame around the front glass panel is made of magnesium, a strong yet light metal. Many devices are using magnesium for structural components due to its desirable qualities for mobile devices.
-
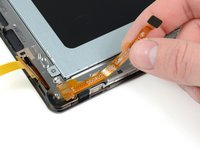
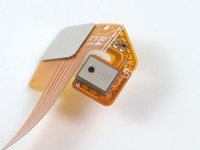
The Cypress CY8CTMA3 Multi-Touch All-Point TrueTouch™ projected capacitive touchscreen controller is visible in the last picture. It is attached directly to the digitizer cable.
-
-
-
BlackBerry PlayBook Repairability Score: 7 out of 10 (10 is easiest to repair)
-
The rear cover comes off easily with a couple of pries from the plastic opening tool.
-
The LCD is not fused to the glass, making the glass repair easier on the wallet.
-
You have to dig through the entire device if you need to replace your cracked glass, but the mid-plane assembly comes out easily with all components attached.
-
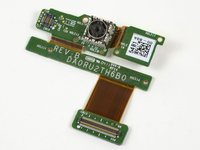
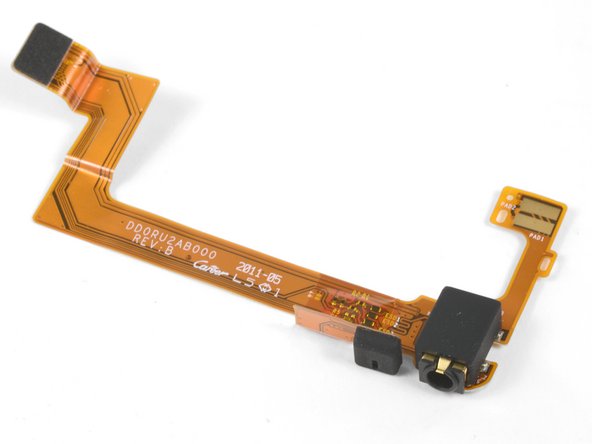
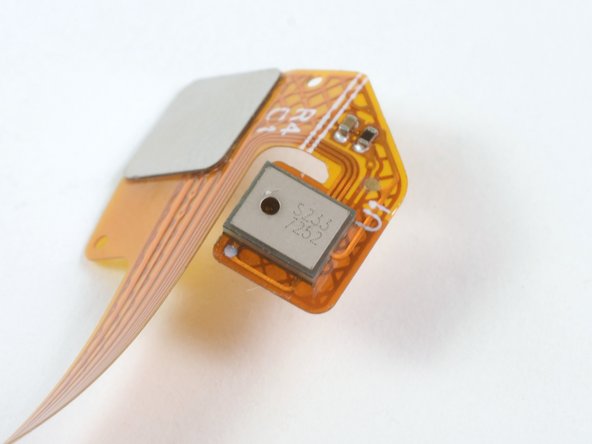
Other components (cameras, headphone jack, etc.) come out easily. However, there are usually two or three components attached to the same ribbon cable, increasing replacement cost if only one component fails.
-
You'll need to remove the motherboard if you'd like to replace the battery -- which is glued to the mid-plane assembly.
-
Front glass panel has a metal frame glued to it, which you'll need to separate with a heat gun if the glass cracks.
-


9 Guide Comments
How come you do not say what that big black thing is to the left of the battery??
Well, it’s 10 years later, but I just did a teardown of my playbook, and I had the same question. The battery label is really clear, what I didn’t realize is both big black rectangles are batteries. It makes the balance of the playbook very even. They squeezed the motherboard in between. I have it partially apart now, I’m looking to see how the two batteries are wired together, it’s not obvious (at least to me).
Allen -
my playbook camera is grey cannot seen any object why is it?
is it possible to replace the power connection we cannot charge it any more