Introduction
Feeling a little turbulent? Take some time and get a little Zen. Better yet, watch us tear this enlightening Ultrabook down to its most basic components.
Did you enjoy the peacefulness of this Zen teardown? Ready to get back into all the action that the internet has to offer? Well, follow @ifixit on Twitter to be kept in the loop about all of our future teardowns!
What you need
-
-
There is an art to becoming Zen. It takes years and years of practice. Quiet meditation, peaceful contemplation, and—according to Asus—use of their flagship Ultrabook.
-
The UX32VD Zenbook Prime was released in the second quarter of 2012, as an update to the already-popular UX31E.
-
Here are some of the most calming features of the UX32VD:
-
1.9 GHz Intel Core i7 processor
-
Nvidia GeForce GT 620M dedicated GPU
-
1920 x 1080 LCD with IPS
-
4 GB (2 GB upgradable) RAM
-
500 GB HDD stock with 24 GB SSD cache
-
-
-
In addition to a slick Ultrabook, Asus throws in a whole bag of goodies with the Zenbook:
-
Envelope-style laptop sleeve
-
Stylish power adapter with a machined face
-
Mini VGA-to-VGA adapter
-
USB-to-ethernet adapter
-
Small pouch to carry the adapters
-
Given the laptop's $1300 price tag, Asus managed to have none of these items look or feel cheap.
-
-
-
The only markings indicating that this is indeed the newest Zenbook is the model number on the bottom of the laptop.
-
The UX32VD comes standard with a hotkey for "Super Performance Mode," initiated by hitting Function+Space.
-
We can't help but think that the logo is reminiscent of certain super-performing Olympic runners.
-
-
-
Everyone likes a well-connected Ultrabook, and the Zenbook is not a disappointment.
-
Three USB 3.0 ports
-
Combo SD, SDHC, and MMC reader
-
Audio out
-
Mini VGA port
-
HDMI out
-
Sadly, the display adapter is not the same as the mini display adapter used by Apple, so defecting parties can't use their existing adapters with the Zenbook. But good news—Asus was kind enough to include the mini VGA-to-VGA adapter with the computer, thus allowing you to spend your extra dough on iFixit tools.
-
-
-
The first component to come out is the battery. Point for repairability!
-
The screws on the outer case were Torx, but the eight screws holding down the battery are good-old Phillips #0. Interesting choice, Asus.
-
Pulling out the battery delivers us special bonus components: the left and right speaker assemblies that are adhered to the sides of the battery.
-
-
-
The 7.4 volt, 6520 mAh battery in the UX32VD weighs 280.5 grams, accounting for approximately 20% of the Zenbook's weight.
-
By comparison, the battery in the 13" MacBook Air is approximately 22% of the Air's total weight, at 300 grams.
-
This Zenbook sports a 48 watt-hour battery, a smaller battery than the previous year's model, but a solid contender with other similarly-sized laptops.
-
2011 Zenbook UX31A: 50 watt-hours
-
Macbook Air: 50 watt-hours
-
Acer Aspire S5: 34 watt-hours
-
-
-
-
Many PC manufacturers turn to audio specialists outside of their own company to provide their laptops with sound systems. Asus is no different, looking to Bang & Olufsen to pump up the volume in the Zenbook.
-
For those of you who aren't familiar with Bang & Olufsen, their sound systems are the choice of many luxury vehicle manufacturers, including Aston Martin.
-
We're pretty sure the left speaker is Bang, while the right is Olufsen.
-
That's what we heard through the grapevine, at least.
-
We'll be here all night, folks.
-
-
-
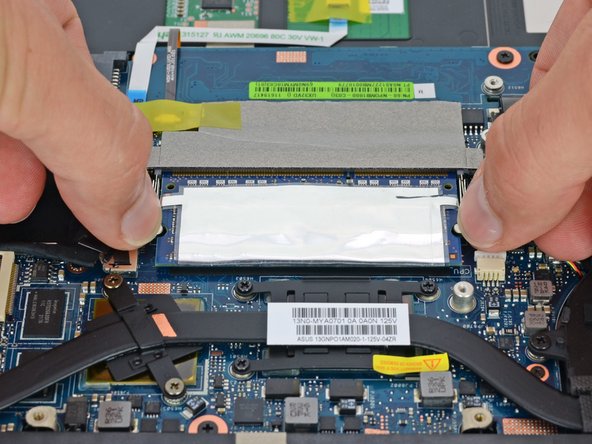
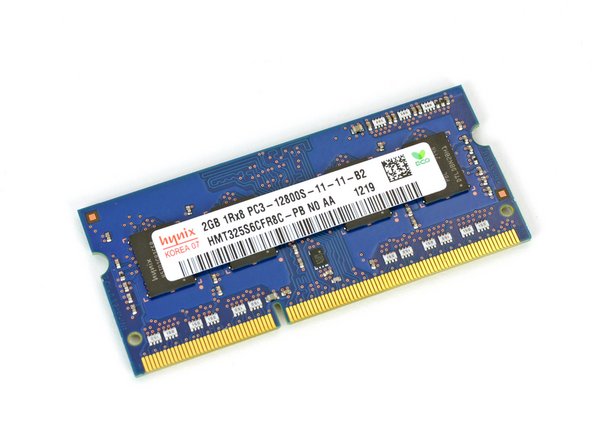
In order to completely blur the lines between an Ultrabook and a high-powered laptop, Asus gave the Zenbook onboard RAM and removable RAM.
-
While this may give the Zenbook an identity crisis, it is a step in the right direction for Ultrabook design.
-
It is clear that Asus wanted to give users the ability to upgrade/repair their laptops, but could only allow for a single RAM module given the space constraints inside the already-bulging Zenbook.
-
We'll keep our eyes peeled for the onboard RAM, but the removable RAM module comes out for now.
-
-
-
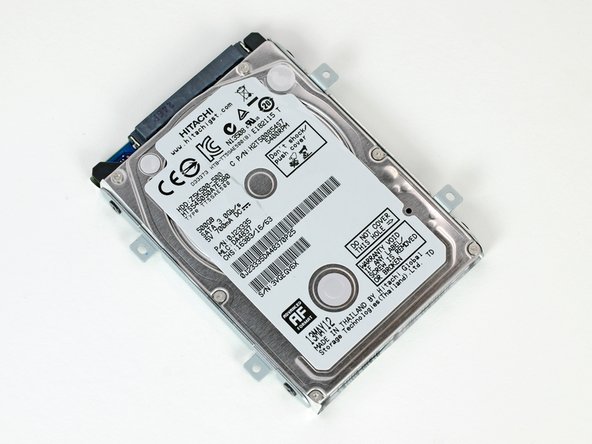
The Zenbook comes standard with a 500 GB, 5400 RPM 2.5" hard disk drive, in addition to 24 GB of onboard SSD storage.
-
Let's see how this hard drive measures up to other high profile Ultrabooks.
-
2012 Apple MacBook Air 13" ($1,099.99 - $1,199.99): 128 GB SSD
-
Dell Inspiron 14z ($899.99): 500 GB, 5400 RPM HDD and 32GB onboard SSD
-
Acer Aspire S5 ($1,279.00 - $1,399.99): 2x 128 GB SSD
-
No matter which way you spin it, a 5400 RPM HDD seems a bit out of place in a $1,300 laptop.
-
-
-
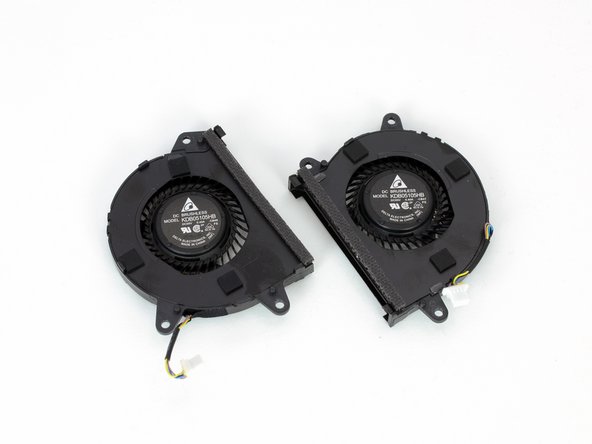
These fans are pretty cool. And accessible!
-
We'll stop. We promise. Or maybe not—only time will tell.
-
Because fans are responsible for circulating the air through the computer, they are often the component that collects the most dust. Having fans that are easy to access for cleaning are important for making a device that is easy to maintain.
-
-
-
There is something oddly satisfying about removing a warranty sticker. Maybe it's the feeling of irrevocability that comes with it—knowing that, from this point onward, the device is entirely yours.
-
It appears as though Asus didn't put too much engineering into enforcing their warranty. The void sticker is just a sticker—not impossible-to-remove residue on the screw head, no weird disintegrating labels. Just a sticker that actually retains a good amount of stickiness even after being removed.
-
We're not saying you should defraud companies—just stating fact.
-
-
-
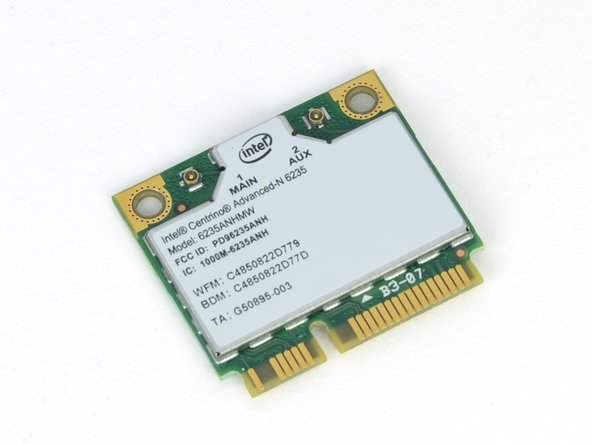
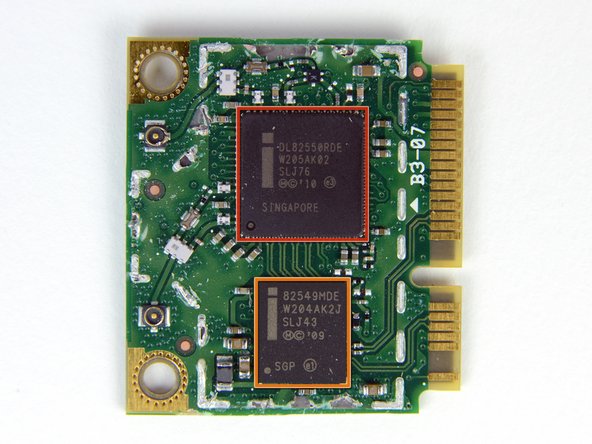
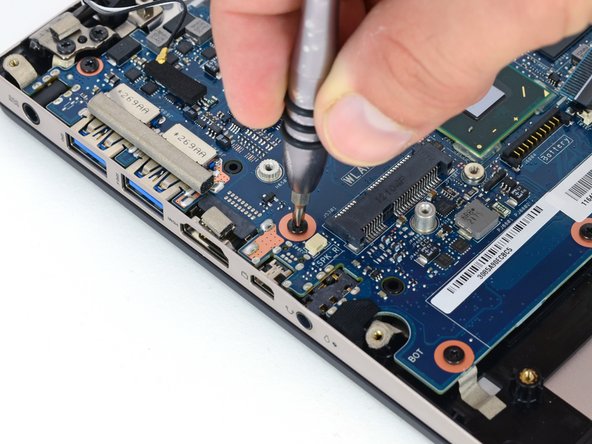
With a little elbow grease, the Intel 6235 Wi-Fi / Bluetooth 4.0 card comes out of its mini PCI Express socket. Inside we find two Intel ICs:
-
Intel 82550 Fast Ethernet Controller
-
Intel 82549MDE Wi-Fi controller
-
In an industry where design often favors slimness over modularity, we're thankful that the Weefees still come as mini PCI Express cards.
-
-
-
Front of motherboard:
-
Intel Core i7-3517U 1.9 GHz processor (4M cache, up to 3.00 GHz)
-
NVIDIA GeForce GT 620M GPU
-
4x Hynix H5TQ2G83CFR 2 Gb DDR3 SDRAM
-
2x Hynix H5TQ2G63DFR 2 Gb DDR3 video SDRAM
-
SanDisk iSSD SDIS5BK 024G 24 GB SSD
-
Intel BD82HM76 platform controller hub
-
ON Semiconductor NCP3218 synchronous buck controller
-
-
-
The backside of the motherboard houses some more chips, including more onboard RAM.
-
4x Hynix h5TQ2G83CFR 2 Gb DDR3 SDRAM
-
2x Hynix h5TQ2G63DFR 2 Gb DDR3 video SDRAM
-
ITE IT8572G
-
3x Fairchild PC78T FDMC7696
-
Richtek RT8168B PWM Controller
-
Realtek ALC269 audio codec
-
So if our tally is correct, the UX32VD has a total of 1 GB onboard video RAM! (4 x 2 Gb = 8 Gb = 1 GB)
-
-
-
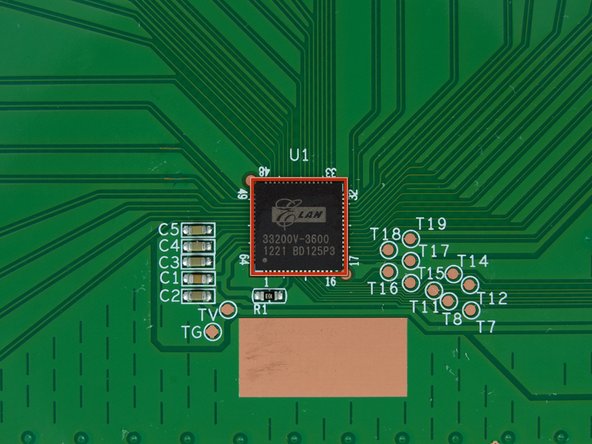
Like the MacBook Pro with Retina display, the touchpad in the Zenbook is located underneath the battery. Unlike the MacBook, though, you can remove this touchpad without destroying said battery.
-
Multi-touch gestures are managed by an Elan 33200V-3600 touchpad controller.
-
-
-
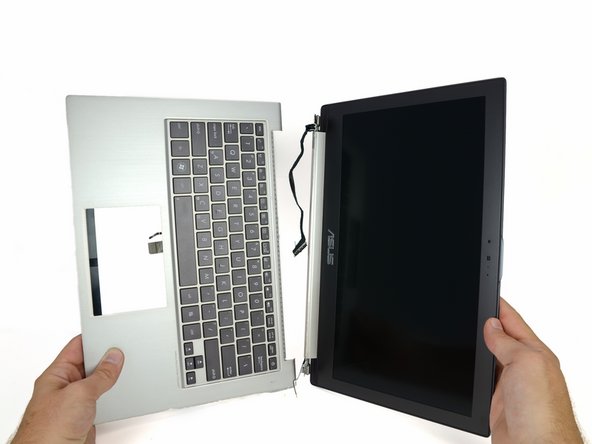
In addition to a couple Phillips screws, each side of the display assembly was held to the upper case with a 4 mm hex nut. Asus may try as they like, but with our 54-bit driver kit in hand, no fastener is secure for long.
-
The display assembly comes off pretty easily and we're left with the upper case that houses the backlit keyboard.
-
Just like the unibody MacBooks, the keyboard in the Zenbook cannot be removed from the upper case, which means the two must be replaced simultaneously.
-
-
-
Next up is some housecleaning on the bottom of the display assembly. Away go the clutch cover, hinges, and wireless antennas.
-
The main and auxiliary wireless antennas hide underneath the plastic clutch cover on the display assembly, one of the few non-metallic surfaces on the exterior of the Zenbook.
-
-
-
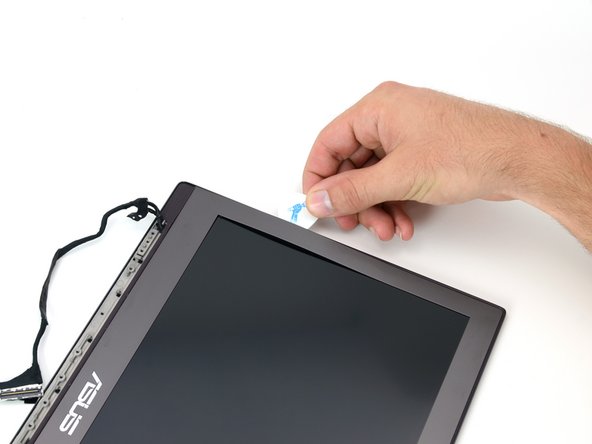
Not only is there no obnoxiously glossy front glass on the Zenbook's display, but the bezel comes off pretty painlessly after applying some heat and playing a sweet tune with our guitar picks.
-
The fact that you can gain access to the display assembly is a huge plus. After opening up the Retina display, such a serviceable display is a welcome sight.
-
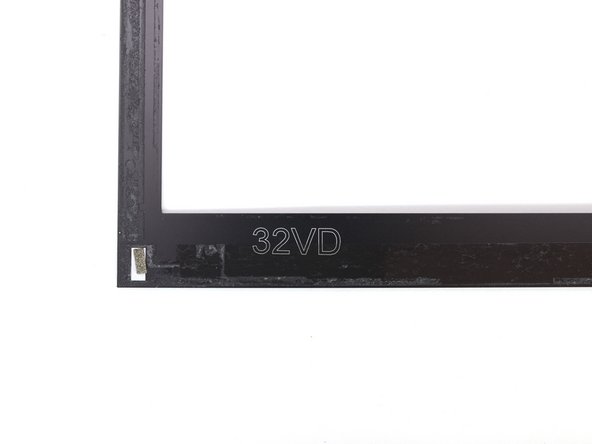
Not only is the fashionable display bezel easy to remove, it's even custom-made for the UX32VD.
-
-
-
Right as we were about to go ga-ga over the accessibility of this display, we had to catch ourselves. The LCD and camera cables are routed underneath the rubber display gasket.
-
In most cases, a simple piece of rubber wouldn't be much of a deterrent, but the corners of this gasket were stuck down with a formidable adhesive and required heat and patience to peel up.
-
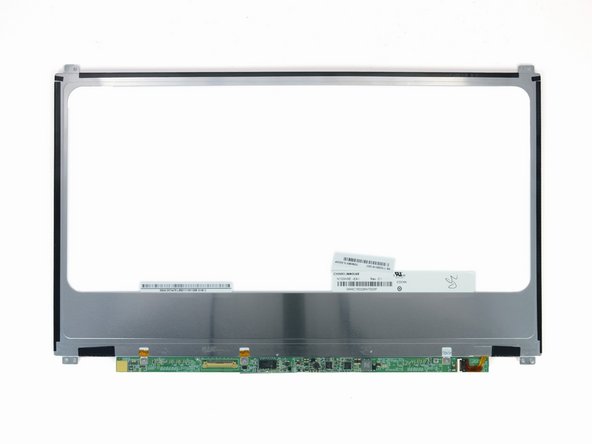
After that, four Phillips screws come out, followed by the LCD.
-
We heard the Chimei Innolux 1920 x 1080 IPS LCD performs extremely well, bringing legitimate gaming chops to an ultra-portable 13" notebook.
-
-
-
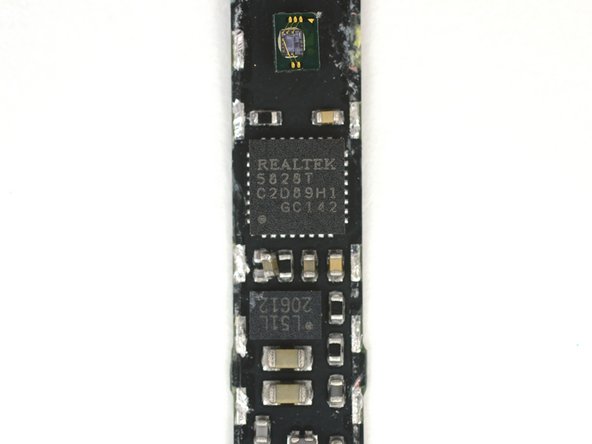
I can see you, and so can the Zenbook's 2 megapixel webcam.
-
A Realtek 5828T camera controller keeps all of your recording and video chatting in check.
-
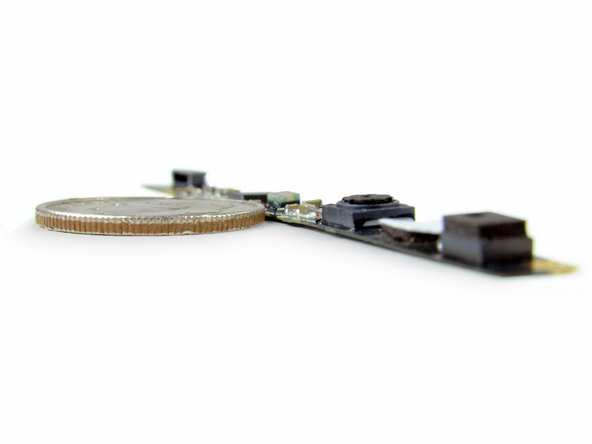
In case you are wondering, the camera board is really thin. Without the components on it, it measures at ~ 0.3 mm, which is about the thickness of three pieces of paper stacked together.
-
Shown here for comparison is a US dime. That's right, folks, a dime.
-
-
-
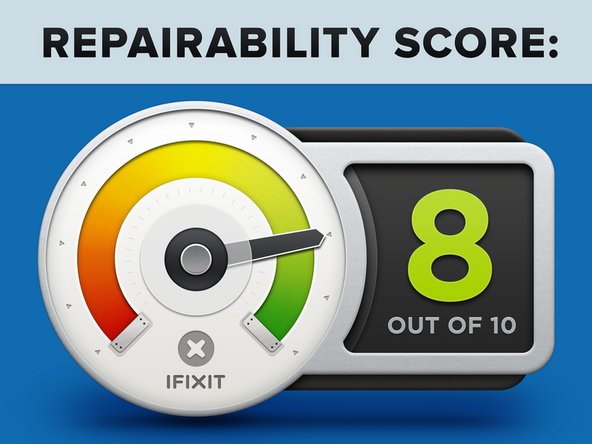
Asus UX32VD Zenbook Repairability Score: 8 out of 10 (10 is the easiest to repair).
-
All the components are easy to access, with no proprietary screws inhibiting access.
-
The battery is not glued in place, and a person equipped with the right tools can replace it in a matter of minutes.
-
You can upgrade both RAM and hard drive in this machine.
-
Labeled motherboard sockets make reconnecting cables easier.
-
A lot of components were held in place with more adhesive than is necessary.
-


46 Comments
Thanks sooo much for the effort. This is the best tear down of Asus Zenbook ever. Very clear. One things to add, when removing the back cover, beware of a void sticker that link the cover to its body. It might void the warranty. Not a big issue though (Simply want to contribute something here). I just bought this laptop a few days ago and I LOVE it so much!
Thank you for this work shows that it is often easier than you might think to disassemble a laptop ....
I have a question though I see that the keyboard is integrated in the lower part of the cell do you think it would be possible to replace a QWERTY or QWERTZ a QWERTY and how to recognize it in bios?
Sorry if my English is bad but I'm French girl...