2011 Mac mini Dual SSD Install: OS X 10.9 & Windows 8.1 Pro on Separate Drives


My Problem
I wanted to upgrade the stock 5400 RPM HDD on my Mac mini, and I wanted to be able to use both OS X and Windows. Since I was already going to be digging around the inside of my mini, I decided that I wanted to be able to Dual Boot with each OS having its own drive. Luckily for me, the Mac mini has a second INTERNAL drive bay, and so I was able to get exactly what I wanted!
My Fix
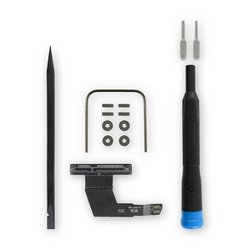
The guide was great for doing the hardware swaps, and the Dual Hard Drive Kit worked perfectly for my SSD upgrades! The SSDs I chose were a pair of 120 GB Samsung 840 EVOs.
On a side note, if you order the Kit from iFixit, the ribbon cable for the second drive comes pre-bent.
My Advice
Before I began, I used DiskMaker X to create a 10.9 (Mavericks) Install Flash Drive. This was important to me because the 2011 mini's Internet Recovery prompts a 10.7 (Lion) download. After the prep work was done, I installed my new hardware using the iFixit guide and Dual Drive Kit.
Once the SSDs were installed, I booted from the flash drive; formatted the "Lower" Bay (Original HDD Location); and installed 10.9. After the install had completed and I had finished with all Apple's software updates, the first third party app I installed was Trim Enabler. I decided to do this because unless you buy your SSD directly from Apple, you need to force the OS to enable TRIM. (You can also do this manually by using Console.)
Still with me? Now for the Windows 8.1 Pro install! Unfortunately, I do not have a external Disc Drive for my mini, and so I had to resort to borrowing a friend's Windows computer to download the Windows 8.1 Pro ISO from Microsoft. (Do NOT download a Windows ISO from anywhere other than Microsoft... It's a really, really bad idea!)
After I had the ISO on my friend's PC, I copied it over to my mini, and I used Boot Camp Assistant to help me through my Windows install. With Boot Camp Assistant, I was able to select the "Upper" Bay SSD as my Windows install location. After that was done, I used Bootcamp and the same Flash Drive that I had previously used as a 10.9 Install drive to create a Windows 8.1 Pro Install drive. Bootcamp Assistant automates this process by recompiling the ISO so it's bootable on a Mac. Additionally, Bootcamp Assistant loads the latest Windows drivers onto the Flash Drive so you don't have to worry about making a separate drive/disc for that purpose.
Finally, I used Bootcamp Assistant to initiate the install. The mini reboots and installs Windows in much the same way as it installs OS X from a flash drive. The only thing you have to remember during this period is that you need to format the BOOTCAMP partition to NTFS. Once that is done, it's smooth sailing.
Hopefully this will help someone out there! Enjoy!!!
0 Comments