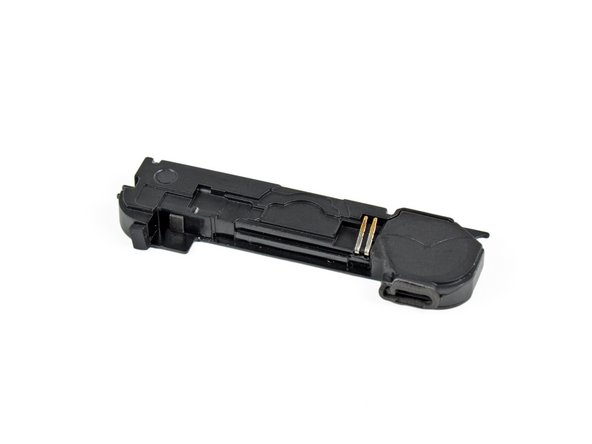
iPhone 4S Speaker Enclosure Replacement

What you need

  1. iPhone 4S Speaker Enclosure Replacement, Rear Panel: step 1, image 1 of 1
    • Before you begin, discharge your iPhone battery below 25%. A charged lithium-ion battery can catch fire and/or explode if accidentally punctured.

    • Power off your iPhone before beginning disassembly.

    • Remove the two 3.6 mm Pentalobe P2 screws next to the dock connector.

    • Be sure the driver is well-seated when removing Pentalobe screws—they are easy to strip.

  2. iPhone 4S Speaker Enclosure Replacement: step 2, image 1 of 2 iPhone 4S Speaker Enclosure Replacement: step 2, image 2 of 2
    • Push the rear panel toward the top edge of the iPhone.

    • The panel will move about 2 mm.

  3. iPhone 4S Speaker Enclosure Replacement: step 3, image 1 of 1
    • Pull the rear panel away from the back of the iPhone, being careful not to damage the plastic clips attached to the rear panel.

    • Remove the rear panel from the iPhone.

  4. iPhone 4S Speaker Enclosure Replacement, Battery: step 4, image 1 of 2 iPhone 4S Speaker Enclosure Replacement, Battery: step 4, image 2 of 2
    • Remove the following screws securing the battery connector to the logic board:

    • One 1.7 mm Phillips screw

    • One 1.5 mm Phillips screw

  5. iPhone 4S Speaker Enclosure Replacement: step 5, image 1 of 3 iPhone 4S Speaker Enclosure Replacement: step 5, image 2 of 3 iPhone 4S Speaker Enclosure Replacement: step 5, image 3 of 3
    • Carefully push the pressure contact away from the battery connector until it slides free from its position.

    • Remove the pressure contact.

  6. iPhone 4S Speaker Enclosure Replacement: step 6, image 1 of 3 iPhone 4S Speaker Enclosure Replacement: step 6, image 2 of 3 iPhone 4S Speaker Enclosure Replacement: step 6, image 3 of 3
    • Use a plastic opening tool to gently pry up the battery connector from its socket on the logic board.

    • Place the tip of the tool between the loudspeaker enclosure and the metal cover of the connector, and lift the bottom edge of the connector first.

    • The battery connector comes off vertically from the logic board. Do not apply force sideways.

    • Be careful not to pry at the battery connector socket itself, or it may detach from the logic board. There are four very small solder points awaiting this mistake!

  7. iPhone 4S Speaker Enclosure Replacement, Reassembly tip: step 7, image 1 of 2 iPhone 4S Speaker Enclosure Replacement, Reassembly tip: step 7, image 2 of 2
    • During reassembly, be sure to carefully position the pressure contact back in place. It should rest on top of the Philips screw post shown, and the gold contact should point towards the battery connector.

    • Be sure to clean the pressure contact with a degreaser such as windex or isopropyl alcohol. The oils on your fingers have the potential to create wireless interference.

  8. iPhone 4S Speaker Enclosure Replacement: step 8, image 1 of 2 iPhone 4S Speaker Enclosure Replacement: step 8, image 2 of 2
    • Insert the edge of a plastic opening tool between the battery and the outer case near the bottom of the iPhone.

    • Run the plastic opening tool along the right edge of the battery and pry up at several points to completely separate it from the adhesive securing it to the outer case.

    • If the adhesive is too strong, apply a few drops of high concentration (over 90%) isopropyl alcohol under the edge of the battery.

    • Wait about one minute for the alcohol solution to weaken the adhesive.

    • Use the flat end of a plastic opening tool to gently lift the battery.

    • Don't try to forcefully lever the battery out. If needed, apply a few more drops of alcohol to further weaken the adhesive. Never deform or puncture the battery with your pry tool.

    • If there's any alcohol solution remaining in the phone, carefully wipe it off or allow it to air dry before installing your new battery.

  9. iPhone 4S Speaker Enclosure Replacement: step 9, image 1 of 2 iPhone 4S Speaker Enclosure Replacement: step 9, image 2 of 2
    • Use the exposed clear plastic pull tab to peel the battery off the adhesive securing it to the iPhone.

    • Be careful not to pull the plastic pull tab too hard as it can be ripped off very easily.

    • Remove the battery.

    • If your replacement battery came in a plastic sleeve, remove it before installation by pulling it away from the ribbon cable.

    • If your replacement battery came with an uncreased cable, carefully crease the cable into the proper shape before installing the battery into the phone.

    • While installing the replacement battery, temporarily connect the battery connector to the phone to ensure proper alignment. Once the battery is glued in place, disconnect the battery connector.

    • Perform a hard reset after reassembly. This can prevent several issues and simplify troubleshooting.

  10. iPhone 4S Speaker Enclosure Replacement, Speaker Enclosure Assembly: step 10, image 1 of 2 iPhone 4S Speaker Enclosure Replacement, Speaker Enclosure Assembly: step 10, image 2 of 2
    • Remove the following screws securing the dock connector cable cover to the logic board:

    • One 1.5 mm Phillips screw

    • One 1.2 mm Phillips screw

    • Remove the metal dock connector cable cover.

  11. iPhone 4S Speaker Enclosure Replacement: step 11, image 1 of 1
    • Use the edge of a plastic opening tool to pry the dock cable up from its socket on the logic board.

  12. iPhone 4S Speaker Enclosure Replacement: step 12, image 1 of 1
    • Peel the dock connector cable off the adhesive securing it to the logic board and the side of the speaker enclosure.

  13. iPhone 4S Speaker Enclosure Replacement: step 13, image 1 of 2 iPhone 4S Speaker Enclosure Replacement: step 13, image 2 of 2
    • Use the edge of a plastic opening tool to pry the cellular antenna cable up from its socket on the logic board.

    • De-route the cellular antenna cable out from under the metal fingers attached to the logic board.

  14. iPhone 4S Speaker Enclosure Replacement: step 14, image 1 of 1
    • Remove the two 2.4 mm Phillips screws securing the speaker enclosure assembly to the outer case.

  15. iPhone 4S Speaker Enclosure Replacement: step 15, image 1 of 1
    • Remove the small black spacer that was under the Phillips screw near the vibrator.

  16. iPhone 4S Speaker Enclosure Replacement: step 16, image 1 of 3 iPhone 4S Speaker Enclosure Replacement: step 16, image 2 of 3 iPhone 4S Speaker Enclosure Replacement: step 16, image 3 of 3
    • Use a plastic opening tool to lift the speaker enclosure assembly out of the case, being sure not to damage the EMI fingers on the attached Wi-Fi antenna.

    • Remove the speaker enclosure assembly.

    • Before reinstalling the speaker enclosure assembly's screws, be sure the Wi-Fi grounding fingers are installed below the lip in the iPhone's metal case as seen in the third picture.

    • Before reassembly, be sure to clean all metal-to-metal contact points between the grounding fingers of the Wi-Fi antenna and the case of the iPhone with a de-greaser such as windex or isopropyl alcohol. The oils on your fingers have the potential to cause wireless interference issues.

  17. iPhone 4S Speaker Enclosure Replacement, Cellular Antenna: step 17, image 1 of 1
    • Remove the two 1.6 mm Phillips screws securing the cellular antenna to the speaker enclosure.

  18. iPhone 4S Speaker Enclosure Replacement: step 18, image 1 of 3 iPhone 4S Speaker Enclosure Replacement: step 18, image 2 of 3 iPhone 4S Speaker Enclosure Replacement: step 18, image 3 of 3
    • Starting near the cellular antenna cable, use the edge of a plastic opening tool to peel the antenna off the speaker enclosure.

    • Continue peeling the cellular antenna off the speaker enclosure, being careful not to rip the gold bracket attached to one of its edges.

    • Remove the cellular antenna.

  19. iPhone 4S Speaker Enclosure Replacement: step 19, image 1 of 1
    • When installing a new cellular antenna, be sure to slide the gold bracket over the ear molded into the speaker enclosure before sticking the antenna down.

  20. iPhone 4S Speaker Enclosure Replacement, Speaker Enclosure: step 20, image 1 of 1
    • Speaker enclosure remains.

Conclusion

To reassemble your device, follow these instructions in reverse order.

185 other people completed this guide.

8 Comments

Your tutorial was very easy to follow and provided the exact direction and instruction for each step... Job well done, thanks for all of your hard work, because of it my install was a success and only took 15 minutes!

dortega4226 - Reply

I found antenna is not replaceable.

greatanalyzer - Reply

Went according to directions fairly straightforward. The Philips heads in the ifixit pro kit are definitely substandard quality. Had to use another jewelers screwdriver on these screws. The fins are too wide.

dwatson102 - Reply

Excellent guide I'm now tech wizard but replaced speaker enclosure no problem . Take your time I used a a4 pad and drew circles for each step I was removing screws or brackets so they were all labelled. It's nerve racking at first but follow guide you ll be fine.

Read it twice perform it once!

Be prepared and have all the tools

Enjoy!! I now have sound back thx ifixit!!!

Danny Kay - Reply

It works fine!!! Following the guide with tools, i fix it!!! And it works perfect.

Thanks

giruss São Paulo Brasil

giruss - Reply

Add Comment

View Statistics:

Past 24 Hours: 2

Past 7 Days: 9

Past 30 Days: 29

All Time: 135,482