Introduction
Use this guide to remove the iPhone's primary rear camera.
Note: Removing the battery allows better access to the plate covering the rear camera's connector. However, it is not absolutely necessary to remove the battery. If your battery is particularly difficult to remove, leave it in and work around it.
What you need
-
-
Power off your iPhone before beginning disassembly.
-
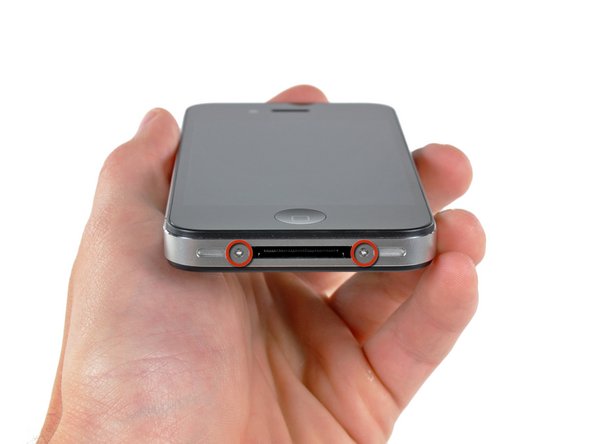
Your iPhone 4 rear cover may have either two #000 Phillips screws or Apple's 5-Point "Pentalobe" screws (second image). Check which screws you have, and ensure you also have the correct screwdriver in order to remove them.
-
Remove the two 3.6 mm Pentalobe or Phillips #000 screws next to the dock connector.
-
-
-
Remove the single 2.5 mm Phillips screw securing the battery connector to the logic board.
-
-
-
-
Use the clear plastic pull tab to gently lift the battery out of the iPhone.
-
If there's any alcohol solution remaining in the phone, carefully wipe it off or allow it to air dry before installing your new battery.
-
Before reconnecting the battery connector, be sure the contact clip (shown in red) is properly positioned next to the battery connector.
-
-
-
Remove the following five screws securing the connector cover to the iPhone:
-
One 2.3 mm Phillips
-
Two 1.6 mm Phillips
-
One 1.4 mm Phillips
-
One 4.8 mm Phillips
-
Remark: in order to remember their proper positions, it might be helpful to draw 5 circles on a sheet of paper, placing each screw in the corresponding circle.
-
-
-
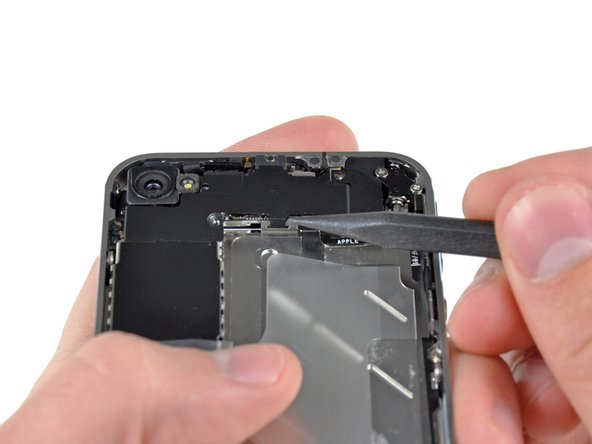
Use an iPod opening tool to slightly lift the top edge of the connector cover away from the logic board.
-
Use the tip of a spudger to pull the connector cover retaining clips away from the inner frame.
-
Remove the connector cover from the iPhone.
-
Before reassembly, be sure to clean all metal-to-metal contact points on the connector cover with a de-greaser such as windex. The oils on your fingers have the potential to cause wireless interference issues.
-
-
-
Remove the rear camera from the iPhone avoiding to move some of the connectors to the right.
-
After reinserting the new camera, verify these connectors if the IPhone does not power on.
-
Remark: The battery (not shown on the photos) should be disconnected but doesn't need to be removed entirely.
-
To reassemble your device, follow these instructions in reverse order.
To reassemble your device, follow these instructions in reverse order.
Cancel: I did not complete this guide.
193 other people completed this guide.
Attached Documents
11 Comments
This was super simple. My camera was not focusing after a previous company replaced it due to a faulty flash. I decided to take things into my own hands...no pun intended.
The instructions are super simple and easy to follow. Be aware of the loose clip under the connector - mine flew out - and I was worried I wouldn't figure out how to get it back in.
I also had to use a #0 screwdriver...#00 was too large.
I couldn't get the battery out...so, I was just super careful that the phone was off, and remained off during the repair.
Out with the defective camera...in with the functioning camera...replaced a couple of screws and the battery connector. Tested the camera prior to replacing everything.
Thank you ifixit!
You ROCK!!!
great comment!. You Rock!
Luca -
Hi guys. I just did it ! I would not describe it as super easy, but thanks to the screw template provided file, even the now famous pressure contact can not be lost ;-)
I just wanted to comment, not only to praise iFixit (and myself), but also to mention two side effects I had to overcome:
-First, when finished, the power button did not work (I had to plug the Dock Connector to start the phone). As I the power button is not so far from the rear camera, I figured out something went wrong in the reassembly. Since I had just done it once, I thought I could do it a second time, so I removed the newly assembled camera and reassembled it with extra caution. At the end, the power button worked as expected.
-Second: each time I restarted the phone after reassembly (twice, then), the SIM card would not unlock after the PIN code was entered. I had to remove and reinsert the SIM card for the PIN code to finally unlock it.
Otherwise, everything went smoothly, thanks again to the iFixit guys !
Fantastic!!! my problem was the rear camera, when i switch on the camera app the screen were completely black and the torch was not working at all! I buyed the tools and the rear camera everything arrived here in Italy in perfect time as scheduled and in one hour I did the job !!! now my iphone camera is perfectly up and running !!! thanks to IFIXIT.COM and their guides!
hello guys ! I have done the replacement correctly because my camera wasn't able to focus anymore ! But now the flash light isn't working anymore :(( what can i do ?
Sincerly,
Antoine


