Introduction
This guide will help you replace the hard drive.
What you need
-
-
Loosen the single Phillips screw in the center of the access door.
-
Remove the access door from your iMac.
-
-
-
Stick two suction cups to opposing corners of the glass panel.
-
-
-
Remove the following 12 screws securing the front bezel to the rear case:
-
Eight 13 mm T8 Torx screws
-
Four 25 mm T8 Torx screws
-
Six 13 mm T8 Torx screws
-
Four 25 mm T8 Torx screws
-
Two 35 mm T8 Torx screws
-
-
-
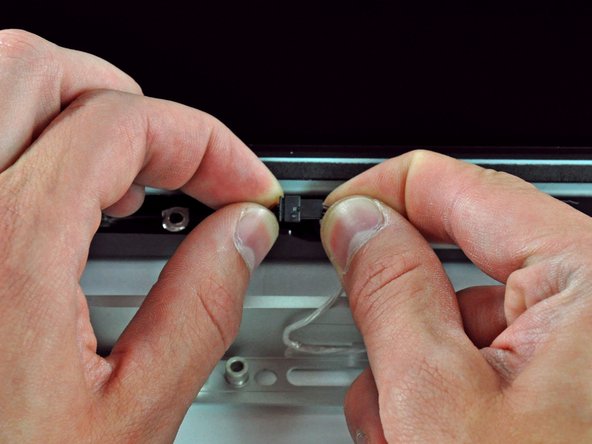
Disconnect the LCD temperature sensor by pulling the connector straight out of its socket on the logic board.
-
-


To reassemble your device, follow these instructions in reverse order.
To reassemble your device, follow these instructions in reverse order.
Cancel: I did not complete this guide.
435 other people completed this guide.


49 Comments
Thank you Brittany for putting together an awesome guide! I was able to swap in a leftover MBA SSD into my 2007 iMac before gifting it to my father-in-law. This iMac was showing its age with Lion installed, mostly due to 2 GB of RAM and a so-so magnetic drive. I was hesitant to gift a hand-me-down with little usable life. Not anymore! I have no doubt that the 5GB of RAM and a super fast SSD breathed another 5+ years of enjoyment into this iMac. Reuse beats recycling! Thank you!
But without any OSX updates .... Your path is Linux
FYI - The iFixit store links for the Torx screwdriver incorrectly displays the security Torx drivers. I had my own set of regular Torx drivers and competed this successfully. I did not find the security (center post) variant of the Torx screwhead anywhere in my iMac.
Security Torx drivers work on both regular Torx and security Torx bits, so we sell the security drivers to keep people from having to buy two tools.
Excellent guide. The entire process took less than 90 minutes and I was not in a hurry. Everybody told me that the iMacs were designed to be "user-proof" and had to be worked on by qualified technicians. What do they know? Now my computer is back up and running with a 1TB drive and it cost less than $150 - even with shipping costs factored in. Great job guys!!!