Introduction
Upgrade your hard drive to gain more storage space!
What you need
-
-
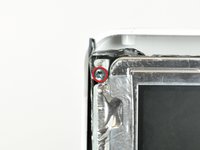
Loosen the two captive Phillips screws securing the access door to the iMac.
-
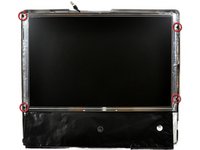
Remove the access door from the iMac.
-
-
-
Flip your iMac over and lay it stand-side down on a flat surface.
-
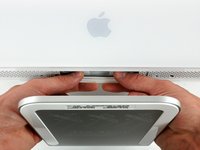
To lift the front bezel off the iMac, simultaneously:
-
Use your thumbs to press in the RAM arms and hold the iMac down.
-
Use your index fingers to pull the small bridge of material on the front bezel toward yourself.
-
Pull the Front bezel up with your index fingers.
-
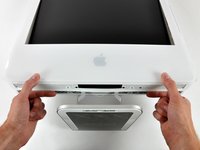
Once the small bridge of material has cleared the RAM arms, lift the front bezel by its lower edge just enough to clear the bottom edge of the rear case.
-
-
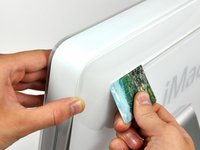
Tool used on this step:Plastic Cards$2.99
-
Insert a plastic card up into the corner of the air vent slot near the top of the rear case.
-
Push the card toward the top of the iMac to release the front bezel latch.
-
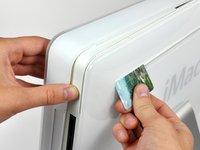
Pull the front bezel away from the rear case.
-
Repeat this process for the other side of the front bezel.
-
If the bezel refuses to release, try pressing the lower edge back onto the rear case and repeat this opening process.
-
-
-
-
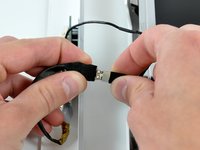
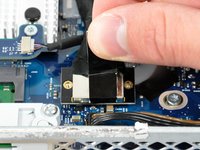
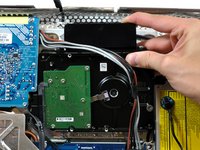
De-route the bundle of power supply cables from behind the hard drive bracket.
-
-
-
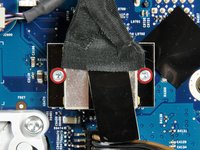
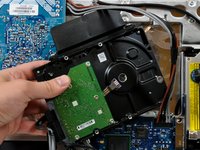
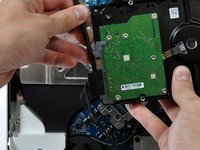
Remove the two T8 Torx screws securing the hard drive bracket to the hard drive.
-


To reassemble your device, follow these instructions in reverse order.
Cancel: I did not complete this guide.
303 other people completed this guide.

19 Guide Comments
It was a fun way to spend a sunday! We didn't have a magnetic screwdriver so we used a glue stick and dipped our screwdriver in the "goop" and used it to secure the screws to the driver for the deep screw section. Fun stuff!
Thanks to this guide and a RAM upgrade my imac has at least a couple more years left on it. I did not disconnect the front bezel or LCD I just laid them aside (the LCD had to be propped up a little to prevent pulling). The scariest part was removing the HD heat sensor. I just went really slow and most of the glue was still attached to the sensor so that all I had to do was press it against the new HD and it affixed just fine. One week later and everything is working great! Magnetizing the Torx driver with the remote magnet is a great idea. I purchased a stand alone magnetizer/demagnetizer myself though.
Very handy guide. I just replaced the internal drive on my iMac and it's working well. Here also is a pretty good video of the procedure:
Part 1: http://www.youtube.com/watch?v=ShY8zuT-w...
Part 2: http://www.youtube.com/watch?v=RjsIU1XEk...
Thanks to this very good description. Now these Mac has 10x more HD-Size than before! (1.5 TB). I wrote this from the IMAc so that you see: it works fine!
Thank you!
Dirk