iHome iH27B iPod Adapter Replacement

What you need

  1. iHome iH27B iPod Adapter Replacement, Adapter: step 1, image 1 of 1
    • Set the IHome on a surface facing upward.

    • Locate the two screws on the docking station adapter.

    • Remove the following screws:

    • Two 10 mm Phillips #0

  2. iHome iH27B iPod Adapter Replacement: step 2, image 1 of 1
    • Grip the plastic adapter case and pull upwards with a medium amount of force. You will have to twist forward a little so that the connections are visible.

    • The adapter will still be connected with wires, so make sure not to pull too hard.

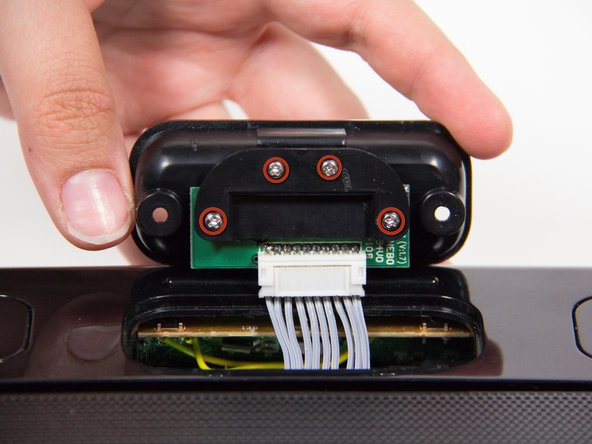
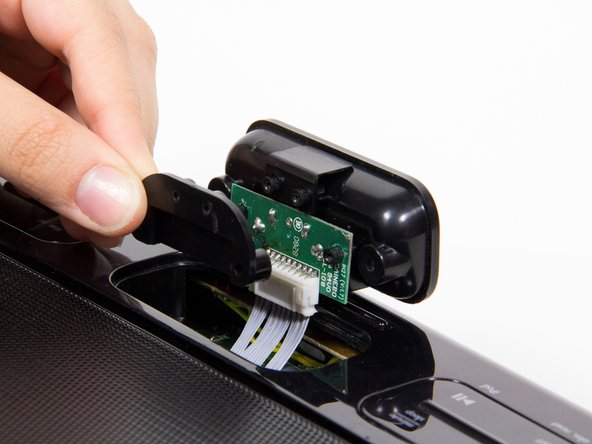
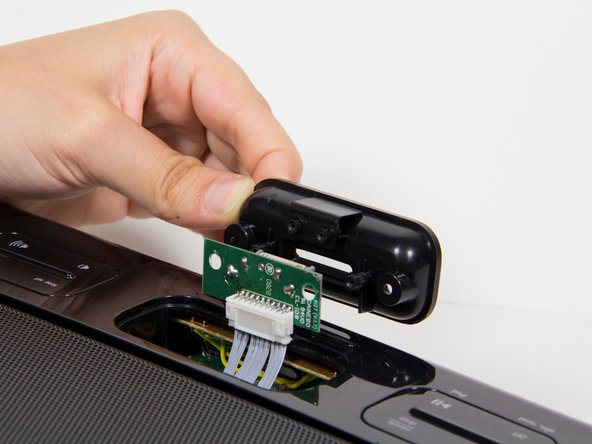
  3. iHome iH27B iPod Adapter Replacement: step 3, image 1 of 3 iHome iH27B iPod Adapter Replacement: step 3, image 2 of 3 iHome iH27B iPod Adapter Replacement: step 3, image 3 of 3
    • Remove the following screws:

    • Four 7 mm Phillips #0

    • Lift up the two black plastic pieces that have come loose on either side of the circuit board, and set them aside.

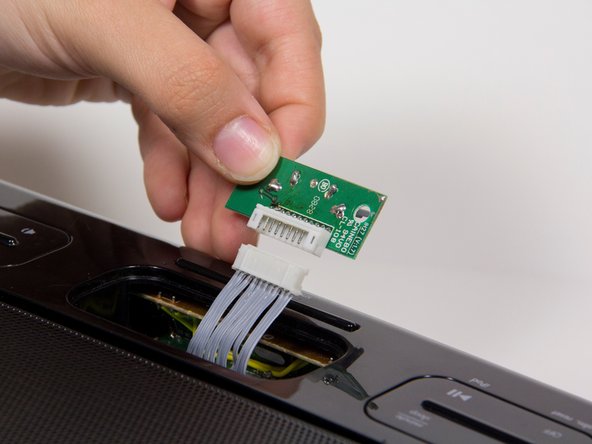
  4. iHome iH27B iPod Adapter Replacement: step 4, image 1 of 2 iHome iH27B iPod Adapter Replacement: step 4, image 2 of 2
    • Carefully pry apart the bundle of white wires connected at the junction with the plastic opening tool.

    • Do this slowly. Be careful not to damage the wires

    • Lift up the circuit board that has become loose.

  5. iHome iH27B iPod Adapter Replacement: step 5, image 1 of 1
    • Pull out the adapter, and replace it with the new one.

Conclusion

To reassemble your device, follow these instructions in reverse order.

One other person completed this guide.

John Kraemer

Member since: 10/09/12

76 Reputation

9 Guides authored

Team

Cal Poly, Team 3-21, Amido Fall 2012 Member of Cal Poly, Team 3-21, Amido Fall 2012

CPSU-AMIDO-F12S3G21

4 Members

9 Guides authored

0 Comments

Add Comment

View Statistics:

Past 24 Hours: 0

Past 7 Days: 1

Past 30 Days: 3

All Time: 2,324