
iDeaUSA CT8 Motherboard Replacement

What you need

  1. iDeaUSA CT8 Motherboard Replacement, Motherboard: step 1, image 1 of 3 iDeaUSA CT8 Motherboard Replacement, Motherboard: step 1, image 2 of 3 iDeaUSA CT8 Motherboard Replacement, Motherboard: step 1, image 3 of 3
    • Place the tablet on a flat surface, facing upwards.

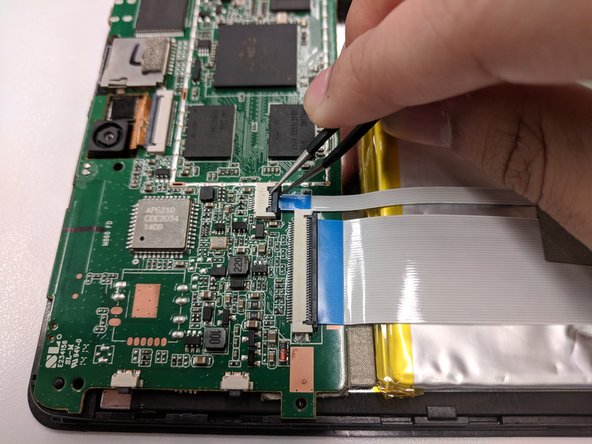
    • Starting from the portholes, use the plastic opening tools to remove the back cover of the tablet from the top half.

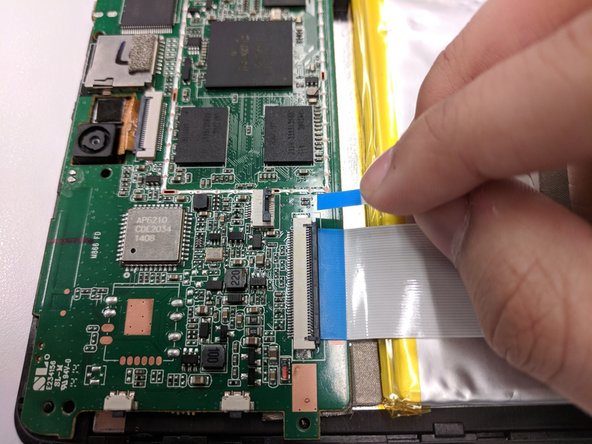
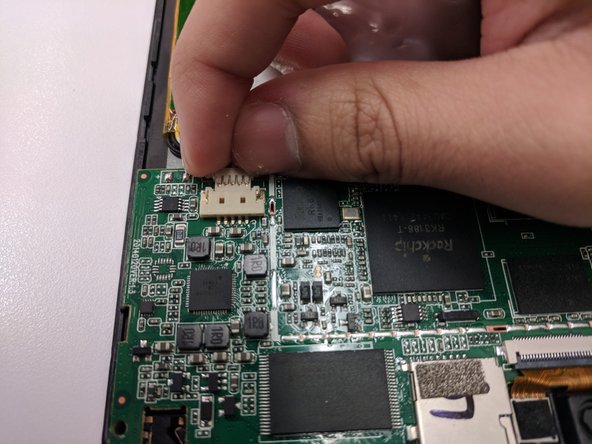
    • Being cautious of the wire connecting the speaker and the motherboard, place the front and back portion of the tablet close in proximity.

  2. iDeaUSA CT8 Motherboard Replacement: step 2, image 1 of 3 iDeaUSA CT8 Motherboard Replacement: step 2, image 2 of 3 iDeaUSA CT8 Motherboard Replacement: step 2, image 3 of 3
    • Locate the five 3.5 mm black screws on the motherboard.

    • Use the #00 Phillips screwdriver to remove the screws, place them in an appropriate location.

  3. iDeaUSA CT8 Motherboard Replacement: step 3, image 1 of 1
    • Carefully peel off the tape covering the circuit boards and blue ribbons. The tape can be disposed or saved for reuse.

  4. iDeaUSA CT8 Motherboard Replacement: step 4, image 1 of 3 iDeaUSA CT8 Motherboard Replacement: step 4, image 2 of 3 iDeaUSA CT8 Motherboard Replacement: step 4, image 3 of 3
    Tool used on this step:
    Tweezers
    $4.99
    Buy
    • After removing the tape, two blue ribbon wires can now be accessed. To disconnect, gently lift up the plastic ZIF tabs covering the wires.

    • Upon lifting the tab, the ribbons can now be safely pulled out of their connections.

    • To avoid breaking or damaging the plastic ZIF tabs, it is recommended to use tweezers.

  5. iDeaUSA CT8 Motherboard Replacement: step 5, image 1 of 1
    • Locate the two wires connecting the speaker to the motherboard.

    • Use a soldering iron to desolder the red and black wires from their sockets.

    • Solder the speaker wires back in place during reassembly.

  6. iDeaUSA CT8 Motherboard Replacement: step 6, image 1 of 2 iDeaUSA CT8 Motherboard Replacement: step 6, image 2 of 2
    • Disconnect the wires connecting the battery to the motherboard.

    • Start from the sides and gently wiggle the connection out until it;s loose enough to pull.

  7. iDeaUSA CT8 Motherboard Replacement: step 7, image 1 of 2 iDeaUSA CT8 Motherboard Replacement: step 7, image 2 of 2
    • Pull out and free the motherboard from its position.

Conclusion

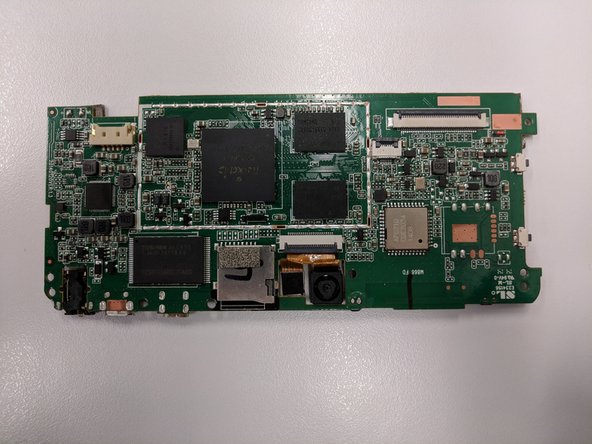
To reassemble your device, follow these instructions in reverse order.

One other person completed this guide.

0 Comments

Add Comment

View Statistics:

Past 24 Hours: 0

Past 7 Days: 0

Past 30 Days: 6

All Time: 135