Toshiba Satellite P755-EZ1511D Laptop Display Assembly Replacement

What you need

  1. Toshiba Satellite P755-EZ1511D Laptop Display Assembly Replacement, Battery: step 1, image 1 of 1
    • First flip the device over so that the back side is facing upwards

  2. Toshiba Satellite P755-EZ1511D Laptop Display Assembly Replacement: step 2, image 1 of 1
    • Push the two sliders toward the edge of the laptop.

    • Remove the battery.

  3. Toshiba Satellite P755-EZ1511D Laptop Display Assembly Replacement, Display Assembly: step 3, image 1 of 1
    • Open the lid.

  4. Toshiba Satellite P755-EZ1511D Laptop Display Assembly Replacement: step 4, image 1 of 3 Toshiba Satellite P755-EZ1511D Laptop Display Assembly Replacement: step 4, image 2 of 3 Toshiba Satellite P755-EZ1511D Laptop Display Assembly Replacement: step 4, image 3 of 3
    • Remove the four screw covers in each of the four corners of the screen.

  5. Toshiba Satellite P755-EZ1511D Laptop Display Assembly Replacement: step 5, image 1 of 3 Toshiba Satellite P755-EZ1511D Laptop Display Assembly Replacement: step 5, image 2 of 3 Toshiba Satellite P755-EZ1511D Laptop Display Assembly Replacement: step 5, image 3 of 3
    • Remove the 4 screws in each of the 4 corners.

  6. Toshiba Satellite P755-EZ1511D Laptop Display Assembly Replacement: step 6, image 1 of 3 Toshiba Satellite P755-EZ1511D Laptop Display Assembly Replacement: step 6, image 2 of 3 Toshiba Satellite P755-EZ1511D Laptop Display Assembly Replacement: step 6, image 3 of 3
    • Take your prying tool and proceed to pry the screen cover off and set to the side.

  7. Toshiba Satellite P755-EZ1511D Laptop Display Assembly Replacement: step 7, image 1 of 1
    • Disconnect the wire from the camera and the backside of the display assembly.

  8. Toshiba Satellite P755-EZ1511D Laptop Display Assembly Replacement: step 8, image 1 of 3 Toshiba Satellite P755-EZ1511D Laptop Display Assembly Replacement: step 8, image 2 of 3 Toshiba Satellite P755-EZ1511D Laptop Display Assembly Replacement: step 8, image 3 of 3
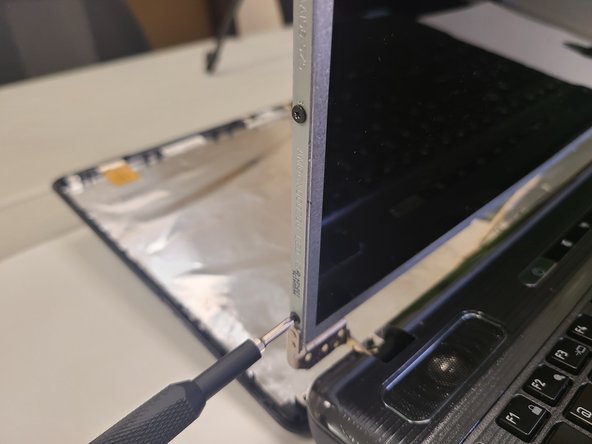
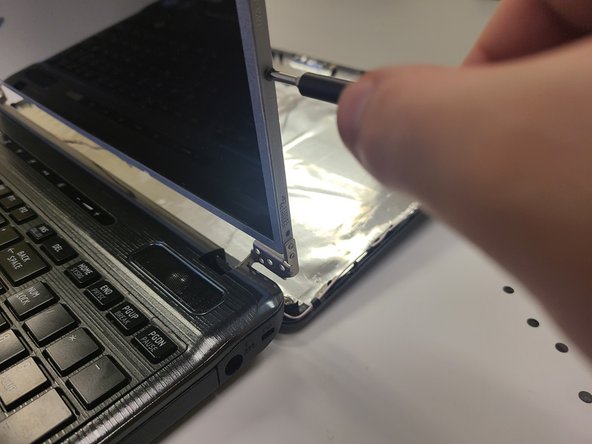
    • Remove the 6 screws holding the display assembly and holding brackets together.

Conclusion

To reassemble your device, follow these instructions in reverse order.

0 Comments

Add Comment

View Statistics:

Past 24 Hours: 1

Past 7 Days: 2

Past 30 Days: 3

All Time: 70