
Toshiba SD-K740 Disc Drive Replacement

What you need

  1. Toshiba SD-K740 Disc Drive Replacement, Top Panel: step 1, image 1 of 1
    • Unplug the DVD player before beginning.

    • Remove the three 7.7 mm screws from the back panel using a Phillips #0 screwdriver.

  2. Toshiba SD-K740 Disc Drive Replacement: step 2, image 1 of 2 Toshiba SD-K740 Disc Drive Replacement: step 2, image 2 of 2
    • Turn the DVD player on its side.

    • Remove the 7.7 mm screw.

    • Flip the DVD player onto its other side.

    • Remove the 7.7 mm screw.

  3. Toshiba SD-K740 Disc Drive Replacement: step 3, image 1 of 1
    • Flip the DVD player over onto its front face.

    • Remove the back panel by lifting up and pulling it towards yourself.

  4. Toshiba SD-K740 Disc Drive Replacement, Front Panel: step 4, image 1 of 1
    • Flip the DVD player so its top is sitting on your working surface.

    • Lift and push away the two tabs located in the middle of the player.

    • The front panel will not detach during this step, so do not force it.

  5. Toshiba SD-K740 Disc Drive Replacement: step 5, image 1 of 1
    • Flip the DVD player on its side.

    • Lift and slide forward the single tab on the side.

    • The front panel will not detach during this step, so do not force it.

  6. Toshiba SD-K740 Disc Drive Replacement: step 6, image 1 of 2 Toshiba SD-K740 Disc Drive Replacement: step 6, image 2 of 2
    • Grasp the front panel and pull forward to your right to remove it.

  7. Toshiba SD-K740 Disc Drive Replacement, Disc Drive: step 7, image 1 of 2 Toshiba SD-K740 Disc Drive Replacement, Disc Drive: step 7, image 2 of 2
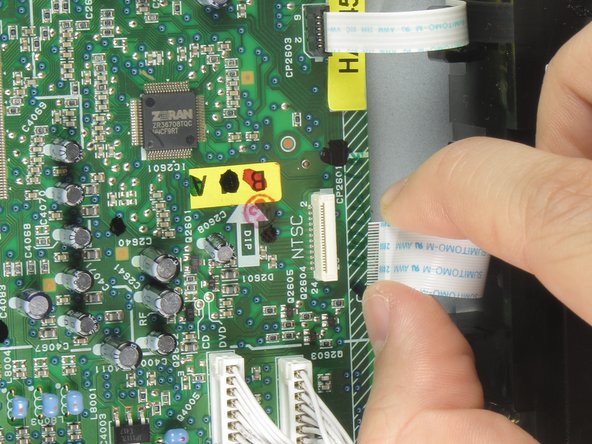
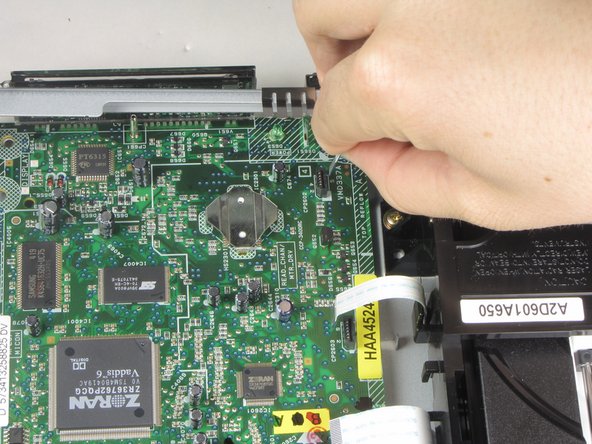
    • Remove the first of three ribbon cables on left hand side of disc drive by pulling vertically.

  8. Toshiba SD-K740 Disc Drive Replacement: step 8, image 1 of 2 Toshiba SD-K740 Disc Drive Replacement: step 8, image 2 of 2
    • Remove the second of three ribbon cables on left hand side of disc drive by pulling vertically.

  9. Toshiba SD-K740 Disc Drive Replacement: step 9, image 1 of 2 Toshiba SD-K740 Disc Drive Replacement: step 9, image 2 of 2
    • Remove the third of three ribbon cables on left hand side of disc drive by pulling vertically.

  10. Toshiba SD-K740 Disc Drive Replacement: step 10, image 1 of 1
    • Remove the four screws holding the disc drive in place using a #0 Phillips screwdriver.

  11. Toshiba SD-K740 Disc Drive Replacement: step 11, image 1 of 1
    • Lift disc drive vertically to remove.

Conclusion

To reassemble your device, follow these instructions in reverse order.

One other person completed this guide.

Joe Murphy

Member since: 01/20/11

542 Reputation

5 Guides authored

Team

Cal Poly, Team 1-16, Amido Winter 2011 Member of Cal Poly, Team 1-16, Amido Winter 2011

CPSU-AMIDO-W11S1G16

4 Members

8 Guides authored

0 Comments

Add Comment

View Statistics:

Past 24 Hours: 0

Past 7 Days: 0

Past 30 Days: 0

All Time: 2,603