
Sharp Aquos LC13B2UA Buttons Replacement

What you need

  1. Sharp Aquos LC13B2UA Buttons Replacement, Stand: step 1, image 1 of 2 Sharp Aquos LC13B2UA Buttons Replacement, Stand: step 1, image 2 of 2
    • Place the TV face down on a flat smooth surface as to not scratch the screen.

    • Using a Phillips #2 screwdriver remove the four 8mm screws attaching the stand to the TV.

  2. Sharp Aquos LC13B2UA Buttons Replacement: step 2, image 1 of 2 Sharp Aquos LC13B2UA Buttons Replacement: step 2, image 2 of 2
    • Lift the stand off the television.

  3. Sharp Aquos LC13B2UA Buttons Replacement, Back Case: step 3, image 1 of 3 Sharp Aquos LC13B2UA Buttons Replacement, Back Case: step 3, image 2 of 3 Sharp Aquos LC13B2UA Buttons Replacement, Back Case: step 3, image 3 of 3
    • Remove the two back panels by prying them out with your hands.

  4. Sharp Aquos LC13B2UA Buttons Replacement: step 4, image 1 of 2 Sharp Aquos LC13B2UA Buttons Replacement: step 4, image 2 of 2
    • Using a Phillips #2 screwdriver, remove the eight 6mm Phillips screws located around the edge.

    • Using a Phillips #2 screwdriver, remove the two 6mm Phillips screws located near the inputs.

  5. Sharp Aquos LC13B2UA Buttons Replacement: step 5, image 1 of 1
    • Using your hands, gently lift and remove the back case of the television.

  6. Sharp Aquos LC13B2UA Buttons Replacement, Motherboard: step 6, image 1 of 3 Sharp Aquos LC13B2UA Buttons Replacement, Motherboard: step 6, image 2 of 3 Sharp Aquos LC13B2UA Buttons Replacement, Motherboard: step 6, image 3 of 3
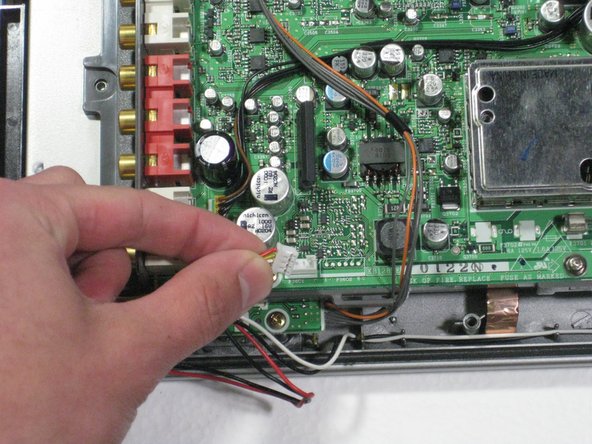
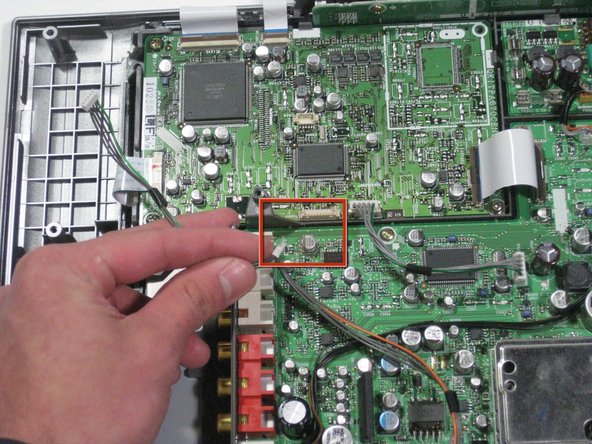
    • Remove the two speaker cables and the connector from the circuit board by pinching the plastic connectors and firmly pulling up.

    • Pull on the plastic part of the connector, even though it may seem easiest to pull on the wires.

  7. Sharp Aquos LC13B2UA Buttons Replacement: step 7, image 1 of 2 Sharp Aquos LC13B2UA Buttons Replacement: step 7, image 2 of 2
    • Remove the green and gray power connector from the side of the buttons panel at the top of the television.

    • Remove the green/gray to orange/gray connector from the center of the circuit board.

  8. Sharp Aquos LC13B2UA Buttons Replacement: step 8, image 1 of 2 Sharp Aquos LC13B2UA Buttons Replacement: step 8, image 2 of 2
    • Remove the four 5mm phillips screws attaching the LCD and circuit board to the front case.

  9. Sharp Aquos LC13B2UA Buttons Replacement: step 9, image 1 of 1
    • Lift the circuit board/LCD block from the case by lifting the near side of the circuit board and sliding it under the button frame.

  10. Sharp Aquos LC13B2UA Buttons Replacement, Power Button: step 10, image 1 of 3 Sharp Aquos LC13B2UA Buttons Replacement, Power Button: step 10, image 2 of 3 Sharp Aquos LC13B2UA Buttons Replacement, Power Button: step 10, image 3 of 3
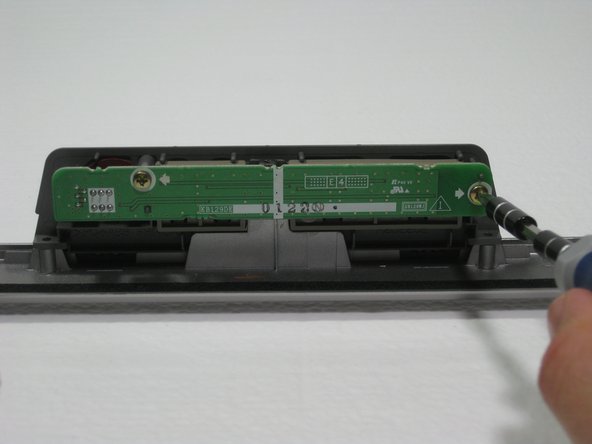
    • Remove the two 6mm Phillips screws.

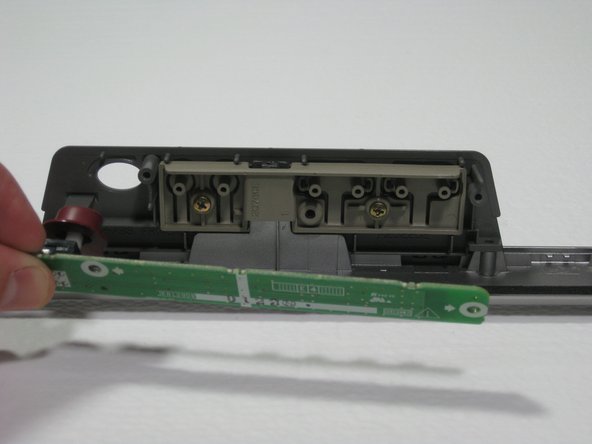
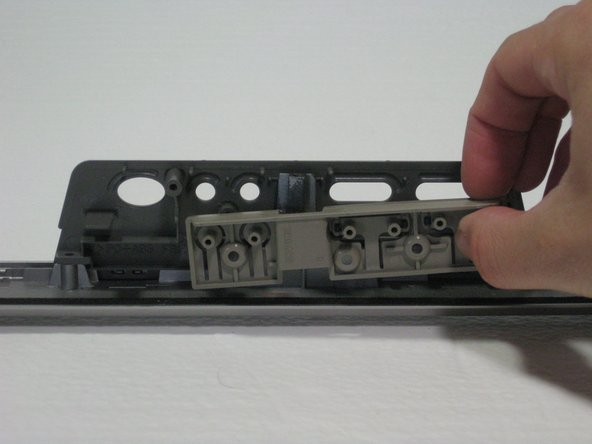
    • Pull the board toward you, giving you access to the power button.

  11. Sharp Aquos LC13B2UA Buttons Replacement, Top Buttons: step 11, image 1 of 2 Sharp Aquos LC13B2UA Buttons Replacement, Top Buttons: step 11, image 2 of 2
    • Unscrew the two 4mm Phillips screws.

    • Lift the buttons off the front case.

Conclusion

To reassemble your device, follow these instructions in reverse order.

Robert Hobson

Member since: 01/20/11

1,290 Reputation

9 Guides authored

Team

Cal Poly, Team 1-11, Amido Winter 2011 Member of Cal Poly, Team 1-11, Amido Winter 2011

CPSU-AMIDO-W11S1G11

4 Members

9 Guides authored

0 Comments

Add Comment

View Statistics:

Past 24 Hours: 0

Past 7 Days: 0

Past 30 Days: 1

All Time: 1,946