Introduction
Problem description: The steering wheel and pedals repeatedly do not work, especially after the steering wheel has been turned fully (to the stop). This is caused by the cables in the steering wheel being worn from (mis)turning. This appears to be a standard fault, especially in the older models.
In the following, all internal cables in the turning mechanism are replaced. Individual wires are used for this, which are more flexible than an entire USB cable. Long-term experience after this repair is still lacking.
(Not yet tested:) A cable alternative would be a cable made of silicone: either again as individual wires or even as an entire USB cable made of silicone. These cables should be much more resistant to strain and twisting than normal USB cables.
Finally, a few repair tips for the pedals.
Device: Saitek (or Logitech G) Farming Simulator Wheel - Model No.: 43216; Year of manufacture: approx. 2015
What you need
-
-
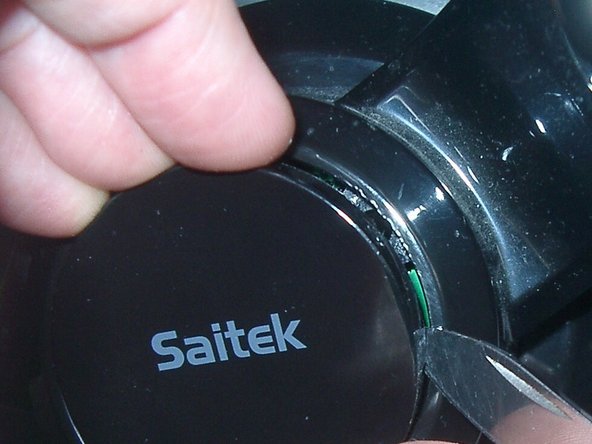
First of all: This is what the defect looks like
-
The tools: knife, lighter, soldering iron, solder, screwdriver(+) and optionally: lubricant (e.g. Silicone grease or Silicone oil spray), pliers
-
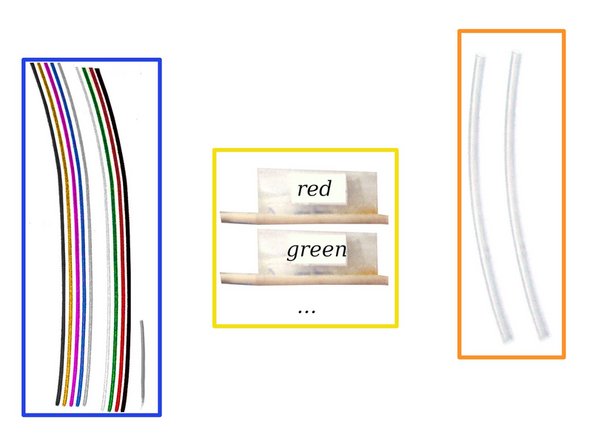
Cable you need (copper wire 0,14mm² / AWG26): 9 pieces of wires, with each 30cm length. AND a single short wire (≈7cm length).
-
if you do not have different colored cables: Simply mark the cables accordingly.
-
Heat-shrink tubing 2:1 for isolation: ≈1,6mm (18*2cm length) and ≈6,4mm (5cm length) ((or alternative use insulating tape))
-
-
-
Carefully use a knife. Maybe press short with the other hand (finger) down. Part by part. Carefully.
-
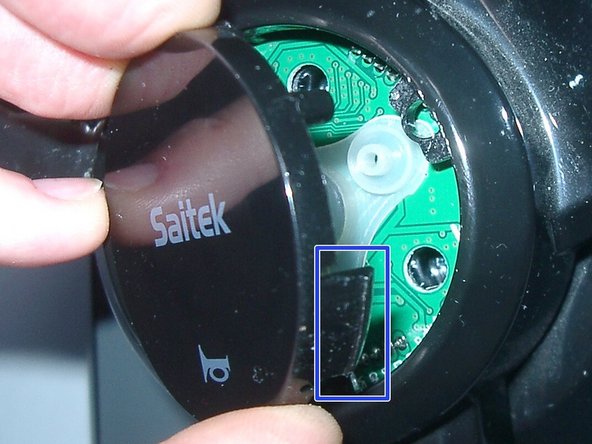
do not break the three retainer tab.
-
-
-
-
cut the USB-cable
-
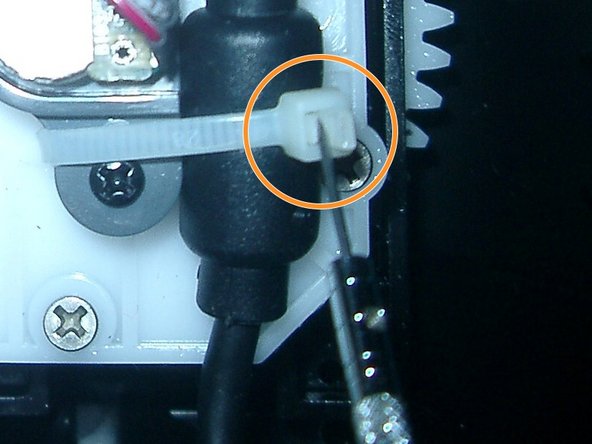
open the cable tie (best: to be reused ; look at last photo)
-
pull out plugs
-
-
-
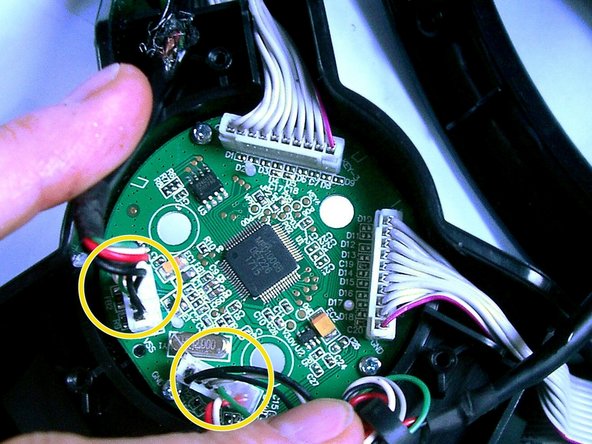
A new very short cable is required (approx. 7cm?).
-
Twist the short cable with the shielding from the USB cable
-
Solder the other side of the cable to the black cable (black cable from the USB cable).
-
Pull the heat-shrink tubing over the repair apply heat to shrink it.
-
-
-
When assembling: If necessary, grease the cables at the pivot point with lubricant (e.g. silicone oil / grease).
-
use cable tie
-
-
-
If a pedal creaks or squeaks: oil the springs
-
In case one or both pedals are not working: The connector ( jack / plug ) might be defect.
-
Material: A cable from Telephone earphone capsule is a good replacement. Cut out some part (with some cable) and solder it. The plug jack is called 4P4C (or „RJ-9“, „RJ-10“, „RJ-22“).
-


Work through the steps in reverse order to reassemble your device.
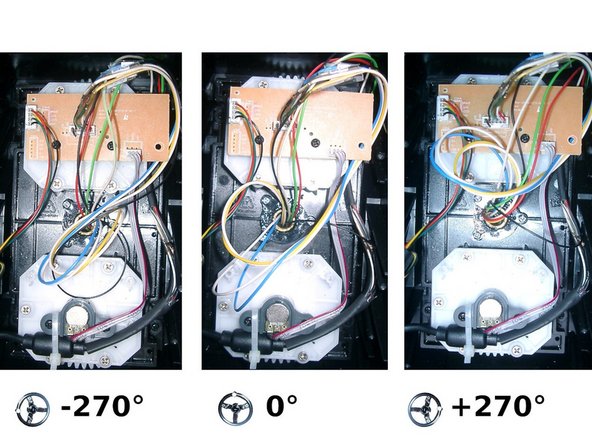
(Lubricate the cables at the pivot points).
The three screws on the front of the steering wheel (behind the horn) should be screwed in straight and completely.
Work through the steps in reverse order to reassemble your device.
(Lubricate the cables at the pivot points).
The three screws on the front of the steering wheel (behind the horn) should be screwed in straight and completely.
Special thanks to these translators:
100%


These translators are helping us fix the world! Want to contribute?
Start translating ›