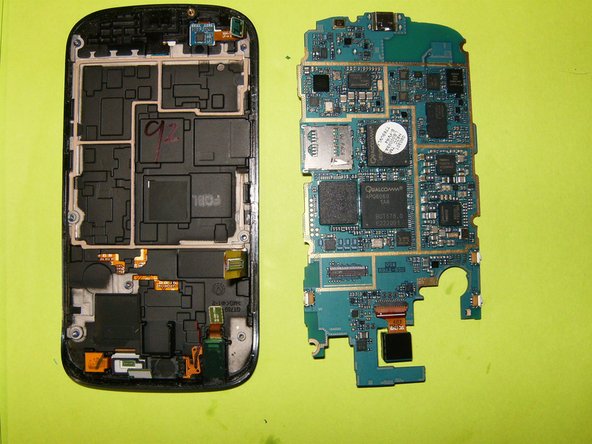
Samsung Galaxy S Blaze Display Replacement

What you need

  1. Samsung Galaxy S Blaze Display Replacement, Display: step 1, image 1 of 3 Samsung Galaxy S Blaze Display Replacement, Display: step 1, image 2 of 3 Samsung Galaxy S Blaze Display Replacement, Display: step 1, image 3 of 3
    • Remove the battery cover,

    • the battery and the SIM card if your phone has one.

  2. Samsung Galaxy S Blaze Display Replacement: step 2, image 1 of 3 Samsung Galaxy S Blaze Display Replacement: step 2, image 2 of 3 Samsung Galaxy S Blaze Display Replacement: step 2, image 3 of 3
    • Remove the eight Phillips head screws

    • All eight screws are 4mm and are identical. No reason to keep them separated.

    • Use a plastic opening tool to separate the frame from the phone

  3. Samsung Galaxy S Blaze Display Replacement: step 3, image 1 of 3 Samsung Galaxy S Blaze Display Replacement: step 3, image 2 of 3 Samsung Galaxy S Blaze Display Replacement: step 3, image 3 of 3
    • Continue to work all the way around the frame.

    • Different size of the plastic opening tools can be used

    • Separate the frame

  4. Samsung Galaxy S Blaze Display Replacement: step 4, image 1 of 3 Samsung Galaxy S Blaze Display Replacement: step 4, image 2 of 3 Samsung Galaxy S Blaze Display Replacement: step 4, image 3 of 3
    • Disconnect the front camera flex

    • Disconnect the audio jack flex

    • Disconnect the control button flex

  5. Samsung Galaxy S Blaze Display Replacement: step 5, image 1 of 3 Samsung Galaxy S Blaze Display Replacement: step 5, image 2 of 3 Samsung Galaxy S Blaze Display Replacement: step 5, image 3 of 3
    • Gently lift the logic board above the frame,

    • and flip it to its side. Remove the LCD flex

    • The logic board can now be safely removed.

  6. Samsung Galaxy S Blaze Display Replacement: step 6, image 1 of 3 Samsung Galaxy S Blaze Display Replacement: step 6, image 2 of 3 Samsung Galaxy S Blaze Display Replacement: step 6, image 3 of 3
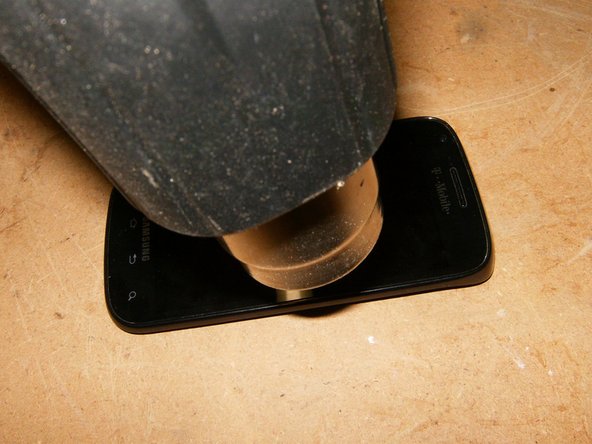
    • The front display is adhered to the frame. It will be necessary to use a heatgun (on very low) or a good hairdryer to loosen the glue.

    • Apply the heat on the outside of the display. Do not stay to long in one are, move the heat continously around the outside of the display.

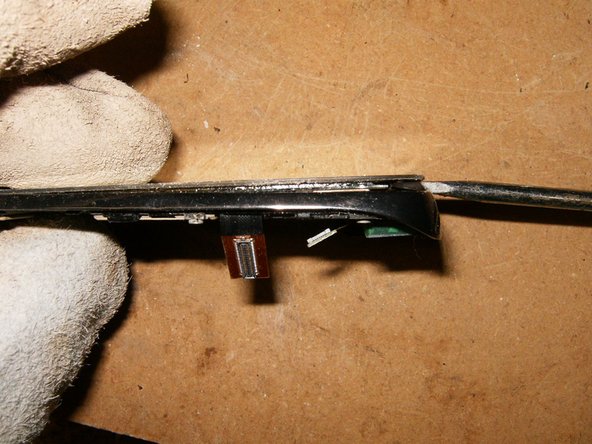
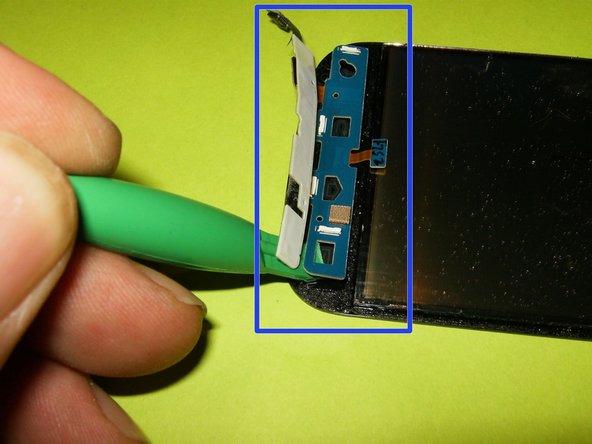
    • With the glue soft enough, use a small spatula, screwdriver or other small tool to separate the display from the frame.

    • The LCD may separate from the digitizer and remain affixed to the frame. This will cause a sparkly mess.

  7. Samsung Galaxy S Blaze Display Replacement: step 7, image 1 of 3 Samsung Galaxy S Blaze Display Replacement: step 7, image 2 of 3 Samsung Galaxy S Blaze Display Replacement: step 7, image 3 of 3
    • LCD is now removed from the frame.

    • The PCB for the buttons is glued to the bottom of the LCD. Remove it slowly and carefully. An opening tool will make it easier.

    • There will be enough adhesive on the button PCB to adhere it to the new LCD.

Conclusion

To reassemble your device, follow these instructions in reverse order. The frame should have enough adhesive to provide a secure grip. If additional glue should be necessary, preference should be given to rubber cement. This will ensure that, should another display replacement be necessary, the glue will come off with heat again.

3 other people completed this guide.

oldturkey03

Member since: 09/29/10

781,480 Reputation

119 Guides authored

Team

Global Fixers Member of Global Fixers

Community

32 Members

531 Guides authored

One Comment

Can just the glass be removed on this device like the Galaxy S3 Meaning is the digitizer attatched to the glass or is it like the S3 where the digitizer is not attatched to the glass?

Andrew Knight - Reply

Add Comment

View Statistics:

Past 24 Hours: 0

Past 7 Days: 0

Past 30 Days: 1

All Time: 6,655