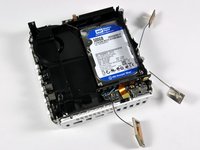
Mac mini Model A1283 Terabyte Drive Replacement

What you need

  1. Mac mini Model A1283 Terabyte Drive Replacement, Terabyte Drive: step 1, image 1 of 1
    • We decided to see if we could stuff a full terabyte worth of storage into our new Mac mini. Why would anyone possibly want this much storage?

    • Bragging rights. Mac minis come with either 120, 250, or 320 GB standard. Yours has 1 TERABYTE.

    • Built-in Time Machine. Sure, you can hook up an external drive, but it's sure nice not to have cables everywhere.

    • RAID -- mirroring, striping, concatenating -- take your pick.

    • And seriously, with that much space, who needs an optical drive?

  2. Mac mini Model A1283 Terabyte Drive Replacement: step 2, image 1 of 3 Mac mini Model A1283 Terabyte Drive Replacement: step 2, image 2 of 3 Mac mini Model A1283 Terabyte Drive Replacement: step 2, image 3 of 3
    • We're going to:

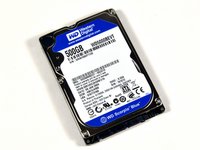
    • Swap out a the existing hard drive for a 500 GB drive.

    • Then remove the optical drive and install another new 500 GB drive in its place.

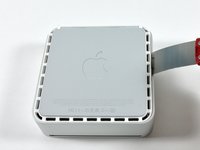
    • Carefully insert a putty knife into the crevice between the top cover and bottom housing. Start on the left side first.

    • Gently enlarge the existing crevice by twisting the putty knife downward and away from the mini.

    • Repeat the prying motion until a portion of the bottom housing has been nudged upward.

  3. Mac mini Model A1283 Terabyte Drive Replacement: step 3, image 1 of 3 Mac mini Model A1283 Terabyte Drive Replacement: step 3, image 2 of 3 Mac mini Model A1283 Terabyte Drive Replacement: step 3, image 3 of 3
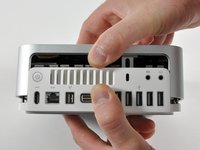
    • Repeat the same prying procedure on the right side.

    • The top cover should now be marginally separated from the bottom housing. Use your fingers to completely separate the two, starting with the I/O side of the mini.

    • The top cover does not have any cables attaching it to the bottom housing; it should now be completely detached from the bottom.

  4. Mac mini Model A1283 Terabyte Drive Replacement: step 4, image 1 of 3 Mac mini Model A1283 Terabyte Drive Replacement: step 4, image 2 of 3 Mac mini Model A1283 Terabyte Drive Replacement: step 4, image 3 of 3
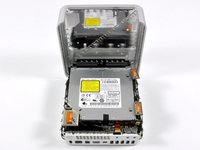
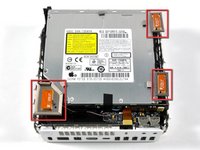
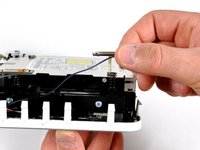
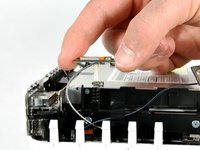
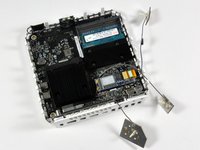
    • All three antennas need to be removed before accessing the hardware underneath.

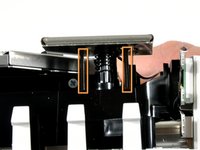
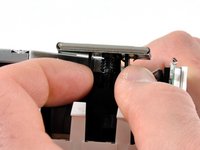
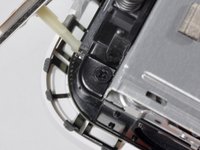
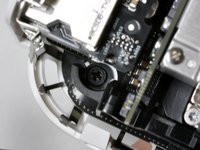
    • Two black posts secure the large Airport antenna board to the internal frame. The other two antennas (on the right) can be removed by pulling them directly upward.

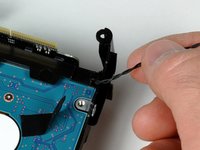
    • Remove the large antenna by squeezing both black posts together and gently lifting the antenna board from the posts.

    • Remove the other two antennas by pulling them directly upward.

  5. Mac mini Model A1283 Terabyte Drive Replacement: step 5, image 1 of 3 Mac mini Model A1283 Terabyte Drive Replacement: step 5, image 2 of 3 Mac mini Model A1283 Terabyte Drive Replacement: step 5, image 3 of 3
    • Rotate the mini 180 degrees.

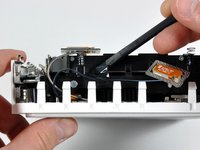
    • Use a spudger to peel back the black tape and release the antenna cable.

    • Carefully lift the remaining two antennas from the right side of the mini.

  6. Mac mini Model A1283 Terabyte Drive Replacement: step 6, image 1 of 3 Mac mini Model A1283 Terabyte Drive Replacement: step 6, image 2 of 3 Mac mini Model A1283 Terabyte Drive Replacement: step 6, image 3 of 3
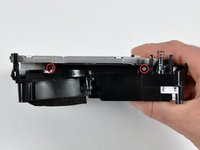
    • Remove the four black Phillips screws holding the internal frame to the bottom housing.

    • Remove the black Phillips screw from the bottom left corner.

    • Remove the black Phillips screw from the top left corner. This particular screw is hidden from view.

  7. Mac mini Model A1283 Terabyte Drive Replacement: step 7, image 1 of 2 Mac mini Model A1283 Terabyte Drive Replacement: step 7, image 2 of 2
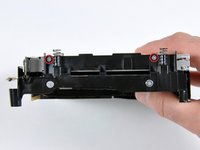
    • Remove the black Phillips screw located on the upper right corner.

    • Remove the black Phillips screw located on the bottom right corner.

  8. Mac mini Model A1283 Terabyte Drive Replacement: step 8, image 1 of 3 Mac mini Model A1283 Terabyte Drive Replacement: step 8, image 2 of 3 Mac mini Model A1283 Terabyte Drive Replacement: step 8, image 3 of 3
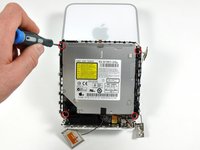
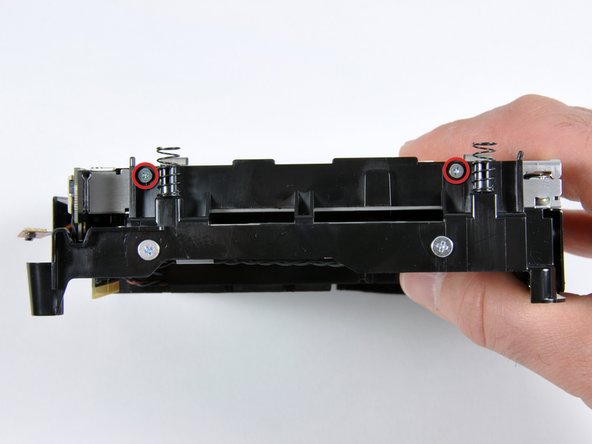
    • Remove the two silver Phillips screws holding the SuperDrive to the internal frame.

    • Rotate the internal frame 180 degrees and remove two more silver Phillips screws.

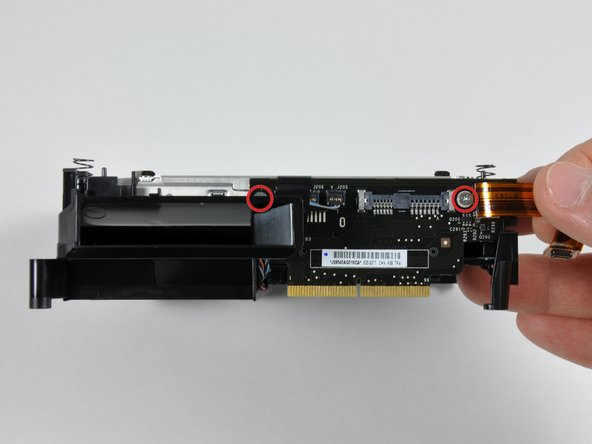
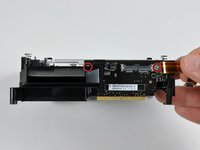
    • Rotate the internal frame so that the interconnect board connector is facing you.

    • Remove the two silver Phillips screws holding the SuperDrive to the interconnect board connector.

  9. Mac mini Model A1283 Terabyte Drive Replacement: step 9, image 1 of 3 Mac mini Model A1283 Terabyte Drive Replacement: step 9, image 2 of 3 Mac mini Model A1283 Terabyte Drive Replacement: step 9, image 3 of 3
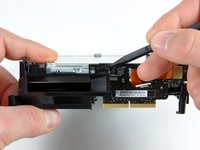
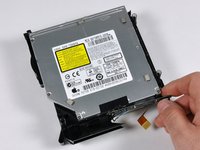
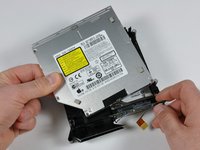
    • Use a spudger to remove the black tape securing the SuperDrive to the interconnect board.

    • Detach the interconnect board connector from the SuperDrive.

    • Lift the SuperDrive out of the internal frame.

  10. Mac mini Model A1283 Terabyte Drive Replacement: step 10, image 1 of 1
    • The SuperDrive should now be removed from the internal frame.

  11. Mac mini Model A1283 Terabyte Drive Replacement: step 11, image 1 of 3 Mac mini Model A1283 Terabyte Drive Replacement: step 11, image 2 of 3 Mac mini Model A1283 Terabyte Drive Replacement: step 11, image 3 of 3
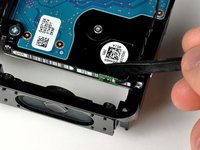
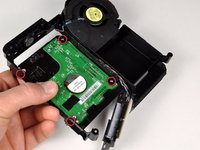
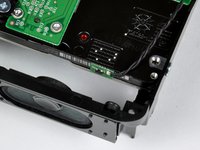
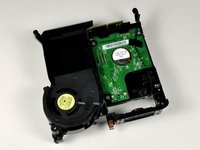
    • Flip the frame and then rotate it 180 degrees so that the speakers are facing you.

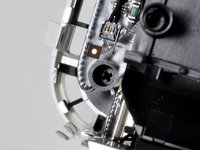
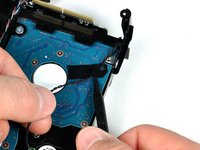
    • Be careful with this sequence of steps, as the thermal sensor (and its connector) are VERY frail.

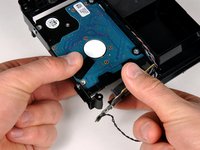
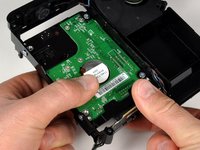
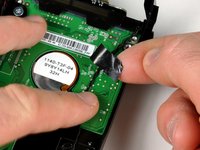
    • Use a spudger to gently disconnect the thermal sensor from the hard drive.

    • Peel back the black tape and free the double-stranded wire from the drive.

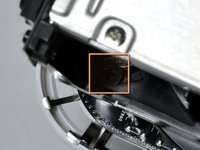
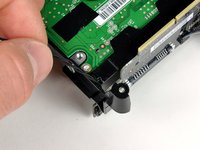
    • Gently deroute the wire from the small notch on the frame (third picture).

    • Make sure that the thermal sensor remains connected to the interconnect board.

  12. Mac mini Model A1283 Terabyte Drive Replacement: step 12, image 1 of 3 Mac mini Model A1283 Terabyte Drive Replacement: step 12, image 2 of 3 Mac mini Model A1283 Terabyte Drive Replacement: step 12, image 3 of 3
    • Unplug the interconnect board from the hard drive.

    • The interconnect board is still held in place by other connectors. Make sure that the they are not separated from the interconnect board.

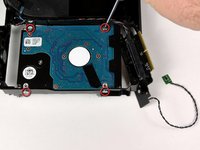
    • Remove the four Phillips screws that hold the drive in place.

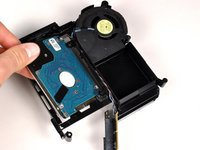
    • The stock hard drive can now be removed.

  13. Mac mini Model A1283 Terabyte Drive Replacement: step 13, image 1 of 3 Mac mini Model A1283 Terabyte Drive Replacement: step 13, image 2 of 3 Mac mini Model A1283 Terabyte Drive Replacement: step 13, image 3 of 3
    • Hold the new drive in place and attach it to the frame using the four Phillips screws.

    • Plug the interconnect board into the new drive, making sure that all wires are in their original place.

    • Route the black thermal sensor wire back through the notch.

  14. Mac mini Model A1283 Terabyte Drive Replacement: step 14, image 1 of 3 Mac mini Model A1283 Terabyte Drive Replacement: step 14, image 2 of 3 Mac mini Model A1283 Terabyte Drive Replacement: step 14, image 3 of 3
    • Secure the thermal sensor to the new hard drive. The original adhesive on the back of the thermal sensor should hold the sensor in place.

    • Reuse the black tape from the old drive to secure the thermal sensor wire to the new drive.

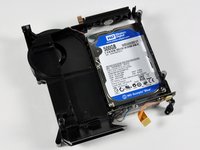
    • Your newly-installed drive should look very similar to the third picture.

  15. Mac mini Model A1283 Terabyte Drive Replacement: step 15, image 1 of 3 Mac mini Model A1283 Terabyte Drive Replacement: step 15, image 2 of 3 Mac mini Model A1283 Terabyte Drive Replacement: step 15, image 3 of 3
    • Flip over the internal framework with the newly attached drive. It should look like the first picture

    • Prepare the bottom housing for connection with the internal framework by connecting the antenna cables to the Broadcom AirPort card as shown

    • Arranging the antennas as pictured will ensure a smooth connection of the two large components

    • When setting the internal framework into the bottom housing, make sure the male connector on the interconnect board finds its way into the female connector on the logic board

  16. Mac mini Model A1283 Terabyte Drive Replacement: step 16, image 1 of 1
    • Snap the antenna boards back into their respective posts.

    • Tape the upper right antenna cable to the side of the internal framework (circled in green).

    • Route the bottom left antenna cable through the guides on the internal framework (marked in yellow).

    • Connect the orange ribbon cable from the interconnect board to the sound card (indicated in red).

  17. Mac mini Model A1283 Terabyte Drive Replacement: step 17, image 1 of 3 Mac mini Model A1283 Terabyte Drive Replacement: step 17, image 2 of 3 Mac mini Model A1283 Terabyte Drive Replacement: step 17, image 3 of 3
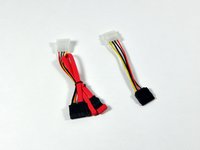
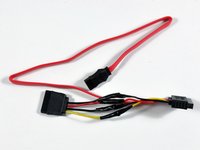
    • To connect the new hard drive, we need to modify some cables.

    • The hard drive has a standard 15 pin SATA power connection, but the logic board has a 6 pin slim SATA power connection. A cable to connect them doesn't exist (yet), so we're going to make one.

    • The two cables you need are:

    • 15 pin Female SATA power to 4 pin Male Molex power.

    • 13 pin Male Slimline SATA to 7 pin Female SATA / 4 pin Male Molex power.

    • We tried a Molex adapter to connect the two (male) power cables together. However, the bulky Molex connectors are difficult to fit inside the mini.

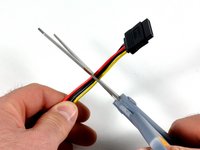
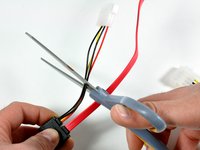
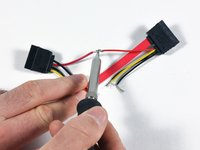
    • Cut the white Molex connectors off both cables. The excess cable has to fit inside the mini, so just leave 3-4" on each cable.

  18. Mac mini Model A1283 Terabyte Drive Replacement: step 18, image 1 of 1
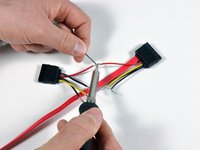
    • Strip half an inch of insulation from the end of each wire.

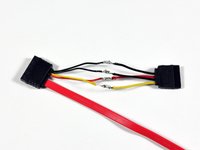
    • Connect each loose wire with the matching color wire on the other cable. Red-red, black-black, yellow-yellow, black-black.

    • To our knowledge, both black wires are ground, so just make sure you have black to black.

    • Tightly twist each pair of wires together.

  19. Mac mini Model A1283 Terabyte Drive Replacement: step 19, image 1 of 3 Mac mini Model A1283 Terabyte Drive Replacement: step 19, image 2 of 3 Mac mini Model A1283 Terabyte Drive Replacement: step 19, image 3 of 3
    • Solder each pair of wires together to make a solid connection.

    • See if you can make your cable look prettier than ours.

  20. Mac mini Model A1283 Terabyte Drive Replacement: step 20, image 1 of 2 Mac mini Model A1283 Terabyte Drive Replacement: step 20, image 2 of 2
    Tool used on this step:
    Heat Shrink Tubing Assortment
    $7.99
    Buy
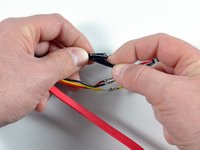
    • Wrap electrical tape around each connection so that they don't short out.

    • Don't skip this step!

    • Voila! Instant cable. Well, maybe not instant. But it's going to work great!

    • Use of heatshrink tubing is highly recommended. It will hold better then electrical tape. Double sealing is best.

  21. Mac mini Model A1283 Terabyte Drive Replacement: step 21, image 1 of 2 Mac mini Model A1283 Terabyte Drive Replacement: step 21, image 2 of 2
    • Another 500 gigs ready to go... Now it's just plug and play.

    • Right now, 500 GB drives are only available in 5400 RPM speeds. However, Seagate has announced a 500 GB, 7200 RPM drive. We hope to have our hands on those drives soon.

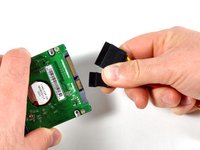
    • Plug in the full-size SATA connectors into the hard drive.

  22. Mac mini Model A1283 Terabyte Drive Replacement: step 22, image 1 of 1
    • Attach the other end of your new cable to the logic board where the optical drive was connected.

    • Carefully wrap up the extra cable and store it to the side of the hard drive.

    • Getting everything to fit with these particular cables is somewhat challenging. If you don't stow the cable correctly, it will prevent the case from going back on all the way, and could also damage the hard drives.

  23. Mac mini Model A1283 Terabyte Drive Replacement: step 23, image 1 of 1
    • Before continuing, take a moment to double-check and make sure the SATA cable is plugged in securely to both the second hard drive and the optical drive connector.

    • Put the upper case back on!

    • You'll feel the tabs 'snick' to secure the case once you get it all the way down. If the tabs don't engage, check to make sure nothing is sticking out and blocking the case (you don't want to crush your new hard drive).

  24. Mac mini Model A1283 Terabyte Drive Replacement: step 24, image 1 of 1
    • Time Machine just works!

    • It recognizes the new drive immediately. Always-on, no-hassle, no-cable backups. Who could ask for anything more?

  25. Mac mini Model A1283 Terabyte Drive Replacement: step 25, image 1 of 3 Mac mini Model A1283 Terabyte Drive Replacement: step 25, image 2 of 3 Mac mini Model A1283 Terabyte Drive Replacement: step 25, image 3 of 3
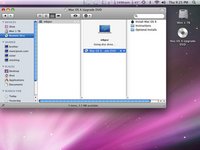
    • The one drawback to this hack is that we removed the optical drive. Fortunately, Apple's provided an easy solution, thanks to the MacBook Air.

    • You can use Remote Disc to share the optical drive of a nearby Mac or PC.

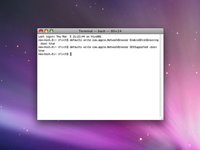
    • Remote Disc is not activated on the mini, but fortunately turning it on is simple. Just type the following two commands in Terminal:

    • defaults write com.apple.NetworkBrowser EnableODiskBrowsing -bool true

    • defaults write com.apple.NetworkBrowser ODSSupported -bool true

    • Restart, and you're all set.

  26. Mac mini Model A1283 Terabyte Drive Replacement: step 26, image 1 of 3 Mac mini Model A1283 Terabyte Drive Replacement: step 26, image 2 of 3 Mac mini Model A1283 Terabyte Drive Replacement: step 26, image 3 of 3
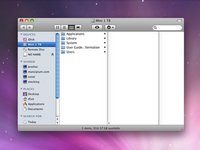
    • If you're like us and Time Machine just isn't enough, you can RAID the two drives together to make a single 1 TB drive.

    • Instructions are elsewhere online to do this, but the basic steps are:

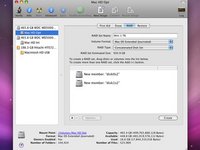
    • Back any data up, then boot off a different startup disc.

    • Format both drives as Mac OS Extended.

    • Create a new 'RAID set', and add both drives to it. You can choose 'Concatenated Set', mirrored RAID 1, or striped RAID 0.

    • After you create the drive array, you can copy an OS onto it from a backup (as we did), or you can install OS X from scratch.

  27. Mac mini Model A1283 Terabyte Drive Replacement: step 27, image 1 of 1
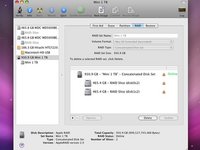
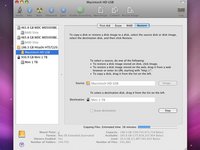
    • There you have it: 930 GB of usable space!

    • Why are we 70 GB short? It depends on how you define a terabyte.

Conclusion

To reassemble your device, follow these instructions in reverse order.

21 other people completed this guide.

3 Comments

Perfect Cable Found:

Http://www.microsatacables.com

Search for this item:

This is the standard 22 pin Female SATA connector to a 13 pin Slimline SATA Male connector.

Item # ADPC22PFWV13PM

It's $7.75 and is a perfect fit. With this cable, the difficulty of this endeavor goes down to "just a little" :-)

It completely eliminates steps 17 to 20

I just replaced my hand soldered adventurous one with the one above and that's a clean and reliable solution.

Enjoy the 2 drives in the mini.

-Jo.

Josef Kohn - Reply

Dear friends, it is necessary that they are of different RPM HDD, my question is if I can use both disks of equal speed???

Javier Acevedo - Reply

It's necessary to use the same drive of your going to RAID it. At least in size, not sure about speed.

Donnie Evans - Reply

Add Comment

View Statistics:

Past 24 Hours: 2

Past 7 Days: 16

Past 30 Days: 66

All Time: 398,430