Introduction
Replace a broken click wheel to regain control of your Nano.
What you need
-
-
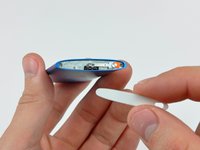
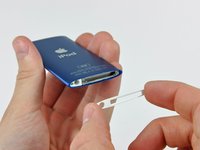
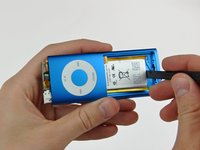
Insert the edge of an iPod opening tool into the gap between the outer case and the top bezel.
-
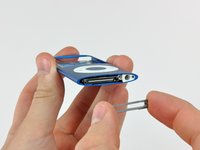
Pry the top bezel off the adhesive securing it to the display retainer.
-
-
-
-
Use the edge of an iPod opening tool to separate the hold switch from the adhesive securing it to the top edge of the display.
-
-
-
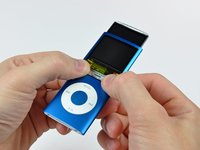
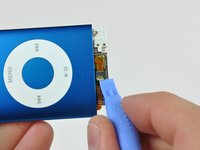
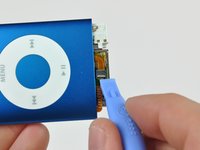
Insert an iPod opening tool between the bottom bezel and the dock connector.
-
Separate the bottom bezel from the adhesive securing it to the Nano and set it aside.
-
-
-
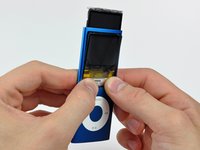
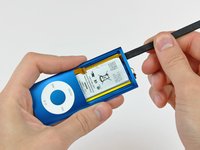
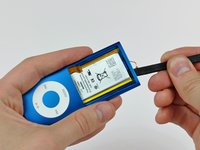
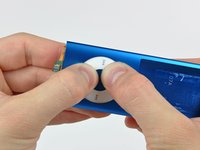
Press down firmly around the perimeter of the click wheel to separate it from the adhesive securing it to the outer case.
-
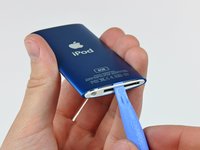
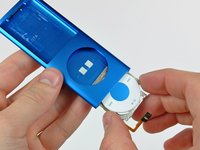
Remove the click wheel from the inside of the Nano.
-


To reassemble your device, follow these instructions in reverse order.
Cancel: I did not complete this guide.
53 other people completed this guide.

3 Guide Comments
Hello, does anybody know where to fin a clickwheel replacement for the nano 4th gen ? I can't seem to find it on the internet, the only sellers who did have it in stock was on alibaba, and he said to me there were not any left when I contacted him.
Sure! My favorite site is EOE or elite obsolete electronics. They have a lot of click wheels. Additionally, you can find a lot on eBay for a few dollars.
Ad123re -
This is the best set of instructions I’ve read regarding anything in the past 9 or 10 years. They are clearly stated, grammar is perfect and perfectly proofread before being published. It’s fits with the quality of simple writing I grew up with in the 50’s and 60’s and haven’t seen or read in the past many, many years. Nothing I’ve had to use over recent years (generally from China) comes close. This level of quality alone gives me confidence in the company itself.