Introduction
Replace a cracked or faulty display.
What you need
-
-
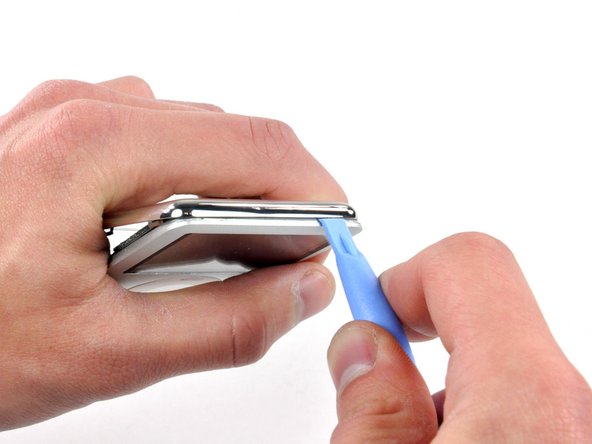
Insert a small iPod opening tool into the seam on the headphone jack side of the Nano, with the edge of the tool pointing toward the rear panel.
-
Gently enlarge the existing gap by pressing/wiggling the small iPod opening tool into the gap near each of the the two tabs attached to the rear case, pushing the clips toward the center of the Nano until both have been freed.
-
-
-
-
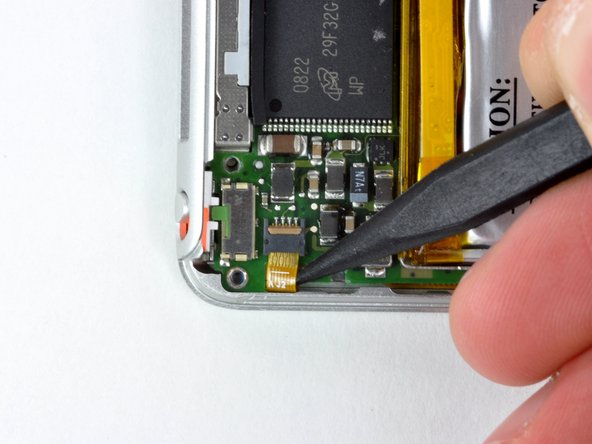
With the rear case removed, the back side of your Nano should now look like this.
-
-
-
Insert a spudger in the gap between the front case and the display near the top right corner. Slowly and gently pry the display up at several points along the top edge of the display, working your way toward the left corner.
-


To reassemble your device, follow these instructions in reverse order.
To reassemble your device, follow these instructions in reverse order.
Cancel: I did not complete this guide.
80 other people completed this guide.

5 Comments
Hi, i recently purchased a repair kit consisting of a new display and the requred tools to do the job Order #383628 only to find that you sent a PH00 torx driver instead of the required Phillips screwdriver , also after replacing the screen because the backlight had failed i find that the replacement screen backlight does not work either , i would welcom your comments on this please !
Never have I seen such ridiculous design. Despite what this blog claims there is no way the blue plastic tool or guitar picks will remove the back cover. The only way I was able to even slightly part the side seam was with a sharp flat bladed screw driver driven in by a clamp - which bent up the aluminum frame. Now using to the blue plastic "tool" (junk) I pretty much destroyed it working it around. The sharp metal back cover just cuts right into it shreds it. Back to metal flat bladed screwdrivers.
Got back over off - but frame no longer straight. Carefully straightened, Replace the battery & re-assembled. Unit beeped - Screen came on and shows cracks and stress marks but no menu.
Because of awful design I destroyed the screen just trying to get the back cover off to simply replace battery.
So - since Apple was so determined not to let me perform a simple battery replacement I am now equally determined NEVER to buy any Apple product again. So much for being a good design company - Total crap.
It’s funny that Chinese companies that make ipod nano clones managed to attach the back case with 2 or 4 tiny screws. Apple also refuses to sell any parts to repair older electronics. Their agenda seems to be” Why would you want to repair an older product when you can just buy a new one?”.
Because adding screws is much cheaper. Plus these were made more then a decade ago. That’s like asking Samsung to sell pieces for a Note 5 or Nokia to sell parts for their Nokia 3310 phone. Devices have advanced more then 8 gigabytes and there’s a lot of places that scrap and sell parts.