Introduction
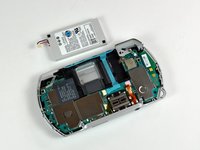
This guide shows how to remove the PSP Go's battery.
What you need
-
-
Unscrew the four Phillips screws on the back of the PSP Go.
-
Rotate the PSP so you can see the top of the device.
-
Unscrew the two Phillips screws next to the volume buttons.
-
-
-
-
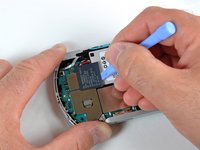
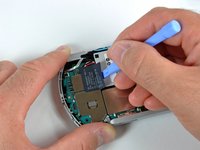
Use the plastic opening tool to gently peel away at the "Warranty Void" sticker. Start on one edge, as shown, and slide the tool from side to side until the sticker is removed from just the battery.
-


To reassemble your device, follow these instructions in reverse order.
Cancel: I did not complete this guide.
22 other people completed this guide.

12 Guide Comments
this was so quick . I have been trying to get this repaired for years, only to hear throw it away there is no fix . sharing love
a couple of notes my cover came completely off in the beginning step without a problem or broken screws. next i didnt und the wired cabled beside the clicker and it wasnt in the way.
After replace a new battery my psp go going crazy. Charge only 1 or 2 min led going to green but not fully charge. Anyone can help me to fix this
Cfw 6.61 pro update. Helppp
Thanks to this guide I was able to reseat the battery, the PSP was not turning on or charging any more, now everything is working again.