Installing MacBook Unibody Model A1342 AirPort/Bluetooth Board

  • Add Note x
  • x 3

Wireless connectivity issues? Use this guide to replace an inoperative AirPort/Bluetooth board.

first image

Add Note Edit Step 1 — Lower Case  ¶ 

  • Remove the eight 4 mm Phillips screws securing the lower case to the MacBook.

first image
thumb image 1
thumb image 2
thumb image 3

Add Note Edit Step 2  ¶ 

  • The lower case is constructed of rubber-coated aluminum. Do not excessively bend the aluminum during removal, as any permanent deformation will cause tolerance issues after reassembly.

  • Slightly lift the lower case near the vent opening.

  • Continue running your fingers between the lower and upper cases until the upper case pops off its retaining clips.

  • The location of these three clips is shown in the third picture.

first image

Add Note Edit Step 3 — Battery  ¶ 

  • For precautionary purposes, we advise that you disconnect the battery connector from the logic board to avoid any electrical discharge. This step is optional and is not required.

  • Use the flat end of a spudger to lift the battery connector up out of its socket on the logic board.

  • It may be easier to use your fingernails to lift up on both sides of the connector.

first image

Add Note Edit Step 4 — Rear Vent  ¶ 

  • Remove the following screws from the optical drive side of the rear vent:

    • Two 10 mm T8 Torx

    • Two 5 mm Phillips

first image

Add Note Edit Step 5  ¶ 

  • Remove the following screws from the port side of rear vent:

    • Two 10 mm T8 Torx

    • Two 5 mm Phillips

first image

Add Note Edit Step 6  ¶ 

  • Carefully lift the rear vent out of the upper case.

first image

Add Note Edit Step 7 — Rear Speaker Assembly  ¶ 

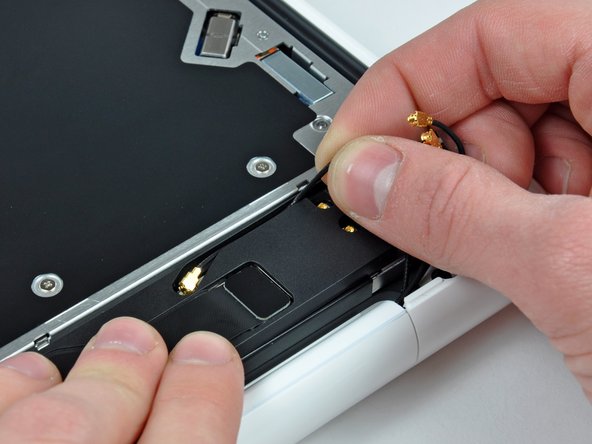
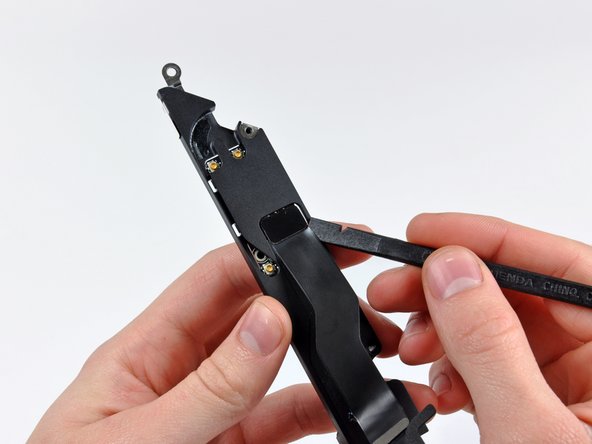
  • Use the flat end of a spudger to pry the AirPort/Bluetooth cable connector up off the logic board.

first image

Add Note Edit Step 8  ¶ 

  • Remove the following screws securing the right speaker assembly to the upper case:

    • One 12 mm Phillips screw.

    • One 3 mm Phillips screw.

first image

Add Note Edit Step 9  ¶ 

  • Remove the single 2.2 mm Phillips screw inserted horizontally into the side of the optical drive.

first image
thumb image 1
thumb image 2

Add Note Edit Step 10  ¶ 

  • Pry the AirPort and Bluetooth antenna connectors (3 total) up off the AirPort/Bluetooth card.

  • De-route the long antenna from its channel in the rear speaker housing.

first image

Add Note Edit Step 11  ¶ 

  • Use the flat end of a spudger to pry the rear speaker cable connector up off the logic board.

first image

Add Note Edit Step 12  ¶ 

  • Remove the rear speaker assembly from the upper case.

first image
thumb image 1
thumb image 2

Add Note Edit Step 13  ¶ 

  • Carefully peel the AirPort/Bluetooth cable from its channel within the rear speaker assembly.

  • Use the flat end of a spudger to pry the AirPort/Bluetooth cable up off the rear speaker.

first image

Add Note Edit Step 14  ¶ 

  • Remove three 3 mm Phillips screws securing the AirPort/Bluetooth board to the rear speaker assembly.

first image

Add Note Edit Step 15  ¶ 

  • Lift the AirPort/Bluetooth board up off the rear speaker assembly.

first image

Add Note Edit Step 16 — AirPort/Bluetooth Board  ¶ 

  • AirPort/Bluetooth board remains.

To reassemble your device, follow these instructions in reverse order.

For more information, check out the MacBook Unibody Model A1342 device page.

Did you successfully follow this guide?

This guide has been completed 3 times.

Comments Add Note Comments are offturn on