Introduction
This guide shows how easy it is for someone with little skills to easily change brake pads & rotors in a Minivan. 2 bolts, and all by hand afterwards.
What you need
-
-
Loosen the lug nuts one half turn while the tire is still on the ground. A large amount of force may be required and the tire will just rotate if the car is on jackstands.
-
-
-
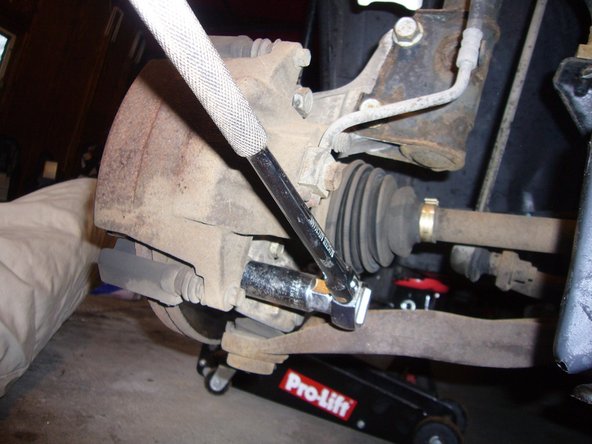
Take a 13/16" socket and breaker bar to remove the lower caliper bolt. A large amount of force may be required.
-
Take the 13/16" socket and remove the upper caliper bolt. A large amount of force may be required.
-
Be ready when the two bolts are backed out enough, as the caliper will be free to fall. The bolts don't have to come out all the way for the caliper to be free.
-
-
-
The new pads are thicker than the old, so the piston will have to be pushed back. Leave the old pad in place for now since the piston is hollow. Use the C-clamp or a disc caliper tool to gently push the piston back. Go slow and steady - you are forcing brake fluid back up to the reservoir and it needs time to equalize the pressure.
-
-
-
-
The old pads now come out by hand. Some jiggling may be necessary, but in my application, I didn't even have to tap them with anything. The pads sit passively in little channels, and come out towards the inside. There should be little clips remaining.
-
The new pads are thicker than the old, obviously.
-
-
-
With the caliper moved aside and supported, the rotor comes right off by hand. In my case, it was not rusted solid in any way.
-
A peek at the old rotor alongside for no reason.
-
Make sure to use a good quality brake cleaner on the new rotors and do not touch it with your bare hands after cleaning.
-
-
-
The red/pink goo is Anti-Squeal, which when put on the back of the pad, can later prevent high pitch squealing. It takes a while to dry, so one might put a light coating on the pads before beginning....
-
The pad goes into the carrier, inside the channels defined by the clips, and up against the retracted piston. One can see here the tabbed-end of the pad, in the carrier's channel, and the clip peeking out, keeping order....
-
The business end of the new pad.
-


To reassemble your device, follow these instructions in reverse order.
To reassemble your device, follow these instructions in reverse order.
Cancel: I did not complete this guide.
34 other people completed this guide.
14 Comments
Thank you ! !
Very precise and effective instructions. Sincere thanks. At 73 years of age I am happt to be able to do these things thanks to help like you offer.
I have a 2006 dodge caravan, when we put new rotates and pads on and did everything right ,when we tested the brakes the tire wouldn't turn,it was like locked up why or how do we fix this,we ended up putting the old pads and rotar back on because we tried 2 different size pads but same thing happened again.HELP CHERYL Portland Oregon