Introduction
This guide will show you how to replace the SuperDrive from your laptop (requires a SATA SuperDrive).
What you need
-
-
With the case closed, place the Unibody top-side down on a flat surface.
-
Depress the grooved side of the access door release latch enough to grab the free end. Lift the release latch until it is vertical.
-
-
-
Grab the translucent plastic tab and pull the battery up and out of the Unibody.
-
If the latch is depressed it will lock the battery in place.
-
-
-
Remove the following eight screws securing the lower case to the chassis:
-
One 5.4 mm Phillips screw.
-
Three 14 mm Phillips screws.
-
Four 3.5 mm Phillips screws.
-
-
-
-
Disconnect the camera cable by pulling the male end straight away from its socket.
-
-
-
Remove the optical drive cable by pulling it straight away from the optical drive.
-
-
-
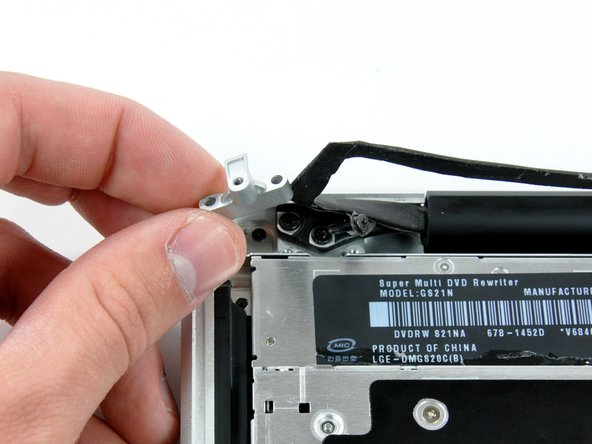
Remove the two black Phillips #0 screws securing the small metal mounting bracket. Transfer this bracket to your new optical drive or hard drive enclosure.
-


To reassemble your device, follow these instructions in reverse order.
To reassemble your device, follow these instructions in reverse order.
Cancel: I did not complete this guide.
73 other people completed this guide.

4 Comments
Be extremely careful removing the drive retainer bracket screws. Stop immediately if they resist. These were extremely tight in my case, and I (carelessly) ended up stripping two, even using the correct screwdriver. Keep your extractor handy. (Apple technicians suggest the Alden Grabit-Micro.)
This was super easy. I just took mine apart and found a piece of tape lodged in it. Works great now. Thanks.