
Lite-On LightScribe SHM-165H6S Faceplate/Eject button Replacement

What you need

  1. Lite-On LightScribe SHM-165H6S Faceplate/Eject button Replacement, Faceplate/Eject button: step 1, image 1 of 2 Lite-On LightScribe SHM-165H6S Faceplate/Eject button Replacement, Faceplate/Eject button: step 1, image 2 of 2
    • Insert an open paper clip into small hole on left side of faceplate.

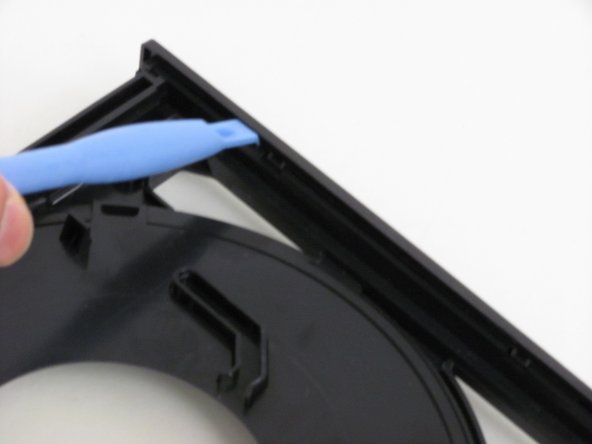
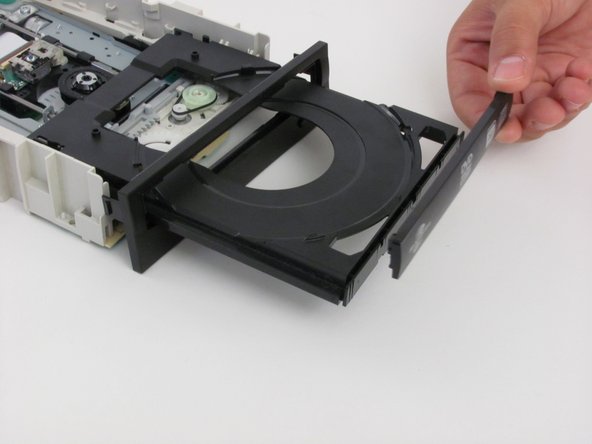
    • The tray should click open, use your hands to gently extend it fully.

  2. Lite-On LightScribe SHM-165H6S Faceplate/Eject button Replacement: step 2, image 1 of 3 Lite-On LightScribe SHM-165H6S Faceplate/Eject button Replacement: step 2, image 2 of 3 Lite-On LightScribe SHM-165H6S Faceplate/Eject button Replacement: step 2, image 3 of 3
    • Push in black tabs on left, right and bottom of outer chassis to unhook faceplate.

  3. Lite-On LightScribe SHM-165H6S Faceplate/Eject button Replacement: step 3, image 1 of 1
    • Pull face plate away from main chassis.

  4. Lite-On LightScribe SHM-165H6S Faceplate/Eject button Replacement: step 4, image 1 of 3 Lite-On LightScribe SHM-165H6S Faceplate/Eject button Replacement: step 4, image 2 of 3 Lite-On LightScribe SHM-165H6S Faceplate/Eject button Replacement: step 4, image 3 of 3
    • Locate the two tabs on the underside of the tray cover.

    • Pry the tabs loose and remove cover.

  5. Lite-On LightScribe SHM-165H6S Faceplate/Eject button Replacement: step 5, image 1 of 1
    • Remove and replace faceplate.

Conclusion

To reassemble your device, follow these instructions in reverse order.

aaa

Member since: 10/20/11

171 Reputation

2 Guides authored

0 Comments

Add Comment

View Statistics:

Past 24 Hours: 1

Past 7 Days: 2

Past 30 Days: 5

All Time: 2,164