Introduction
Each and every computer will need a permanent memory storage to store large amounts of data. Typically, a computer will include a hard drive, which is the standard form of storage. The solid state drive (SSD) loads and reads files faster than a standard hard drive, and are often lower in storage capacity. If your device is loading slower than normal or if you can’t access the files in your computer, your SSD may be corrupted and needs to be replaced.
This guide is to replace a faulty SSD or upgrade to an SSD with more capacity. Ensure that the computer is completely powered off and backups have been made before beginning this guide.
What you need
-
-
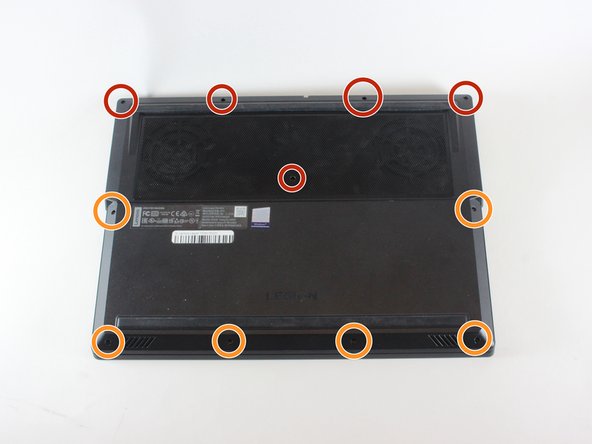
Use a PZ00 screwdriver bit to remove the eleven screws securing the back cover.
-
Five 7 mm screws
-
Six 4 mm screws
-
-
-
-
Remove one 4mm screw circled in orange in the second picture with a JIS #1 screwdriver.
-


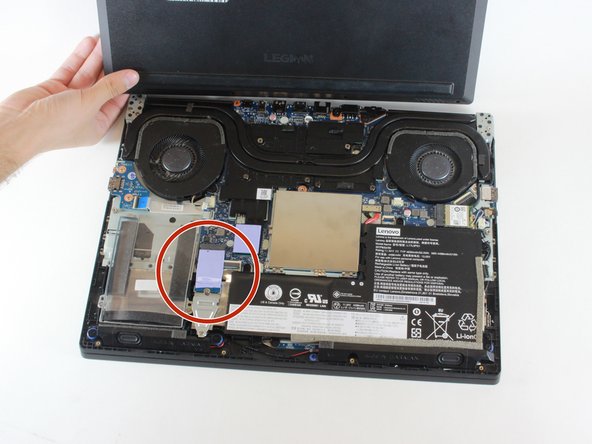


Insert your new SSD into the connector. To reassemble your device, follow these instructions in reverse order.
Insert your new SSD into the connector. To reassemble your device, follow these instructions in reverse order.
Cancel: I did not complete this guide.
One other person completed this guide.

Team

Cal Poly, Team S7-G1, Regan Winter 2020 Member of Cal Poly, Team S7-G1, Regan Winter 2020
CPSU-REGAN-W20S7G1
4 Members
12 Guides authored