What you need
-
-
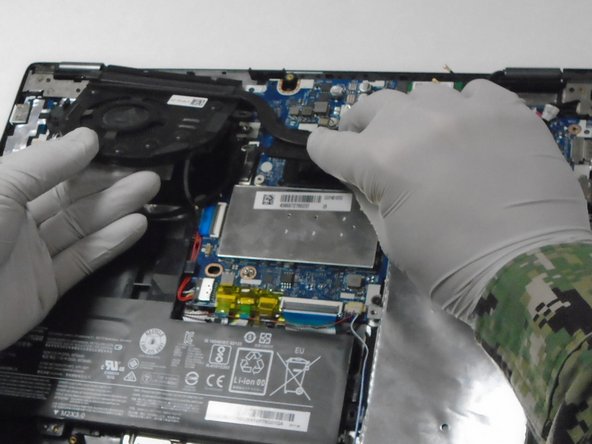
Use a Phillips #00 screwdriver to remove the three screws securing the fan.
-
Lift the fan up and out.
-
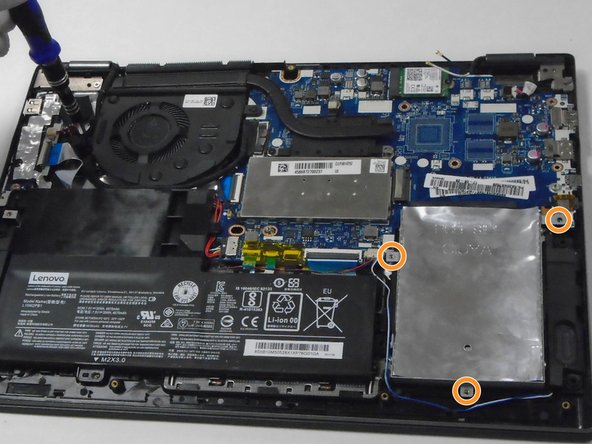
Use a Phillips #00 screwdriver to remove the three screws securing the hard drive.
-
Lift the hard drive up and out.
-
-
-
-
Use a Phillips #00 screwdriver to remove the four 5 mm screws from the left and right hinges (two screws on each hinge).
-
-
-
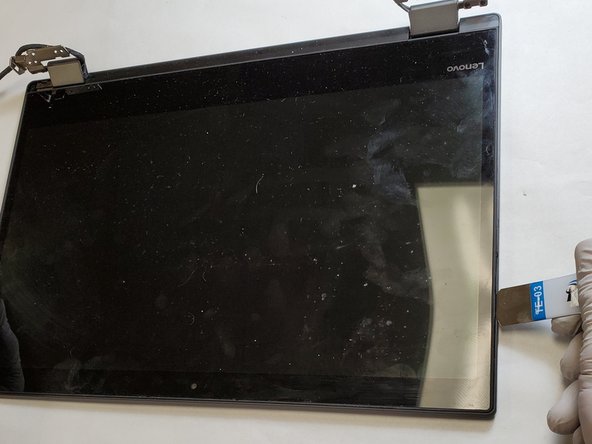
Disconnect the display assembly from the rest of the device by separating the hinges of the display from the body of the laptop.
-
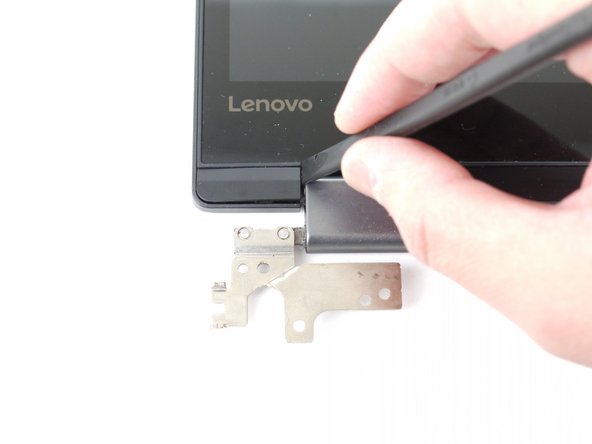
Use a spudger to carefully pry loose the two screw covers (one on each hinge).
-
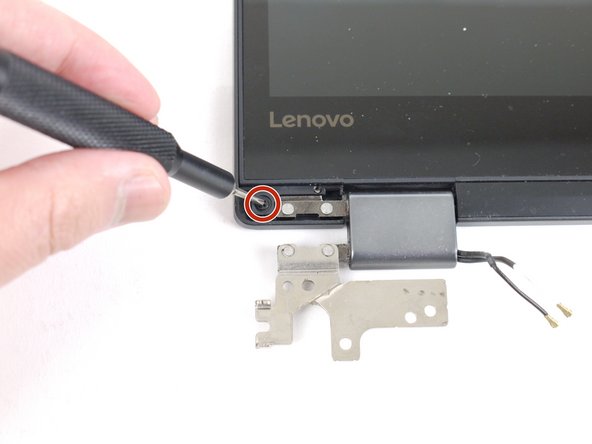
Use a Phillips #00 screwdriver to remove the two 3 mm screws from the display (one on each side).
-


To reassemble your device, follow these instructions in reverse order.
To reassemble your device, follow these instructions in reverse order.
Cancel: I did not complete this guide.
One other person completed this guide.

Team

The Citadel Military College of South Carolina, Team 1-5, Eggleston Spring 2022 Member of The Citadel Military College of South Carolina, Team 1-5, Eggleston Spring 2022
CMCSC-EGGLESTON-S22S1G5
3 Members
3 Guides authored
2 Comments
This is way off.
First of all, unplug the battery as soon as it is possible.
Step 3: Only takes two screws to remove the fan. The far left one you have circled. The other two are unnecessary and are for heat sink. And you didn't circle the 2nd screw for the fan, found at the upper right side of the fan.
Step 4: Removing wifi card is unnecessary
Step 5: There's only 2 screws if you removed the fan screws. And are you taking out the motherboard while it's still hooked to power and all ribbon cables!?!? AGHHHH
Step 6: Yep and they are, still connected. Don't leave your motherboard dangling and putting stress on fragile ribbon cables - ESPECIALLY WHEN it's connected to power still.
Step 7: You got the screws under the edges of the lower bezel but not the ones in the middle. You need to remove those as well. Underneath the middle bezel is where you get access to the adhesive holding the screws in. Removing the adhesive this way makes it easy to remove the LCD and not have to use heat which can damage it.