Use this guide to replace the Bluetooth/Wi-FI antenna.
Parts of this guide were shot with a Wi-Fi model and as such the internals may look slightly different from the cellular model. The procedure is the same for both models except where noted.
Depending on the wattage of your microwave, more or less time may be required. The iOpener is sufficiently heated when it's barely too hot to touch.
Throughout the repair procedure, as the iOpener cools, reheat it in the microwave for an additional thirty seconds at a time.
Be careful not to overheat the iOpener during the repair. Overheating may cause the iOpener to burst. Do not attempt to heat over 100˚C (212˚F).
Never touch the iOpener if it appears swollen.
If the iOpener is still too hot in the middle to touch, continue using it while waiting for it to cool down some more before reheating. A properly heated iOpener should stay warm for up to 10 minutes.
If you don't have a microwave, follow this step to heat your iOpener in boiling water.
Fill a pot or pan with enough water to fully submerge an iOpener.
Heat the water to a boil. Turn off the heat.
Place an iOpener into the hot water for 2-3 minutes. Make sure the iOpener is fully submerged in the water.
Use tongs to extract the heated iOpener from the hot water.
Thoroughly dry the iOpener with a towel.
The iOpener will be very hot, so be careful to hold it only by the end tabs.
Your iOpener is ready for use! If you need to reheat the iOpener, heat the water to a boil, turn off the heat, and place the iOpener in the water for 2-3 minutes.
If your display glass is cracked, keep further breakage contained and prevent bodily harm during your repair by taping the glass.
Lay overlapping strips of clear packing tape over the iPad's display until the whole face is covered.
This will keep glass shards contained and provide structural integrity when prying and lifting the display.
Do your best to follow the rest of the guide as described. However, once the glass is broken, it will likely continue to crack as you work, and you may need to use a metal prying tool to scoop the glass out.
Wear safety glasses to protect your eyes, and be careful not to damage the LCD screen.
Again, as you may find yourself working with broken glass during this procedure, we strongly recommend wearing safety glasses for protection from flying shards.
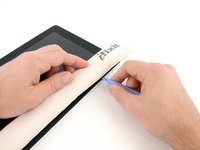
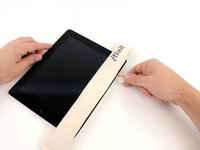
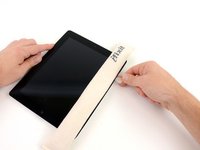
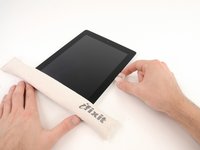
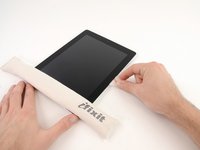
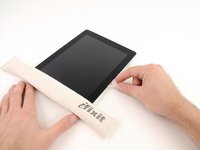
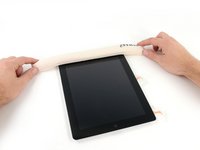
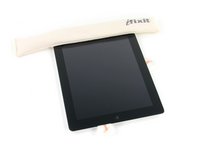
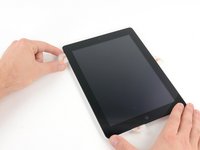
Lay the iOpener flat on the right edge of the iPad, smoothing it out so that there is good contact between the surface of the iPad and the iOpener.
Let the bag sit on the iPad for approximately 90 seconds before attempting to open the front panel.
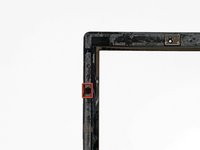
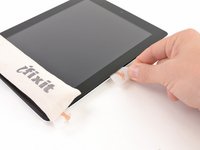
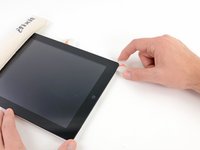
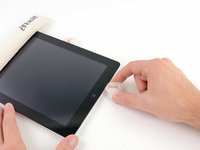
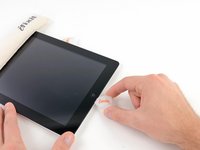
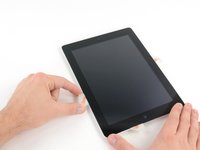
There is a small gap in the iPad's adhesive ring in the upper right corner of the iPad, approximately 2.0 inches (~5 cm) from the top of the iPad. You are going to exploit this weakness.
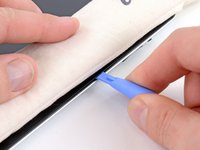
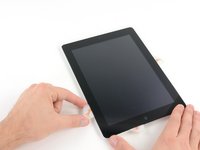
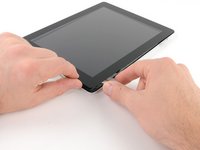
Align the tool with the mute button. Insert the tip of a plastic opening tool into the gap between the front glass and the plastic bezel. Just insert the very tip of the opening tool, just enough to widen the crack.
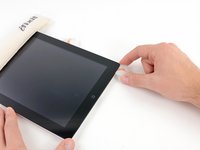
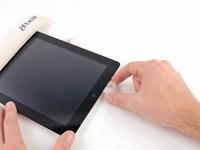
It may require some force to get the wedged tip of the opening tool between the glass and plastic. Work patiently and carefully, wiggling the plastic opening tool back and forth as necessary.
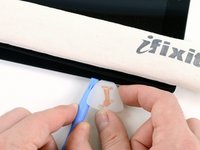
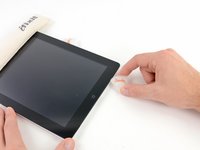
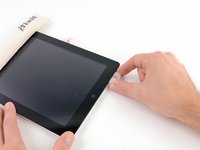
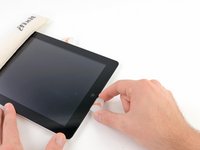
Keeping the tip of the plastic opening tool wedged between the front glass and plastic bezel, slide a plastic opening pick in the gap, right next to the plastic opening tool.
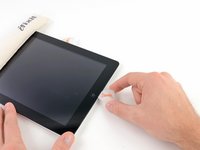
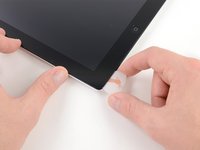
While the bottom edge is being heated by the iOpener, begin releasing the adhesive from the right edge of the iPad.
Slide the opening pick down along the edge of the iPad, releasing the adhesive as you go.
The adhesive is very strong, and some serious force may be required. Work carefully.
If you can see the tip of the opening pick underneath the front glass, pull the pick out just a little bit. While using the opening pick this deep won't damage anything, it may get adhesive residue all over the LCD.
It may be necessary to move the heated iOpener back onto the right edge of the iPad as you release the adhesive. This depends on how long the iPad has been able to cool while you were working on it.
If the opening pick gets stuck in the adhesive, "roll" the pick along the side of the iPad, continuing to release the adhesive.
Before removing the first opening pick from the bottom corner of the iPad, insert a second pick under the right edge of the front glass to keep the adhesive from re-adhering.
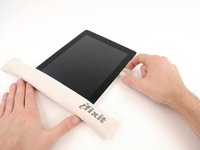
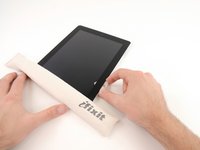
Re-heat the iOpener, and move it to the top edge of the iPad.
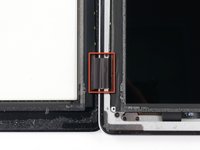
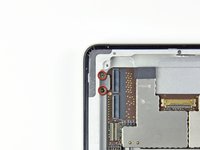
The Wi-Fi antenna is attached to the bottom right edge of the rear case of the iPad via screws and a cable. Because of the orientation of the Wi-Fi antenna, it is imperative to proceed with caution otherwise irreversible damage to the Wi-Fi antenna may result.
You will have to release the adhesive securing the antenna to the front panel without damaging the delicate parts attaching the antenna to the bottom of the iPad. Follow the next steps carefully.
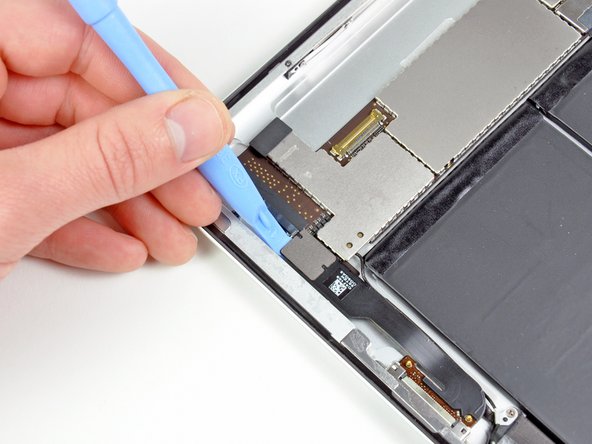
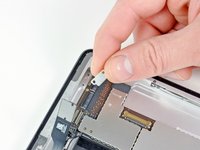
This step requires you to move the opening pick along the bottom right edge of the front panel. The Wi-Fi antenna is very close to the corner and is easily severed if the adhesive is released improperly.
Do not completely remove the pick from under the front glass, but pull it out just a little bit so that ~1/8" (3 mm) of the tip is still under the front glass.
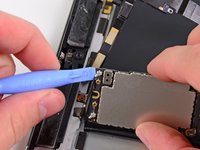
Slide the tip of the opening pick along the bottom edge of the iPad, releasing the adhesive over the Wi-Fi antenna.
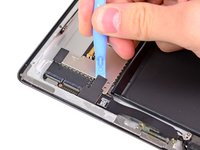
Once you have moved past the Wi-FI antenna (approximately 3" (75 mm) from the right edge, or right next to the home button) re-insert the opening pick to its full depth.
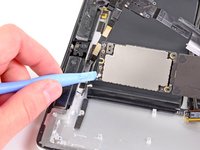
Slide the pick to the right, releasing the adhesive securing the Wi-Fi antenna to the front glass.
The antenna is attached to the bottom of the iPad via screws and a cable. This step detaches the antenna from the front panel, ensuring that when you remove the panel, the antenna will not be damaged.
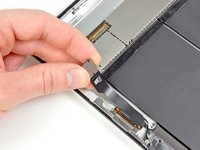
Continue releasing the adhesive along the bottom of the iPad, pulling the opening pick out far enough to go around the home button, and re-inserting it to a depth of 1/2 inch (10 mm) once the pick is past the home button.
If the adhesive has cooled too much along the bottom edge, reheat the iOpener to warm the adhesive where you are working.
Do not heat the iOpener more than a minute at a time, and always allow at least two minutes before reheating it.
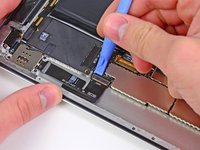
Slide the opening pick along the top edge of the iPad, pulling it out slightly to go around the front-facing camera bracket.
The adhesive along this section is very thick, and a fair amount of force may be required. Work carefully and slowly, making sure to not slip and damage yourself or your iPad.
If the adhesive has cooled too much, replace the iOpener along the top edge and continue working. If the iOpener has cooled too much, reheat it.
If the opening pick is getting stuck in the adhesive, "roll" the pick as shown in step 9.
Continue releasing the adhesive along the top edge of the iPad, and slide the opening pick around the top left corner.
If the adhesive is warm enough, remove the iOpener from the iPad for convenience. However, if the adhesive is still quite sticky, re-heat the iOpener and lay it on the left edge while you work.
Slide the opening pick along the left edge of the iPad, releasing the adhesive as you go. The adhesive is thin here due to the digitizer along the whole left side. Make sure the pick is not too deep (max 1/2 inch) 10 mm to prevent damaging the digitizer.
The digitizer cable is located approximately 2" (50 mm) from the bottom of the iPad. Stop sliding the pick when you get ~2.25" (60 mm) from the bottom of the iPad.
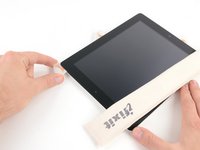
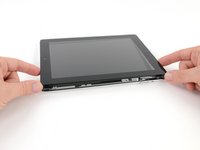
Using one of the opening picks, pry up the bottom right corner of the iPad and grab it with your fingers.
Some of the adhesive along the perimeter of the iPad may have stuck back down again. If this is the case, slide a pick underneath the edge of the iPad where the front glass is still stuck and "cut" the adhesive.
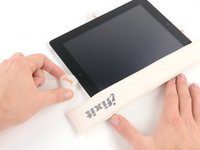
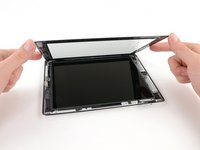
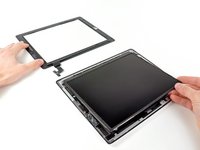
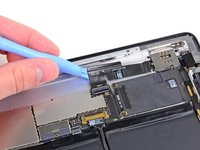
In order to remove the front panel assembly, the ribbon cable needs to slide out between the case and the LCD. You'll need to move the LCD to make some room.
Be very careful when moving the LCD, and do not attempt to remove it from the iPad—its cable will remain connected while it is rotated over.
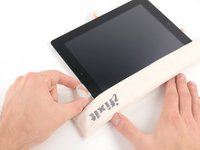
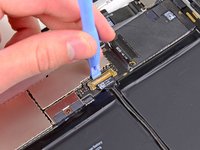
Lift the LCD from its long edge farthest from the digitizer cable and gently flip it toward the rear case—like closing a book.
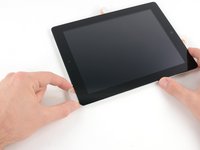
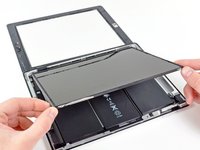
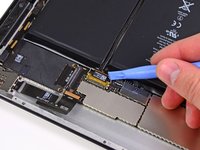
While holding the LCD up, gently slide the front panel away from the iPad. Be careful not to snag the digitizer cable on the rear case or LCD.
Today when I lifting the screen off the ipad 2 I actually broke the wifi cable where the speaker is. but my wifi still works… can somebody explain this for me?