Introduction
Installing the hard drive involves removing the outer case before actual installation.
What you need
-
-
Release the back handle of the PowerMac. Slowly pull out the cube by holding the end of the handle. Watch for any parts that may become entangled with the outer case.
-
Push back the handle after you have taken the core out of the case.
-
-
-
-
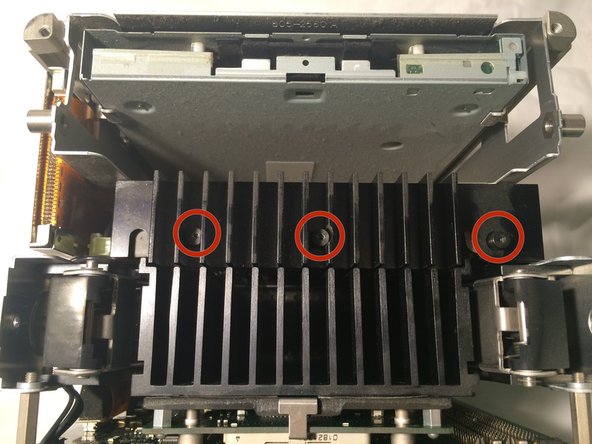
Remove the three top screws of the hard drive use a T8 bit and remove the heat sink.
-
Carefully slide the hard drive to the open side (side without the IDE and power cables) to remove the drive.
-
Turn the drive over, remove the sled rail with a T10 driver for its two screws. Transfer the rail to the same side on the new drive.
-
Insert new hard drive.
-


To reassemble your device, follow these instructions in reverse order.
To reassemble your device, follow these instructions in reverse order.
Cancel: I did not complete this guide.
21 other people completed this guide.

Team

Cal Poly, Team 2-7, Johann Summer 2010 Member of Cal Poly, Team 2-7, Johann Summer 2010
CPSU-JOHANN-R10S2G7
5 Members
14 Guides authored
One Comment
Strictly speaking, steps 2 through 4 aren’t necessary: you can just unscrew the heatsink from the hard drive, as in step 7, and carefully lift it out (I found that tilting it toward the optical drive and then pivoting it out worked).