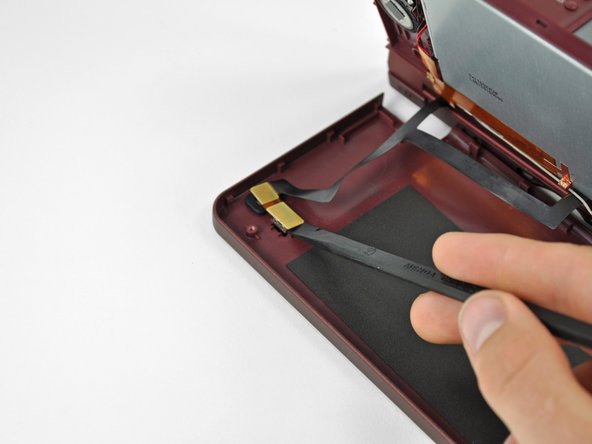
Nintendo DSi XL Rear Bezel Replacement

What you need

  1. Nintendo DSi XL Rear Bezel Replacement, Rear Bezel: step 1, image 1 of 3 Nintendo DSi XL Rear Bezel Replacement, Rear Bezel: step 1, image 2 of 3 Nintendo DSi XL Rear Bezel Replacement, Rear Bezel: step 1, image 3 of 3
    • Use a push pin to remove the four plastic screw covers on the front bezel.

  2. Nintendo DSi XL Rear Bezel Replacement: step 2, image 1 of 1
    • Remove four Phillips screws securing the front bezel to the rear bezel.

  3. Nintendo DSi XL Rear Bezel Replacement: step 3, image 1 of 2 Nintendo DSi XL Rear Bezel Replacement: step 3, image 2 of 2
    • Using two hands, gently slide the rear bezel upwards.

    • The rear bezel will move only about 2 mm.

  4. Nintendo DSi XL Rear Bezel Replacement: step 4, image 1 of 2 Nintendo DSi XL Rear Bezel Replacement: step 4, image 2 of 2
    • Insert a spudger into the gap between the front and rear bezel

    • Rotate the spudger away from the DSi XL, prying the two bezels apart.

  5. Nintendo DSi XL Rear Bezel Replacement: step 5, image 1 of 1
    • In the same manner as described above, continue prying along the top edge of the front and rear bezels.

  6. Nintendo DSi XL Rear Bezel Replacement: step 6, image 1 of 1
    • Separate the rear bezel from the front bezel.

    • Do not attempt to completely remove the rear bezel yet. It is still attached to the front bezel by the rear-facing camera.

  7. Nintendo DSi XL Rear Bezel Replacement: step 7, image 1 of 1
    • Use the flat end of a spudger to pry the rear camera off the rear bezel.

    • Remove the rear bezel.

Conclusion

To reassemble your device, follow these instructions in reverse order.

3 other people completed this guide.

Matthew Newsom

Member since: 01/05/10

39,500 Reputation

67 Guides authored

0 Comments

Add Comment

View Statistics:

Past 24 Hours: 0

Past 7 Days: 4

Past 30 Days: 26

All Time: 5,067