Introduction
Use this guide to replace a broken optical drive.
What you need
-
-
Remove the following ten screws:
-
Three 14.4 mm Phillips #00 screws
-
Three 3.5 mm Phillips #00 screws
-
Four 3.5 mm shouldered Phillips #00 screws
-
-
-
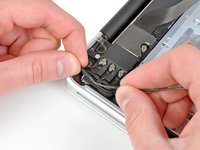
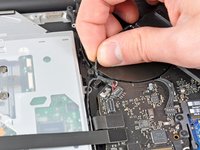
Use the edge of a spudger to pry the battery connector upwards from its socket on the logic board.
-
-
-
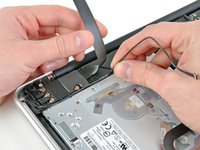
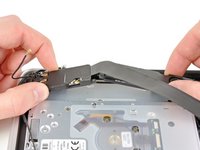
Use the flat end of a spudger to pry the AirPort/Bluetooth ribbon cable connector up from its socket on the logic board.
-
-
-
-
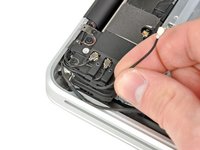
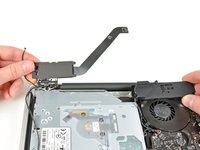
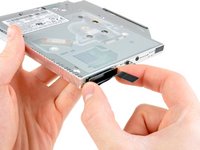
Pull the optical drive cable away from the optical drive.
-
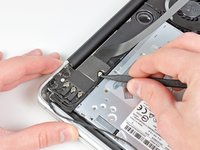
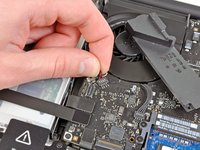
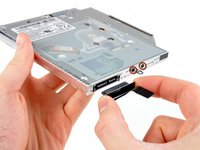
Remove the two black Phillips #0 screws securing the small metal mounting bracket. Transfer this bracket to your new optical drive or hard drive enclosure.
-


To reassemble your device, follow these instructions in reverse order.
Cancel: I did not complete this guide.
46 other people completed this guide.

2 Guide Comments
Wow thanks.
I finally successfully installed caddy for extra hdd. Thanks ALLAH. and thank you guys.
I actually swapped my internal hdd with an ssd. And put hdd into caddy. And replaced caddy with this dvd drive.
After installing I realized I shouldn’t move my internal hdd to caddy. I could just put ssd into caddy. And make that my startup disk.
Anyways. It was a great experience with removing HDD and DVD Drive.