Introduction
Use this guide to replace the headphone jack on your iPod Touch.
What you need
-
-
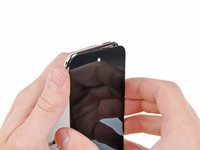
With the heat gun set on "low", begin heating the lower portion of the Touch near the home button.
-
-
-
-
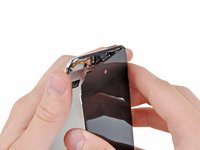
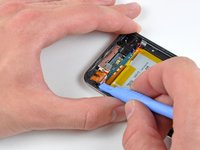
Insert the edge of an opening tool under the steel mid plate near the bottom left corner of the Touch.
-
Slowly pry upward to separate the plate from the adhesive securing it to the plastic inner case.
-
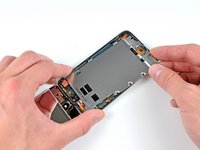
If the plate is still attached to the logic board, re-warm the area to loosen the adhesive, then slowly separate the plate from the logic board using the opening tool.
-
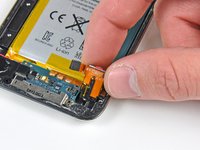
There is a thin, fragile ribbon cable underneath the plate. As you pry the plate up, be very careful not to rip the cable.
-
-
-
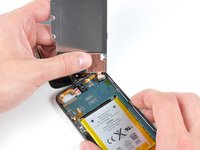
Use an iPod opening tool to pry the headphone jack connector up and out of its socket on the logic board.
-


To reassemble your device, follow these instructions in reverse order.
Cancel: I did not complete this guide.
62 other people completed this guide.

3 Guide Comments
BEFORE TO OPERATE, make sure that your headphone jack problem is not a clump of pocket dust stuck into it. It is hard to see so use a needle from which you curve the end a little bit. Make sure to empty it properly. Mine is like new.
You made my day
This Project was not hard if you are patient and sober. The guide is not so clear on reassembly. I RECOMMEND GETTING SOME SORT OF ADHESIVE FOR THE SCREEN when you replace anything on this Ipod. Most likely the previous adhesive will not be strong enough to hold it together, so rip it out and start over.