Introduction
This guide will help you install the dual hard drive kit, and can be used to add either a regular hard drive or SSD. This procedure does not require you to permanently remove or disable your optical drive.
What you need
-
-
Loosen the three Phillips screws securing the access door to the bottom edge of your iMac.
-
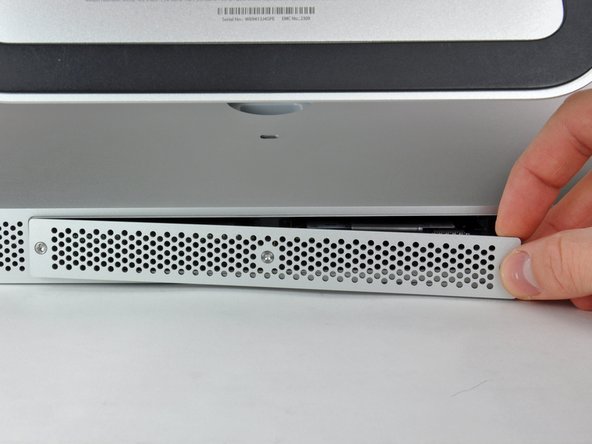
Remove the access door from your iMac.
-
-
-
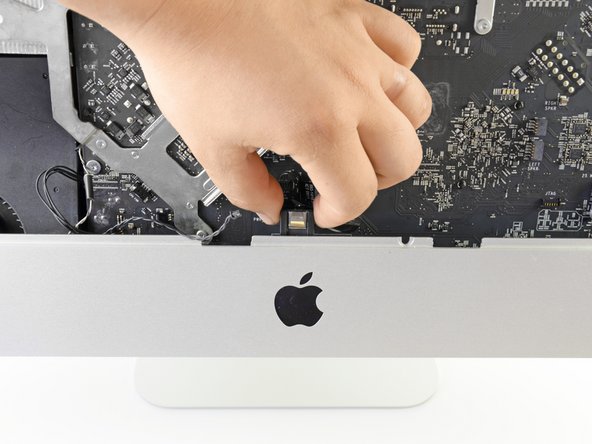
Use your fingers or the tip of a spudger to slide the black plastic RAM tray pull tab out of the RAM slot.
-
-
-
Stick a heavy-duty suction cup near each of the two top corners of the glass panel.
-
While lightly holding the suction cup against the glass, raise the movable handle until it is parallel with the other handle (as indicated by the third picture).
-
-
-
Carefully lay the iMac stand-side down on a flat surface.
-
Use a thin hooked tool to lift one side of the top edge of the display by its steel outer frame.
-
Raise and hold the display high enough to access the cables.
-
-
-
-
Lay the display face down on a flat, soft surface.
-
If there is a wire or cable underneath adhesive tape, always pull the tape off first. Do not pull on the cable directly.
-
If the cable is glued to the chassis, use a heated iOpener or a hair dryer to soften the adhesive first. You can then slide an opening pick underneath the cable to loosen it. Never pull on the delicate connectors.
-
Slide an opening pick underneath the foam cushion pieces to separate them from the display, and gently pull them off. You may need some double sided tape to re-attach them to the new display.
-
-
-
Use the flat end of a spudger to pull the optical drive data cable out of the optical drive.
-
-
-
Use the flat end of a spudger to pull the optical drive fan connector out of its socket.
-
-
-
To secure your new drive in your iMac, you will need to place high strength double-sided tape at the four corners on the side of the drive with the SATA connectors.
-
Peel the backing off one side of the double sided tape.
-
Press the exposed adhesive side of the double sided tape to the corner of the SSD.
-
Repeat the above process for the remaining 3 corners.
-
-
-
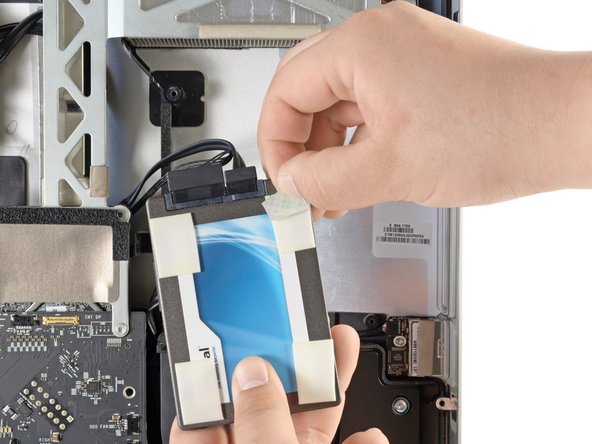
Connect both the SATA data and SATA power connectors to their respective sockets on the SSD.
-
Peel the backing off of the double sided tape.
-
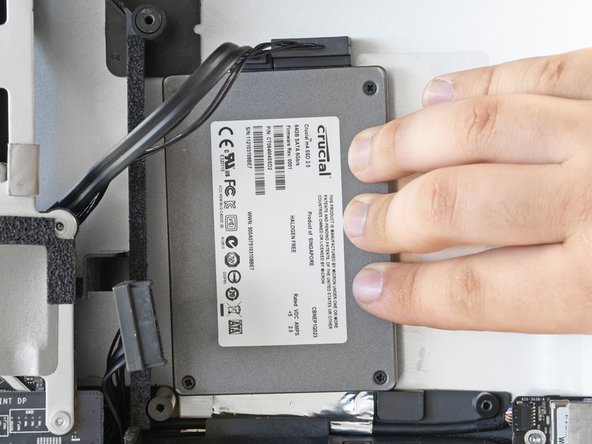
Carefully set the SSD into the iMac optical bay as close to the lower left corner as possible.
-
Once you are happy with the SSD's placement, firmly press down along its edges to ensure full adhesion.
-


To reassemble your device, follow these instructions in reverse order from Step 27.
To reassemble your device, follow these instructions in reverse order from Step 27.
Cancel: I did not complete this guide.
355 other people completed this guide.

71 Comments
Excellent guide. Thank you!
I got through everything, turned on the iMac, got the start up gong, and ... nothing. Screen stayed black and the fans started blowing like crazy, indicating failure of Apple Hardware Test. All my attempts to remedy (zap PRAM, reset SMC) failed. Uh oh.
Opened the machine back up, took out the LCD, and re-seated all four connections from display panel to logic board. Crossed my fingers and put it back together. This time, the displayed turned on, the Apple logo appeared, system booted up, and the new SSD appeared on the desktop. Yay!
The connectors from the LCD are delicate. It's tricky to seat them properly without damaging them, but don't close it up without a positive click on each one.
The upgrade has been fantastic so far. SanDisk 120GB SSD. Dramatic speed improvement. Well worth all the surgery on the machine.
in step 22 you can see the wifi cables are not connected anymore. but there is no step that shows you should disconnect them
+1 Unfortunately mine has been broken (CH1 cable is out from the UFL connector). Unfortunately I do not now how to repair it.
It would be important to add this step in order to protect others falling into the same issue.
PeterZ -
i followed this guide to the T. used a 240gig Corsair GS and after it gets far along the boot process the fans blow at max speed! i took the monitor off again to make sure i had all the connections in the right place. there was one i was missing... the ambient temp lol. but i plugged it back in and still fans blow full blast :( gonna keep messing with it to see if i can figure it out :)