Installing MacBook Unibody Model A1342 Fan

  • Add Note x
  • x 13

Replacing a defective fan will keep your laptop running cool.

Image #1

Add Note Edit Step 1 — Lower Case  ¶ 

  • Remove the eight 4 mm Phillips screws securing the lower case to the MacBook.

Image #1 Image #2 Image #3

Add Note Edit Step 2  ¶ 

  • The lower case is constructed of rubber-coated aluminum. Do not excessively bend the aluminum during removal, as any permanent deformation will cause tolerance issues after reassembly.

  • Slightly lift the lower case near the vent opening.

  • Continue running your fingers between the lower and upper cases until the upper case pops off its retaining clips.

  • The location of these three clips is shown in the third picture.

Image #1

Add Note Edit Step 3 — Battery  ¶ 

  • For precautionary purposes, we advise that you disconnect the battery connector from the logic board to avoid any electrical discharge. This step is optional and is not required.

  • Use the flat end of a spudger to lift the battery connector up out of its socket on the logic board.

  • It may be easier to use your fingernails to lift up on both sides of the connector.

Image #1

Add Note Edit Step 4 — Fan  ¶ 

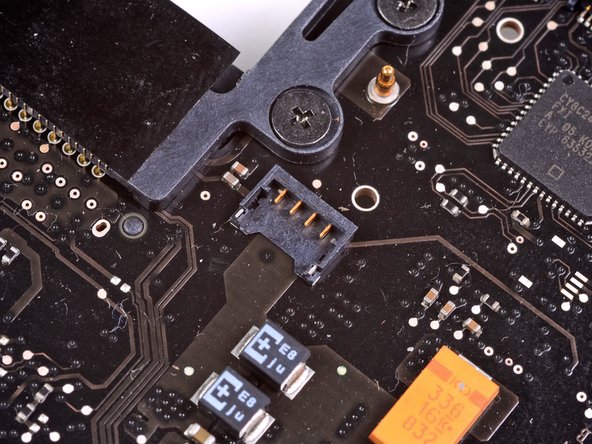
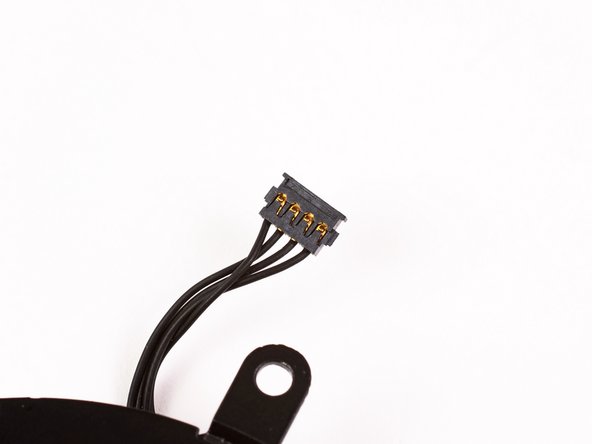
  • Use a spudger to pry the AirPort/Bluetooth ribbon cable connector straight up off the logic board.

  • Gently bend the AirPort/Bluetooth ribbon cable away from the fan.

Image #1 Image #2 Image #3

Add Note Edit Step 5  ¶ 

  • Use the flat end of a spudger to pry the fan connector straight up off the logic board.

  • It is useful to twist the spudger axially from beneath the fan cable wires to release the connector.

  • The fan socket and the fan connector can be seen in the second and third pictures. Be careful not to break the plastic fan socket off the logic board as you use your spudger to lift the fan connector straight up and out of its socket. The layout of the logic board shown in the second picture may look slightly different than your machine but the fan socket is the same.

Image #1

Add Note Edit Step 6  ¶ 

  • Remove the following three screws securing the fan to the upper case:

    • One 7.1 mm Phillips

    • Two 5.3 mm Phillips

Image #1

Add Note Edit Step 7  ¶ 

  • Lift the fan out of the upper case.

Required Tools

Spudger

$2.95 · 50+ In stock

Phillips #00 Screwdriver

$4.95 · 5 In stock

Recommended Tools

Universal Drive Adapter

$29.95 · 50+ In stock

Inspection Scope

$39.95 · 18 In stock

Frictionless Ratchet

$24.95 · 1 In stock

Portable Anti-Static Mat

$24.95 · 12 In stock

Popular Device Products

Unibody Laptop Dual Drive

$39.95 · 3 In stock

13" Unibody LCD Panel

$129.95 · 50+ In stock

Arctic Silver Thermal Paste

$8.95 · 50+ In stock

Arctic Silver ArctiClean

$7.95 · 50+ In stock

Comments Add Note Comments are offturn on