Introduction
In this guide, you will be removing the drive motor of an HP Photosmart c3180 Printer, in order to either replace the drive motor itself or to replace the driving cabal, per step 3. If the drive motor is burned out or is beginning to fail, the operation of your printer can be greatly or completely hindered.
The screws in step 1 can be removed using the TR10 Torx Security Screwdriver.
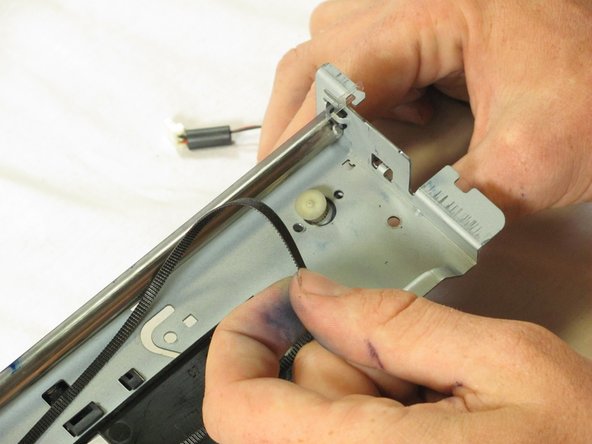
The driving cabal appears to be made out of some kind of synthetic elastic material. Even though it can stretch a little, be careful not to stretch it too much and snap it.
There are no major safety hazards to worry about while performing this repair.
What you need
-
-
Rotate the printer 90 degrees counter clockwise so that the side panel next to control panel is facing you.
-
Remove the two T10 12mm Torx screws from the left side panel.
-
-
-
Set aside the top panel of the printer.
-
Remove the two T10 12 mm Torx screws from the top front of the printer
-
-
-
Set aside the printer body.
-
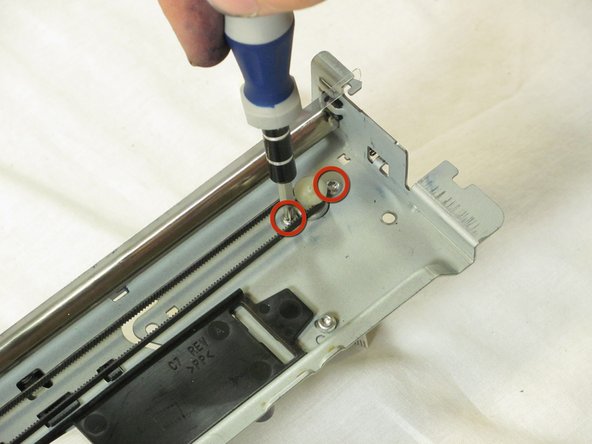
Remove the two motor retainment T10 4 mm Torx screws, per images 1-2.
-


To reassemble your device, follow these instructions in reverse order.
To reassemble your device, follow these instructions in reverse order.
Cancel: I did not complete this guide.
One other person completed this guide.
Team

Cal Poly, Team 20-30, Maness Fall 2011 Member of Cal Poly, Team 20-30, Maness Fall 2011
CPSU-MANESS-F11S20G30
4 Members
25 Guides authored