
Gateway SA1 RAM Replacement

What you need

  1. Gateway SA1 RAM Replacement, Battery: step 1, image 1 of 1
    • Move the latch to the right of the battery to unlock.

  2. Gateway SA1 RAM Replacement: step 2, image 1 of 1
    • Slide the latch on the left directly below the battery to unlock and pull out the battery as shown.

    • The latch must be held in position to remove the battery.

  3. Gateway SA1 RAM Replacement, RAM: step 3, image 1 of 2 Gateway SA1 RAM Replacement, RAM: step 3, image 2 of 2
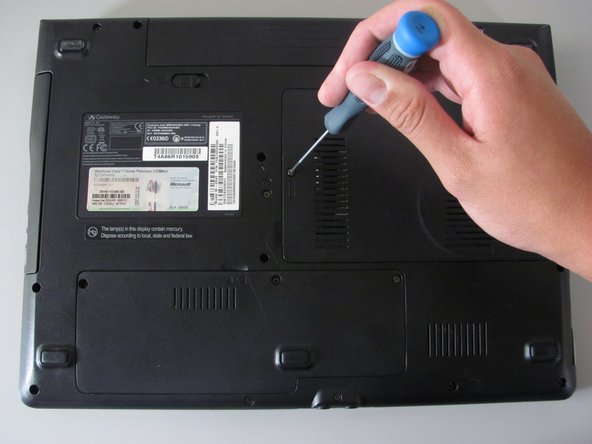
    • Loosen the indicated Philips screw that connects the memory bay cover to the casing.

    • The indicated Philips screw does not come out of the cover.

  4. Gateway SA1 RAM Replacement: step 4, image 1 of 2 Gateway SA1 RAM Replacement: step 4, image 2 of 2
    • Lift and remove the cover using the spudger.

  5. Gateway SA1 RAM Replacement: step 5, image 1 of 2 Gateway SA1 RAM Replacement: step 5, image 2 of 2
    • Gently press the clip outwards.

    • The module will tilt up and can be pulled out of the slot.

    • There may be another memory module underneath so be sure to remove both.

  6. Gateway SA1 RAM Replacement: step 6, image 1 of 1
    • To insert a new memory, slide the module into the slot at a 30 to 45 degree angle.

    • Place the first module into the bottom slot then the next module into the top slot.

    • These slots are keyed so verify that you are sliding the module in one direction.

    • Verify that the new memory modules are designed for your specific Gateway Laptop.

Conclusion

To reassemble your device, follow these instructions in reverse order.

3 other people completed this guide.

Diego Carteno

Member since: 04/15/10

258 Reputation

7 Guides authored

Team

Cal Poly, Team 24-20, Regan Spring 2010 Member of Cal Poly, Team 24-20, Regan Spring 2010

CPSU-REGAN-S10S24G20

4 Members

14 Guides authored

0 Comments

Add Comment

View Statistics:

Past 24 Hours: 0

Past 7 Days: 2

Past 30 Days: 6

All Time: 5,537