
Dyson DC28 Animal Air Muscle Assembly Replacement

What you need

  1. Dyson DC28 Animal Air Muscle Assembly Replacement, Sole Plate: step 1, image 1 of 1
    Tool used on this step:
    Coin
    $2.99
    Buy
    • Lay the vacuum on its side to allow for easy access to the bottom of the cleaner head.

    • Unlock the sole plate by using a quarter or other flat tool to turn the three plastic bolts counter-clockwise, as indicated on the sole plate.

    • The plastic fasteners can be damaged when using a metal tool to turn them.

  2. Dyson DC28 Animal Air Muscle Assembly Replacement: step 2, image 1 of 2 Dyson DC28 Animal Air Muscle Assembly Replacement: step 2, image 2 of 2
    • Gently pull off the sole plate

  3. Dyson DC28 Animal Air Muscle Assembly Replacement, Air Muscle Assembly: step 3, image 1 of 1
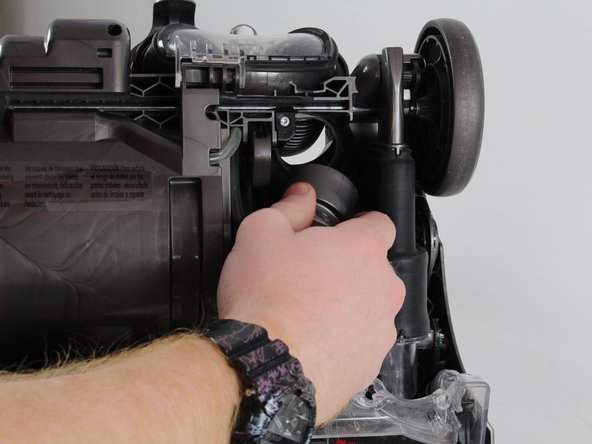
    • Remove the dust collector using the red button located at the top of the bin

  4. Dyson DC28 Animal Air Muscle Assembly Replacement: step 4, image 1 of 1
    • Flip the vacuum over to allow for easy access to bottom.

  5. Dyson DC28 Animal Air Muscle Assembly Replacement: step 5, image 1 of 3 Dyson DC28 Animal Air Muscle Assembly Replacement: step 5, image 2 of 3 Dyson DC28 Animal Air Muscle Assembly Replacement: step 5, image 3 of 3
    • Identify the 6 screws.

    • Remove the six 9mm screws using T15 Torx Screwdriver.

  6. Dyson DC28 Animal Air Muscle Assembly Replacement: step 6, image 1 of 1
    • Gently remove the drive cover.

  7. Dyson DC28 Animal Air Muscle Assembly Replacement: step 7, image 1 of 1
    • Remove the drive assembly.

  8. Dyson DC28 Animal Air Muscle Assembly Replacement: step 8, image 1 of 2 Dyson DC28 Animal Air Muscle Assembly Replacement: step 8, image 2 of 2
    • Grab the hose by hard plastic base.

    • Pull firmly to remove it from the holder.

    • If you pull too hard the plastic can be ripped.

  9. Dyson DC28 Animal Air Muscle Assembly Replacement: step 9, image 1 of 2 Dyson DC28 Animal Air Muscle Assembly Replacement: step 9, image 2 of 2
    • Firmly grab top section of the hose and remove from the holder.

    • If you pull too hard the plastic can be ripped.

  10. Dyson DC28 Animal Air Muscle Assembly Replacement: step 10, image 1 of 1
    • Remove section of the hose from the vacuum.

  11. Dyson DC28 Animal Air Muscle Assembly Replacement: step 11, image 1 of 2 Dyson DC28 Animal Air Muscle Assembly Replacement: step 11, image 2 of 2
    • Go to the wheel on the right side of the vacuum.

    • Remove the cap of wheel by sliding in a small metal spudger or flat head screwdriver and gently prying up.

  12. Dyson DC28 Animal Air Muscle Assembly Replacement: step 12, image 1 of 2 Dyson DC28 Animal Air Muscle Assembly Replacement: step 12, image 2 of 2
    Tool used on this step:
    Metal Spudger
    $2.99
    Buy
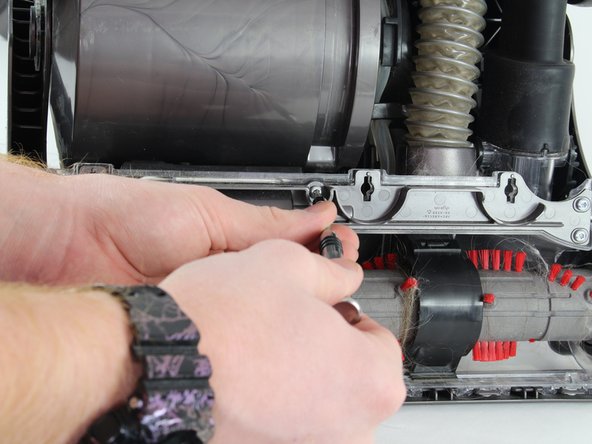
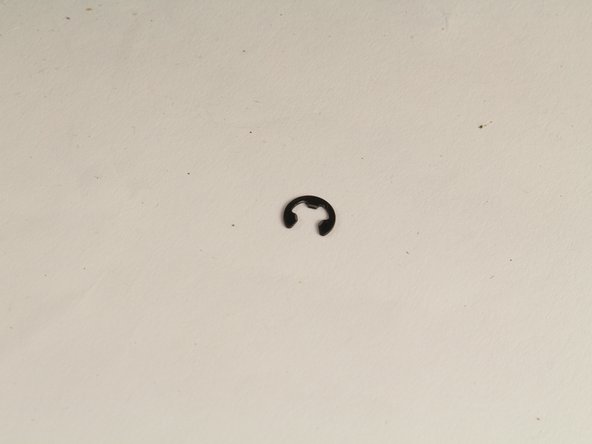
    • Use the pointed end of a metal spudger to pull off the e-clip.

    • The e-clip is hard to remove and may require some effort to remove.

  13. Dyson DC28 Animal Air Muscle Assembly Replacement: step 13, image 1 of 1
    • Pull the wheel off of the axel.

  14. Dyson DC28 Animal Air Muscle Assembly Replacement: step 14, image 1 of 1
    • Remove the axel piston from axel.

    • Be careful not to lose the washer on the end of the axel piston.

  15. Dyson DC28 Animal Air Muscle Assembly Replacement: step 15, image 1 of 1
    Tool used on this step:
    Flush Cutter
    $29.99
    Buy
    • Use the wire cutters to cut the zip tie holding the tube on.

    • Be careful not to cut the plastic hose.

  16. Dyson DC28 Animal Air Muscle Assembly Replacement: step 16, image 1 of 1
    • Gently pry and pull the tube off of the nub.

  17. Dyson DC28 Animal Air Muscle Assembly Replacement: step 17, image 1 of 1
    • Use a flat head screwdriver or metal spudger to push the plastic out of the way and remove the air muscle.

    • Be careful not to break the plastic. Bend it just enough to remove the part.

  18. Dyson DC28 Animal Air Muscle Assembly Replacement: step 18, image 1 of 1
    • Remove the air muscle from the rest of the vacuum.

Conclusion

To reassemble your device, follow these instructions in reverse order.

4 other people completed this guide.

Alec Goodman

Member since: 01/25/17

222 Reputation

1 Guide authored

Team

Cal Poly, Team 21-4, Maness Winter 2017 Member of Cal Poly, Team 21-4, Maness Winter 2017

CPSU-MANESS-W17S21G4

5 Members

10 Guides authored

0 Comments

Add Comment

View Statistics:

Past 24 Hours: 1

Past 7 Days: 11

Past 30 Days: 52

All Time: 9,297